TRENDnet TE100-P2U1P Manual - Page 7
Before you start, you should prepare, Hardware Installation - attach port
 |
View all TRENDnet TE100-P2U1P manuals
Add to My Manuals
Save this manual to your list of manuals |
Page 7 highlights
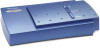
Before you start, you should prepare: One Win9X/Me/2000/XP/2003 computer with CD-ROM One Printer (USB or Parallel Port) Hardware Installation To install the print server(s), you need to complete these steps: ˙Confirm that your printer parallel(USB) port work well. ˙Connect the print server to the network and printer(s) and plug in the print server. ˙Create a configuration page from the print server. Follow these instructions to install the print server(s), please refer to any peripheral you are connecting to the print server: 1. To ensure your printer(s) work well, do one of the following: ˙Send data through the parallel (USB) port of each printer you are connecting to the print server, or generate a printer self-test page. 2. Turn off the power for each printer. 3. Connect the print server to printer(s). Note: One port print server attaching only one printer, further three ports print server can expand three printers, for example, the print server's port1(Parallel) should be connect printer1, port2(USB1) or port3(USB2) as following above step. 4. Plug the AC power adapter to the print server. 5. Power on the Print Server. 6. Check the LED's marked as Status on topside or beside of the print server. It should be flash five times normally, if not, please contact your local dealer for repair or replacement. 7. Turn on the power of your printer(s) to begin printing. 5
-
 1
1 -
 2
2 -
 3
3 -
 4
4 -
 5
5 -
 6
6 -
 7
7 -
 8
8 -
 9
9 -
 10
10 -
 11
11 -
 12
12 -
13
-
14
-
15
-
16
-
17
-
18
-
19
-
20
-
21
-
22
-
23
-
24
-
25
-
26
-
27
-
28
-
29
-
30
-
31
-
32
-
33
-
34
-
35
-
36
-
37
-
38
-
39
-
40
-
41
-
42
-
43
-
44
-
45
-
46
-
47
-
48
-
49
-
50
-
51
-
52
-
53
-
54
-
55
-
56
-
57
-
58
-
59
-
60
-
61
-
62
-
63
-
64
-
65
-
66
-
67
-
68
-
69
-
70
-
71
-
72
-
73
-
74
 |
 |
