TRENDnet TEW-431BRP User's Guide - Page 6
Setup - same
 |
View all TRENDnet TEW-431BRP manuals
Add to My Manuals
Save this manual to your list of manuals |
Page 6 highlights
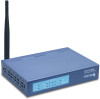
Installation For best Wireless reception and performance, the TEW431BRP should be positioned in a central location with minimum obstructions between the TEW-431BRP and the PCs. Also, if using multiple Access Points, adjacent Access Points should use different Channels. 2. Connect LAN Cables • Use standard LAN cables to connect PCs to the Switching Hub ports on the TEW- 431BRP. Both 10BaseT and 100BaseT connections can be used simultaneously. • If required, connect any port to a normal port on another Hub, using a standard LAN cable. Any LAN port on the TEW-431BRP will automatically function as an "Uplink" port when required. 3. Connect WAN Cable Connect the DSL or Cable modem to the WAN port on the TEW-431BRP. Use the cable supplied with your DSL/Cable modem. If no cable was supplied, use a standard cable. 4. Power Up • Power on the Cable or DSL modem. • Connect the supplied power adapter to the TEW-431BRP and power up. Use only the power adapter provided. Using a different one may cause hardware damage 5. Check the LEDs • The Power LED should be ON. • The Status LED should flash, then turn Off. If it stays on, there is a hardware error. • For each LAN (PC) connection, the LAN Link/Act LED should be ON (provided the PC is also ON.) • The WAN LED should be ON. • The WLAN LED should be ON For more information, refer to Front-mounted LEDs in Chapter 1. 7 Chapter 3 Setup This Chapter provides Setup details of the TEW-431BRP. 3 Overview This chapter describes the setup procedure for: • Internet Access • LAN configuration • Wireless setup • Assigning a Password to protect the configuration data. PCs on your local LAN may also require configuration. For details, see Chapter 4 - PC Configuration. Other configuration may also be required, depending on which features and functions of the TEW-431BRP you wish to use. Use the table below to locate detailed instructions for the required functions. To Do this: Configure PCs on your LAN. Check TEW-431BRP operation and Status. Use any of the following Internet features: • Advanced Setup • Dynamic DNS • MAC Address • Virtual Servers Configure or use any of the following: • Access Control • Remote Management • PC Database • Upgrade Firmware • Options • Security • Logs • Routing Refer to: Chapter 4: PC Configuration Chapter 5: Operation and Status Chapter 6: Internet Features Chapter 7: Other Features and Settings 8
-
 1
1 -
 2
2 -
 3
3 -
 4
4 -
 5
5 -
 6
6 -
 7
7 -
 8
8 -
 9
9 -
 10
10 -
 11
11 -
 12
12 -
13
-
14
-
15
-
16
-
17
-
18
-
19
-
20
-
21
-
22
-
23
-
24
-
25
-
26
-
27
-
28
-
29
-
30
-
31
-
32
-
33
-
34
-
35
-
36
-
37
-
38
-
39
-
40
-
41
-
42
-
43
-
44
-
45
 |
 |
