TRENDnet TK-209K User's Guide - Page 8
properly, the KVM Switch is ready to use. - manual
 |
UPC - 710931304282
View all TRENDnet TK-209K manuals
Add to My Manuals
Save this manual to your list of manuals |
Page 8 highlights
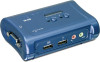
5. Connects the shared USB keyboard, mouse, monitor, microphone/speakers (optional) to your KVM Switch 6. Connects each KVM PC port to a computer via included USB KVM Cables. After you have connected the KVM and computers properly, the KVM Switch is ready to use. NOTE: • The KVM Switching software only supports Windows operating system on PC Platforms. For the other platform such as Linux, you can still use the keyboard hotkey "ScrLK + ScrLK" to switch between PCs. Mac OS only supports push buttons function. • Some computers with USB interface might be need to manual enable the USB option in the BIOS setting before using any USB device. If your USB interface does not work, please check the USB option Status in BIOS. • If you are using the Windows 98(SE) and has not installed a USB mouse yet, it is highly recommend that you connect the USB mouse directly to computer first before it connects to KVM Switch. - 8 -
-
 1
1 -
2
-
 3
3 -
 4
4 -
 5
5 -
 6
6 -
 7
7 -
 8
8 -
 9
9 -
 10
10 -
 11
11 -
 12
12 -
 13
13 -
14
 |
 |
