TRENDnet TV-IP342PI Quick Installation Guide - Page 3
Hardware Installation and Configuration
 |
View all TRENDnet TV-IP342PI manuals
Add to My Manuals
Save this manual to your list of manuals |
Page 3 highlights
2. Hardware Installation and Configuration Note: To download the latest version of the Autorun installation software, please go to http://www.trendnet.com/support. 1. Do not install or mount the IP camera until after you complete the installation steps below. Temporarily place the IP camera next to your computer. 2. Insert the Utility CD-ROM into your CD-ROM drive. 3. Select language from the drop down menu. 4. Click Install Camera. 5. Write down the MAC address of your camera. Then click Next. 6. Plug in and connect the power adapter to the camera. The IR LEDs will turn on and show a dim visible red light. Allow 60 seconds for the camera to boot up. 2

2
2. Hardware Installation and Configuration
1.
Do not install or mount the IP camera until after you complete the installation steps below.
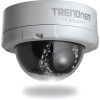
Temporarily place the IP camera next to your computer.
2.
Insert the Utility CD-ROM into your CD-ROM drive.
3.
Select language from the drop down menu.
4.
Click
Install Camera
.
5.
Write down the MAC address of your camera. Then click
Next
.
Note
: To download the latest version of the Autorun installation software, please go to
6
. Plug in and connect the power adapter to the camera. The IR LEDs will turn on and show a dim
visible red light. Allow 60 seconds for the camera to boot up.


