TRENDnet TV-IP344PI Quick Installation Guide
TRENDnet TV-IP344PI Manual
 |
View all TRENDnet TV-IP344PI manuals
Add to My Manuals
Save this manual to your list of manuals |
TRENDnet TV-IP344PI manual content summary:
- TRENDnet TV-IP344PI | Quick Installation Guide - Page 1
Quick Installation Guide TV-IP344PI (V1) - TRENDnet TV-IP344PI | Quick Installation Guide - Page 2
Table of Content 1 English 1. Before You Start 2. Hardware Installation and Configuration - TRENDnet TV-IP344PI | Quick Installation Guide - Page 3
You Start Package Contents Ÿ TV-IP344PI Ÿ CD-ROM (Utility, Software and User's Guide) Ÿ Quick Installation Guide Ÿ Network cable (1.5m / TV-IP344PI has a 5.5 mm barrel connector for an optional 12 V DC 1A power adapter. Ÿ Optional power supply not included. TRENDnetVIEW Pro Requirements Supported - TRENDnet TV-IP344PI | Quick Installation Guide - Page 4
2. Hardware Installation and Configuration 1. Do not install or mount the IP camera until after you complete the installation steps below. Temporarily place the IP camera next to your computer. 2. Insert the Utility CD-ROM into your CD-ROM drive. 3. Select language from the drop down menu. 4. Click - TRENDnet TV-IP344PI | Quick Installation Guide - Page 5
6. Connect a network cable from the camera's network port to your PoE source. The IR LEDs will turn on and show a dim visible red light. Allow 60 seconds for the camera to boot up. Then click Next. 7. Select your camera. Click Next and follow the instructions. Next Next 3 - TRENDnet TV-IP344PI | Quick Installation Guide - Page 6
8. Select DHCP option to assign an IP by DHCP server, select "Fixed IP" to set IP address manually. Click Next. Next 9. If you select "Fixed IP", fill out the IP address, subnet mask, default gateway, and DNS server. Please ensure that the IP - TRENDnet TV-IP344PI | Quick Installation Guide - Page 7
11. Initial Setup is complete! Your camera is now connected to your network. Click the hyperlink to confirm access to the management page. This will open up a web browser. To resume installation, minimize the web browser and then click Next. Next 12. Congratulations! Your camera is now ready to be - TRENDnet TV-IP344PI | Quick Installation Guide - Page 8
TRENDnetVIEW Pro Software in the Autorun window and refer to the TRENDnetVIEW Pro User's Guide on the CD for more information. Note Ÿ See User's Guide for advanced management functions Ÿ Two User's Guides are included - one for the camera and one for the complimentary management software. Ÿ When - TRENDnet TV-IP344PI | Quick Installation Guide - Page 9
your desired location. To connect the IP camera to your network with PoE, please use either of the following examples: Using the TV-IP344PI with a PoE switch (TPE-S50) TV-IP-344PI PoE TPE-S50 Internet Non-PoE Ÿ Connect the provided network cable from the Power over Ethernet switch (e.g. TPE-S50 - TRENDnet TV-IP344PI | Quick Installation Guide - Page 10
OUT DATA IN PoE Internet Non-PoE Ÿ Connect the power adapter to the TPE-113GI and then to a power outlet. Ÿ Connect a network cable from the TV-IP344PI to the TPE-113GI's PWR+DATA OUT (PoE) port. Ÿ Connect a network cable from a switch or router (e.g. TEW-818DRU) to the TPE-113GI's DATA IN (Non - TRENDnet TV-IP344PI | Quick Installation Guide - Page 11
Mounting the camera Note: For tips on capturing appropriate camera viewing angle, please refer to the user's guide. 1. Loosen the locking bolts and manually position the camera as desired . 2. Place the provided template label on the wall or ceiling. Drill hole Wire hole Drill hole Drill hole - TRENDnet TV-IP344PI | Quick Installation Guide - Page 12
8. Align the mounting bracket with the screw anchors, and then use the provided screws to secure the camera to the mounting surface. 9. Power up the camera by connecting the other end of the cable to a PoE switch or injector on your network. 10. Loosen the screws and rotate the collar to final angle - TRENDnet TV-IP344PI | Quick Installation Guide - Page 13
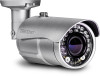
, Inc. 20675 Manhattan Place Torrance, CA 90501 USA Product Information Model Number: TV-IP344PI Product Name: Indoor/Outdoor 4 MP Motorized Varifocal PoE IR Network Camera Trade Name: TRENDnet TRENDnet hereby declare that the product is in compliance with the essential requirements and other - TRENDnet TV-IP344PI | Quick Installation Guide - Page 14
warrants its products against defects in material and workmanship, under normal use and service. Specific warranty periods are listed on each of the respective product pages on the TRENDnet website. Garantie Limitée TRENDnet garantit ses produits contre les problèmes de matériel ou de fabrication - TRENDnet TV-IP344PI | Quick Installation Guide - Page 15
device for the first time, it is essential to read and understand all safety and operating instructions. Keep instructions in a safe place for future reference. Some TRENDnet products are rated for outdoor applications and can sustain certain weather conditions. Please refer to the product's Ingress - TRENDnet TV-IP344PI | Quick Installation Guide - Page 16
available at www.trendnet.com/support TRENDnet 20675 Manhattan Place Torrance, CA 90501 USA Copyright © 2016. All Rights Reserved. TRENDnet. Product Warranty Registration Please take a moment to register your product online. Go to TRENDnet's website at: www.trendnet.com/register TV-IP344PI(V1) /10
-
 1
1 -
 2
2 -
 3
3 -
 4
4 -
 5
5 -
 6
6 -
 7
7 -
8
-
9
-
10
-
11
-
12
-
13
-
14
-
15
-
16
 |
 |

TV-IP344PI (V1)
Quick Installation Guide