Tecumseh Products OH318EA Operator Manual - Page 7
Filling Oil Sump - carburetor
 |
View all Tecumseh Products OH318EA manuals
Add to My Manuals
Save this manual to your list of manuals |
Page 7 highlights
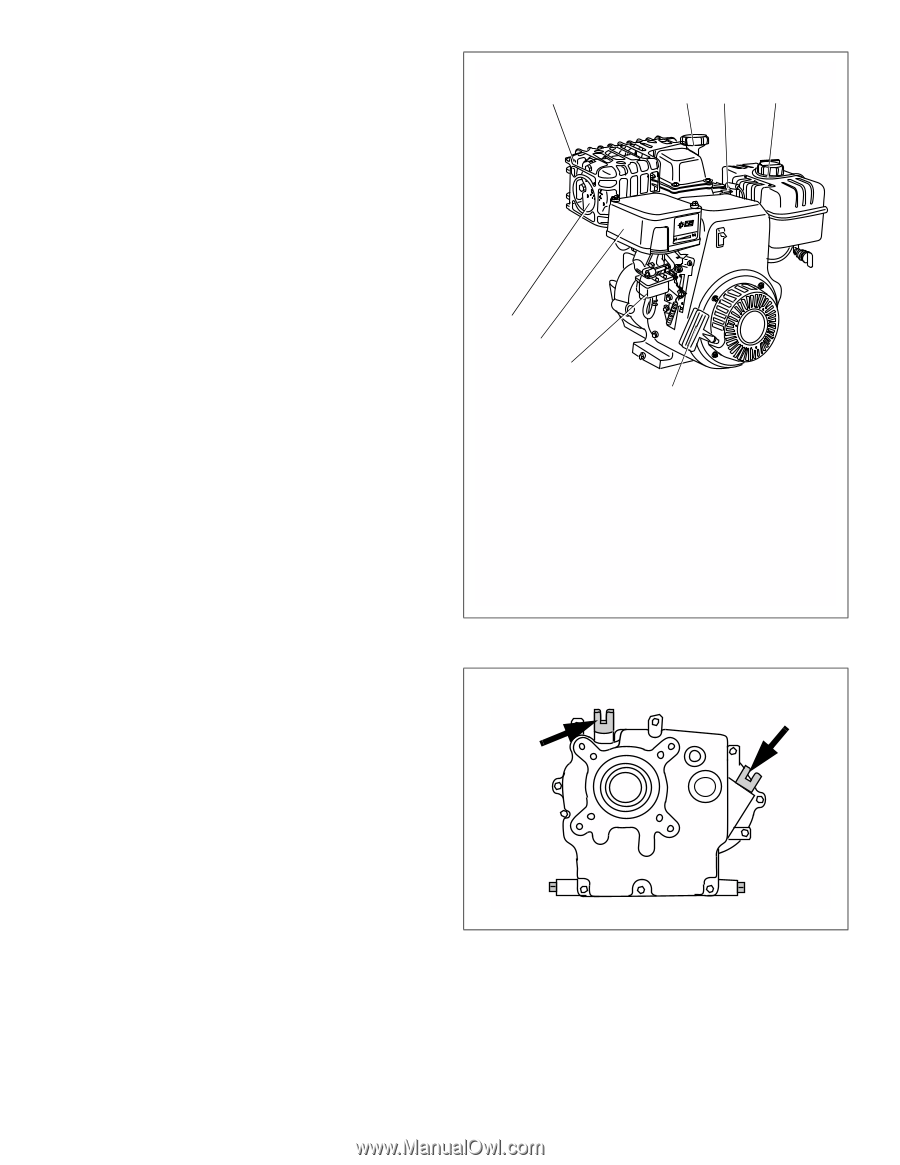
B. Filling Oil Sump I. Oil Fill Cap/Dipstick If your engine has an oil fill cap/dipstick go to step 1. If your engine does NOT have an oil fill cap/dipstick, see "II. Oil Fill Cap/Plug" instructions below. 1. Be sure engine is upright and level. 2. Unscrew oil fill cap/dipstick from oil filler tube and wipe dipstick clean. See Figure 8. 3. Screw oil fill cap/dipstick back into oil filler tube. Tighten securely. 4. Unscrew and remove oil fill cap/dipstick from oil filler tube. Note oil level. If oil reading on dipstick is below "ADD" mark, slowly add oil to reach "FULL" level. See Figure 7 on page 4. Afterward, continue reading instructions below. 5. Screw oil fill cap/dipstick back into oil filler tube. Tighten securely. 6. Wipe away any spilled oil. NOTE To change oil for engines with an oil fill cap/dipstick, see "A. Checking and Changing Oil" instructions on page 13. II. Oil Fill Cap/Plug If your engine does NOT have an oil fill cap/dipstick, go to step 1. If your engine has an oil fill cap/dipstick, see "I. Oil Fill Cap/Dipstick" instructions above. 1. Be sure engine is upright and level. 2. Clean area around oil fill cap/plug. See Figure 9. 3. Unscrew oil fill cap/plug. 4. Add oil to overflow point, making sure to avoid spilling. 5. Screw oil fill cap/plug back into oil fill hole. Tighten securely. 6. Wipe away any spilled oil. NOTE To change oil for engines with an oil fill cap/plug, see "A. Checking and Changing Oil" instructions on page 13. 4 56 7 ! 3 2 1 8 1. Carburetor 2. Air Cleaner 3. Muffler 4. Muffler Guard 5. Oil Fill Cap 6. Spark Plug Cap 7. Fuel Fill Cap 8. Starter Cord Handle Figure 8. Engine Components Figure 9. Oil Fill Locations 181-719-14 Four-Cycle Engine • Horizontal Crankshaft • Air-Cooled Page 5
-
 1
1 -
 2
2 -
 3
3 -
 4
4 -
 5
5 -
 6
6 -
 7
7 -
 8
8 -
 9
9 -
 10
10 -
 11
11 -
 12
12 -
13
-
14
-
15
-
16
-
17
-
18
-
19
-
20
-
21
-
22
-
23
-
24
 |
 |