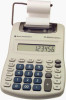
Texas Instruments TI5019 User Manual - Page 2
English, Getting Started, Installing the AC Adapter, Installing or Replacing Batteries
 |
UPC - 033317197422
View all Texas Instruments TI5019 manuals
Add to My Manuals
Save this manual to your list of manuals |
Page 2 highlights
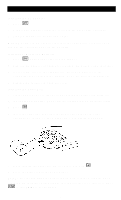
Getting Started Installing the AC Adapter 1. Press N. 2. Connect the adapter cord to the socket on the back of the calculator. 3. Plug the adapter into an electrical outlet. Warning Using any AC adapter other than the appropriate TI adapter may damage the calculator and void the warranty. Installing or Replacing Batteries 1. Press N. Unplug any connected AC adapter. 2. Remove the battery compartment cover from the bottom of the calculator. 3. If necessary, remove the old batteries. Insert new batteries in the compartment as shown in the diagram inside the battery compartment. 4. Replace the battery compartment cover. Installing the Paper Roll 1. Lift the paper holder so that it extends behind the printer compartment. 2. If using the AC adapter, make sure it is plugged into an electrical outlet. 3. Press M. 4. Insert the end of the paper into the paper slot on the back of the calculator as shown. To avoid paper jams, use quality bond paper. 7. While feeding the paper into the slot, press and hold !. 8. Place the paper roll on the paper holder. Note To prevent damaging the printer (which may void the warranty), when operating the calculator without paper, turn the printer off. To turn it off, press " so that PRINT is not displayed. 1
-
 1
1 -
 2
2 -
 3
3 -
 4
4 -
 5
5 -
 6
6 -
 7
7 -
 8
8 -
9
-
10
-
11
-
12
-
13
-
14
-
15
-
16
-
17
-
18
-
19
-
20
-
21
-
22
-
23
-
24
-
25
-
26
 |
 |
