Thermador MEDMC301WS Installation instructions - Page 10
Remove Lower Oven Door Prior to Installation, Correctly Lifting the Combination Oven, CAUTION,
 |
View all Thermador MEDMC301WS manuals
Add to My Manuals
Save this manual to your list of manuals |
Page 10 highlights
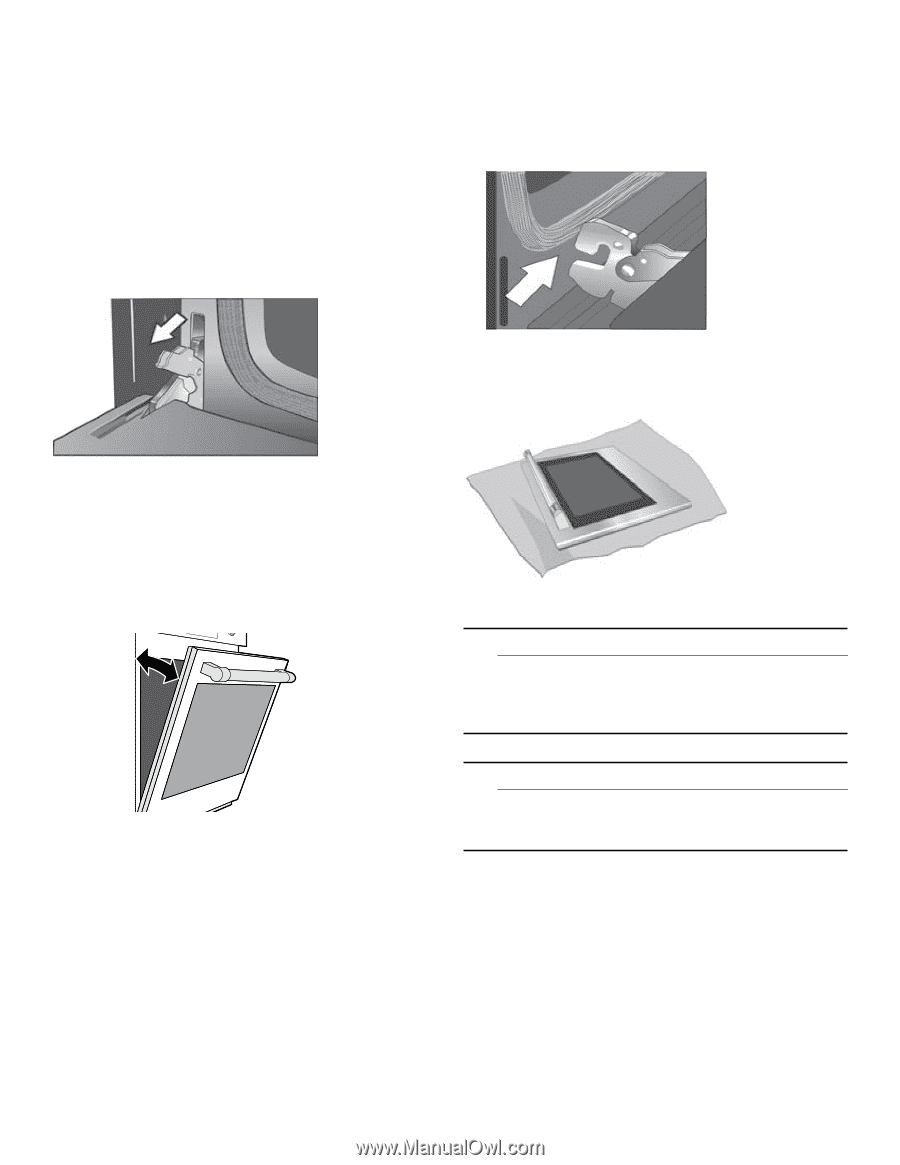
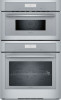
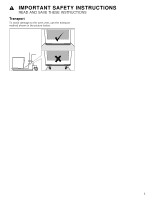
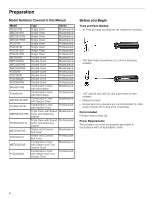
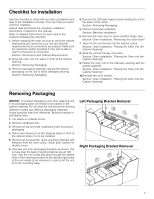
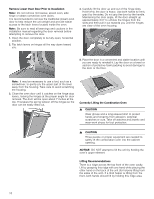
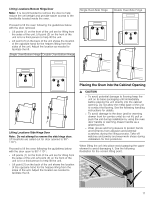
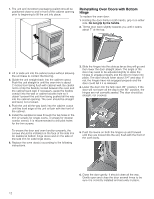
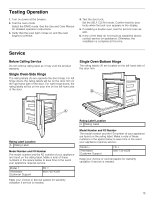
Remove Lower Oven Door Prior to Installation Note: Do not remove microwave, speed oven, side hinge or steam convection oven doors. It is recommended to remove the traditional (lower) oven door to help reduce the unit weight and provide easier access to the latch levers located inside the oven. Note: Be sure to read all warnings and cautions in the installation manual regarding the door removal before attempting to remove the door. 1. Open the door completely to its fully open, horizontal position. 2. Flip latch levers on hinges all the way down toward you. 4. Carefully lift the door up and out of the hinge slots. Hold firmly; the door is heavy. Use both hands to firmly grip it by the sides. Do not grip the door by the handle. Maintaining the door angle, lift the door straight up approximately 3/4" to unhook the hinges from the slots and then pull it out towards you until the hinges are clear of the oven housing. 5. Place the door in a convenient and stable location until you are ready to reinstall it. Lay the door on a towel or section of protective foam padding to avoid damage to the door or the floor. Note: It may be necessary to use a tool, such as a screwdriver, to gently pry the upper part of the lever away from the housing. Take care to avoid scratching the housing. 3. Close the oven door until it catches on the hinge stop levers, locking the hinges at the proper angle for door removal. The door will be open about 7 inches at the top. This takes the spring tension off the hinges so the door can be easily lifted out. Correctly Lifting the Combination Oven 9 CAUTION Wear gloves and a long-sleeved shirt to protect hands and forearms from abrasion, potential scratches or cuts. Take off watches and jewelry and wear work shoes for foot protection. 9 CAUTION Three people or proper equipment are needed to safely lift the combination oven into the cabinet opening. NOTICE: DO NOT attempt to lift the unit by holding the oven's upper element. Lifting Recommendations There is a ridge across the top front of the oven cavity. Lift by grasping this ridge with one hand while placing the other hand on the back of the unit (for helpers lifting from the sides of the unit). If a third helper is lifting from the front, both hands should lift by holding this ridge area. 10
-
 1
1 -
2
-
3
-
4
-
 5
5 -
 6
6 -
 7
7 -
 8
8 -
 9
9 -
 10
10 -
 11
11 -
 12
12 -
 13
13 -
 14
14 -
 15
15 -
16
-
17
-
18
-
19
-
20
-
21
-
22
-
23
-
24
-
25
-
26
-
27
-
28
-
29
-
30
-
31
-
32
-
33
-
34
-
35
-
36
-
37
-
38
-
39
-
40
-
41
-
42
-
43
-
44
-
45
-
46
-
47
-
48
-
49
-
50
-
51
-
52
-
53
-
54
-
55
-
56
-
57
-
58
-
59
-
60
-
61
-
62
-
63
-
64
-
65
-
66
-
67
-
68
-
69
-
70
-
71
-
72
-
73
-
74
-
75
-
76
-
77
-
78
-
79
-
80
-
81
-
82
-
83
-
84
 |
 |