Thermador PRD606WCSG Instructions for Use
Thermador PRD606WCSG Manual
 |
View all Thermador PRD606WCSG manuals
Add to My Manuals
Save this manual to your list of manuals |
Thermador PRD606WCSG manual content summary:
- Thermador PRD606WCSG | Instructions for Use - Page 1
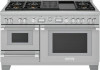
Use and care GUIDE Professional Series Pro Grand® Dual Fuel Steam and 60-Inch Pro Grand Ranges THERMADOR.COM - Thermador PRD606WCSG | Instructions for Use - Page 2
- Thermador PRD606WCSG | Instructions for Use - Page 3
Use and care GUIDE Professional Series Pro Grand® Dual Fuel Steam and 60-Inch Pro Grand Ranges Table of contents 4 Models: PRD48WCSGC PRD48WCSGU PRD48WDSGC PRD48WDSGU PRD48WISGC PRD48WISGU PRD48WLSGC PRD48WLSGU PRD606WCG PRD606WCSG PRD606WEG PRD606WESG THERMADOR.COM - Thermador PRD606WCSG | Instructions for Use - Page 4
and smart devices. This module is integrated at the factory, under direct control of BSH Home Appliances Corporation, and is not user serviceable or upgradable. At least 20 cm separation distance should be maintained from device to user. FCC COMPLIANCE STATEMENT CAUTION: Changes or modifications - Thermador PRD606WCSG | Instructions for Use - Page 5
a moment to review the Use and Care Guide. You will find the answers to all of your questions as well as some very important safety information. Pay special attention to the Important Safety Instructions located at the beginning of the manual. Your Thermador product is ready and waiting to be used - Thermador PRD606WCSG | Instructions for Use - Page 6
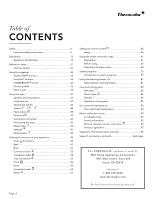
Safety 6 Important safety instructions 6 Description 15 Appliance service 94 Troubleshooting 94 Service information 95 Remote costumer service connection 95 Product registration 95 Statement of limited product warranty 96 Support, accessories, and parts back page This THERMADOR - Thermador PRD606WCSG | Instructions for Use - Page 7
Safety DEFINITIONS 9 WARNING This indicates that death or serious injuries may occur as a result of non-observance of this warning. 9 CAUTION This indicates that minor or moderate injuries may occur as a result of non-observance of this warning. NOTICE: This indicates that damage to the appliance or - Thermador PRD606WCSG | Instructions for Use - Page 8
the range without the anti-tip bracket in place. Failure to follow the instructions in this manual can result in death or serious burns to children and adults. If the range is pulled away from the wall for cleaning, service, or any other reason, ensure that the anti-tip bracket is properly reengaged - Thermador PRD606WCSG | Instructions for Use - Page 9
36'' (914 mm). Ensure proper installation and servicing. Follow the Installation Instructions provided with this product. Have the appliance 5 minutes for the gas to dissipate before lighting the burner manually. To light the burners manually, carefully hold a lighted match to the burner ports and - Thermador PRD606WCSG | Instructions for Use - Page 10
the wall receptacle before servicing this unit. See the Installation Instructions for electrical requirements and grounding instructions. Have the installer and maintenance must be carried out correctly. Follow the instructions in the Installation Manual supplied with the product. Make sure that a - Thermador PRD606WCSG | Instructions for Use - Page 11
READ AND SAVE THESE INSTRUCTIONS General safety WARNING To reduce the risk of injury to persons, in the event of a range top grease fire, observe the following: • Smother flames with a - Thermador PRD606WCSG | Instructions for Use - Page 12
READ AND SAVE THESE INSTRUCTIONS Never leave the appliance unattended when using high flame settings. only the bottom of the pan and does not extend beyond the bottom of the pan. This instruction is based on safety considerations. Use caution to ensure that drafts like those from forced air vents - Thermador PRD606WCSG | Instructions for Use - Page 13
"flaming" liquor or other spirits on the appliance, follow manufacturer's instructions. Use caution when cooking foods with high alcohol content (e.g. rum, This type of ventilation system may cause ignition and combustion problems with the appliance resulting in personal injury, property damage, - Thermador PRD606WCSG | Instructions for Use - Page 14
door gasket clean and contact a Thermador Service Technician to replace if necessary. The oven cavity is made of high quality stainless steel. Improper care may result in corrosion of the oven cavity. Follow the care and cleaning instructions provided in this manual. Remove food residue and spills - Thermador PRD606WCSG | Instructions for Use - Page 15
Getting started with your range Getting started with your range - Thermador PRD606WCSG | Instructions for Use - Page 16
- Thermador PRD606WCSG | Instructions for Use - Page 17
(options will vary) 5 Griddle option (options will vary) 6 Control panel 7 Leg covers (If additional leg covers are required, they may be ordered from the service center by calling 1-800-735-4328 at no charge for up to one year after purchase date of the appliance.) 8 Main oven 9 Secondary oven 10 - Thermador PRD606WCSG | Instructions for Use - Page 18
(options will vary) 5 Griddle option (options will vary) 6 Control panel 7 Leg covers (If additional leg covers are required, they may be ordered from the service center by calling 1-800-735-4328 at no charge for up to one year after purchase date of the appliance.) 8 Main oven 9 Steam oven 10 - Thermador PRD606WCSG | Instructions for Use - Page 19
Oven interior light 6 Outlet for multi-point meat probe 7 Rack positions 8 Oven rack 9 Bake element (hidden) 1 2 Steam oven interior 1 Rack guide 2 Oven light 3 Steam vent 4 Convection cover 5 Water tank 6 Evaporator dish 7 Rack 5 12 9 3 4 Warming drawer 1 Warming platform 2 Heating element - Thermador PRD606WCSG | Instructions for Use - Page 20
Control panel identification NOTE: Not all knobs, modes, and features are available to all models. ExtraLow® POWERBOOST® Standard Griddle Grill Steam oven temp selector Induction Mode selector OFF OFF Oven temp selector Oven digital display 1 06:30 2 TIMERS SETTINGS ENTER 3 4 - Thermador PRD606WCSG | Instructions for Use - Page 21
Top surface identification Model 486 with induction 1 3 5 7 2 4 6 Model 486 with griddle 1 3 2 4 6 5 7 1 ExtraLow® burner Natural 15000, LP 12000 BTU 2 ExtraLow burner and PowerBoost® Natural 22000, LP 15000 BTU 3 Standard burner Natural 15000, LP 12000 BTU 4 Standard burner - Thermador PRD606WCSG | Instructions for Use - Page 22
Model 606 with griddle and grill Model 606 with double griddle 1 3 5 2 4 7 6 8 1 3 2 4 6 5 7 1 ExtraLow burner® Natural 15000, LP 12000 BTU 2 ExtraLow burner and PowerBoost® Natural 22000, LP 15000 BTU 3 Standard burner Natural 15000, LP 12000 BTU 4 Standard burner Natural 18000, - Thermador PRD606WCSG | Instructions for Use - Page 23
safety hooks under the front of the rack guides. Data rating label • Record the model and serial number. • The model and serial number must be provided when calling customer support for assistance. • Register your BSH product to ensure timely service and access to your product related information - Thermador PRD606WCSG | Instructions for Use - Page 24
To install flat racks 1. Grasp rack firmly on both sides and insert rack. 2. Tilt rack up to allow stop into rack guide. Oven operation 9 WARNING To help prevent burns, never remove or reposition the oven racks while the oven is ON or while the oven is cooling. - Thermador PRD606WCSG | Instructions for Use - Page 25
Using the rangetop Using the rangetop - Thermador PRD606WCSG | Instructions for Use - Page 26
- Thermador PRD606WCSG | Instructions for Use - Page 27
placed on the burner bases for the cooktop to function properly. If the burner cap is not properly placed, one or more of the following problems may occur: • Burner flames are too high. • Flames shoot out of burners. • Burners do not ignite. • Burner flames light unevenly. • Burner emits gas odor - Thermador PRD606WCSG | Instructions for Use - Page 28
Control knobs The control knobs for two sealed gas burners, one in front and one in the rear, are located directly in front of and below the pair of burners on the control panel. Operation of the burners To turn on the burners 1. Press in on the knob and turn it counter-clockwise HI. - The igniter - Thermador PRD606WCSG | Instructions for Use - Page 29
the event of a power failure, turn all knobs to the OFF position. Only the standard burners can be lit manually. • In the event of a power failure, only the standard burners can be manually lit. It is necessary to light each one individually. • If the rangetop is being used when the power failure - Thermador PRD606WCSG | Instructions for Use - Page 30
Cookware recommendations 9 WARNING To avoid risk of serious injury, damage to appliance or cookware, please observe the following: • Bakeware, such as large casserole pans, cookie sheets, etc. should never be used on the rangetop. • Placement of large stock pots should be staggered when used on the - Thermador PRD606WCSG | Instructions for Use - Page 31
Round bottom woks must be used with a support ring. • The wok pan and the porcelain-coated cast iron wok support ring must be purchased separately. Canners and cooking recommendations • Use the chart beginning on page 30 as a guide. The settings you use will vary depending on the pans selected and - Thermador PRD606WCSG | Instructions for Use - Page 32
Surface burner cooking recommendations Food Start setting Finish setting standard burners Finish setting XLO® burners Beverages MED - heat milk, cover LO - finish heating XLO - keep warm, cover Cocoa Breads MED - preheat skillet LO to MED - cook Same as for standard burners French - Thermador PRD606WCSG | Instructions for Use - Page 33
Food Start setting Finish setting standard burners Finish setting XLO® burners Simmering: Stewed chicken, corned beef, tongue, etc. Pastas Macaroni, noodles, spaghetti Popcorn (use a heavy, flat bottom pan) HI - cover, bring liquid to a boil XLO - to simmer slowly XLO - to hold, cover HI - - Thermador PRD606WCSG | Instructions for Use - Page 34
never operate the griddle without the griddle plate installed. Never use the griddle in a manner that is not prescribed by the Use and Care Guide. NOTE: Not available on all models. Griddle widths vary. A maple chopping block and stainless steel cover are available as accessories and are purchased - Thermador PRD606WCSG | Instructions for Use - Page 35
12'' griddle cooking recommendations Food * Setting Eggs Bacon, breakfast sausage Toasted sandwiches 325° - 350°F 450° - 475°F 375° - 400°F Boneless chicken breasts Boneless pork chops, 1'' (25.4 mm) Steaks, 1'' (25.4 mm) thick Ground beef patties, 6 oz. 425° - 450°F 425° - 450°F 450° - 475°F - Thermador PRD606WCSG | Instructions for Use - Page 36
help regain the griddle's non-stick properties. For optimal performance and long life of your griddle plate, follow these simple cleaning and seasoning instructions. NOTE: 24'' griddles will not fit in the oven cavity for seasoning. Therefore, care should be taken not to overheat and damage their - Thermador PRD606WCSG | Instructions for Use - Page 37
is easy to clean. A non-stick cast iron griddle plate is available as an accessory and may be purchased separately. See the instructions that come with the griddle plate accessory for more details. 6 4 3 2 5 1 1 Grill housing 2 Drip tray 3 Briquette basket 4 Ceramic briquettes 5 Heating element (x2 - Thermador PRD606WCSG | Instructions for Use - Page 38
elements (5) down. The grill heating elements must lie flat. Supports should rest inside of side notches. 6. Install the grill also be cleaned periodically as needed and as recommended by the Use and Care Guide as well as surrounding surfaces. • Keep a fire extinguisher nearby and accessible. - Thermador PRD606WCSG | Instructions for Use - Page 39
Grill cooking recommendations IMPORTANT: • GRILL SHOULD NOT BE OPERATED WITHOUT PROPER VENTILATION. • Foods with excessive fat or grease should not be prepared on an indoor grill. Grilling foods with high fat content (certain types of ground beef, sausage, etc) increases the chances of smoke and - Thermador PRD606WCSG | Instructions for Use - Page 40
Page. 38 - Thermador PRD606WCSG | Instructions for Use - Page 41
Using the convection oven Using the Convection Oven - Thermador PRD606WCSG | Instructions for Use - Page 42
- Thermador PRD606WCSG | Instructions for Use - Page 43
Using the oven Symbols and descriptions Symbol/mode Definitions and recommendations Bake Cooks with dry, heated air. Variety of foods, such as cakes, cookies, pastries, quick breads, quiche and casseroles. Conv bake Similar to bake, but air is circulated by a fan at the back of the oven. Best - Thermador PRD606WCSG | Instructions for Use - Page 44
or its settings from being changed accidentally. Door locking Symbol is displayed during and after the self-clean mode when the door is locked. Remote service Symbol is displayed if customer service is connected during remote access. Page. 42 - Thermador PRD606WCSG | Instructions for Use - Page 45
using the assistant Factory settings Restore Service access Connect Customer service Displays customer service contact information Home ConnectTM assistant About the section "Setting up Home Connect™" on page 56 for full instructions on how to install the Home Connect app. Setting up Home - Thermador PRD606WCSG | Instructions for Use - Page 46
About data protection When your appliance is connected for the first time to a WLAN network, which is connected to the Internet, your appliance transmits the following categories of data to the Home Connect server (initial registration): • Unique appliance identification (consisting of appliance - Thermador PRD606WCSG | Instructions for Use - Page 47
require longer baking times. This mode is not recommended for baked goods. • The unit will continue to run the fast preheat indefinitely until the user manually changes it in the settings, or until the unit loses power, in which case fast preheat will need to be reset. • Fast preheat is available - Thermador PRD606WCSG | Instructions for Use - Page 48
modes except self-clean. • By default, the temperature is set at 0°. • The unit will continue to run the input offset value indefinitely until the user manually changes it, or until the unit loses power, in which case offset will need to be reset. To set offset 1. Begin from the STANDBY mode - Thermador PRD606WCSG | Instructions for Use - Page 49
4. Press the right ( or ) to the desired internal temperature. a ƒBake 05:40 c b ¥70°/ 150° Oven temperature 375° d TIMERS SETTINGS ENTER a. Cooking mode c. Set shut-off temp b. Current probe temp d. Set oven temp - The oven display indicates the current temperature of the meat - Thermador PRD606WCSG | Instructions for Use - Page 50
4. Turn the main oven mode knob to BAKE and turn the temperature knob to the desired temp. 5. Press TIMERS on the main oven display. 6. Press the left ( or ) to scroll to SABBATH TIMER. 06:30 › Sabbath Timer --min--s TIMERS SETTINGS ENTER 7. Press the right ( or ) and enter the - Thermador PRD606WCSG | Instructions for Use - Page 51
services in your country. Home Connect services are not available in every country. You can find more information on this at www.home-connect.com IMPORTANT: • Ensure that you follow the safety instructions in this instruction manual instructions in the latest version of the Home Connect app to guide - Thermador PRD606WCSG | Instructions for Use - Page 52
Getting the most out of your appliance Oven rack positions Rack levels Rack level positions in the oven are numbered on the front frame like an elevator. Number one level is the lowest and number five level is at the top. Two rack baking Level Bake or conv bake mode 2 and 4 -- Casserole dishes - Thermador PRD606WCSG | Instructions for Use - Page 53
cooking times will vary. For accurate information, write the Extension Service, Colorado State University, Fort Collins, Colorado 80521. There may be a cost for the guides. Specify which high altitude food preparation guide you prefer: general information, cakes, cookies breads, etc. Condensation It - Thermador PRD606WCSG | Instructions for Use - Page 54
Convection broil About convection broil Convection broil is similar to broil. It combines intense heat from the upper element with heat circulated by a convection fan. Convection broil mode is well suited for cooking thick, tender cuts of meat, poultry and fish. Convection broil is not recommended - Thermador PRD606WCSG | Instructions for Use - Page 55
Three rack convection baking Level Conv bake mode 1, 3, -and 5 When several sheets of cookies are to be baked. Place the baking sheets directly above each other on the respective racks to allow air to flow around the baking sheets. Dehydrating foods with convection bake Use the convection bake - Thermador PRD606WCSG | Instructions for Use - Page 56
Proof About proof The proof feature maintains the warm, non-drafty environment needed for proofing yeast leavened products. It is best to start with a cool oven when using the proofing function. To set the oven for proof 1. Allow dough to thaw if frozen. 2. Place dough in dish and loosely cover. 3. - Thermador PRD606WCSG | Instructions for Use - Page 57
temperatures that foods must reach to be considered safe to eat, as determined by the U. S Department of Agriculture Food Safety and Inspection Service, are as follows: Egg dishes, casseroles 160°F (72°C) Leftovers 165°F (74°C) Ground beef, veal, lamb, or pork 160°F (72°C) Beef, veal, lamb - Thermador PRD606WCSG | Instructions for Use - Page 58
: Please ensure that you follow the safety instructions given at the beginning of this instruction manual and that these are also observed when operating login details here: Network name (SSID Password (Key The app will guide you through the steps of adding your appliance to Home Connect. Step - Thermador PRD606WCSG | Instructions for Use - Page 59
button on your router. -- Please consult your router's manual to locate the WPS button. -- The app will the app on your mobile device and follow the instructions in the app. 2. The login process is updated (e.g. for the purpose of optimization, troubleshooting or security updates). To do this, you - Thermador PRD606WCSG | Instructions for Use - Page 60
Page. 58 - Thermador PRD606WCSG | Instructions for Use - Page 61
Using the steam convection oven Using the steam convection oven - Thermador PRD606WCSG | Instructions for Use - Page 62
- Thermador PRD606WCSG | Instructions for Use - Page 63
steam oven accessories come with your steam oven: Wire rack (CSRACKH): Use for support during baking. Perforated cooking pan full-size (CS2XLPH): Ideal for steaming fish or large can be purchased in retail appliance stores where Thermador products are sold or through customer service. Page. 61 - Thermador PRD606WCSG | Instructions for Use - Page 64
Steam oven modes Mode Function True conv Operates as a convection oven, with no steam. Even heat distribution assures superb moist cakes, sponge cakes, and braised meat. Reheat The inflow of steam keeps the food moist and brings back the original flavor, texture, and crispness when cooked food - Thermador PRD606WCSG | Instructions for Use - Page 65
Empty the water tank after each use. 1. Keep the water tank level while slowly pulling it out of the appliance to ensure that no remaining water drips down and out through the vent. 2. Pour out the water. 3. Thoroughly dry the seal of the tank lid and the slot where the tank resides in the appliance - Thermador PRD606WCSG | Instructions for Use - Page 66
Operating the steam oven Using seven of the eight modes available in your steam oven requires similar steps. Using a steam program is somewhat different and is described separately starting on page 75. Setting the steam oven To operate the steam oven 1. Place food in steam oven before preheat unless - Thermador PRD606WCSG | Instructions for Use - Page 67
Getting the most out of your steam oven Steam oven tips 9 WARNING DO NOT use aluminum foil or protective liners to line any part of the appliance, especially the oven bottom. Installing these liners may result in risk of electric shock or fire. These tables contain a selection of dishes that can be - Thermador PRD606WCSG | Instructions for Use - Page 68
Steam oven cooking recommendations Vegetables Place vegetables in the perforated cooking pan and place pan at rack level 3. Place the baking pan underneath it at rack level 1. The baking pan will catch any drippings. Food Artichokes Asparagus, green* Asparagus, white* Beets, red Broccoli Brussels - Thermador PRD606WCSG | Instructions for Use - Page 69
Food Potato gratin Brown rice Long grain rice Basmati rice Parboiled rice Lentils Canellini beans, pre-softened Couscous Dumplings Ratio - 1:2 1:2 1:1.5 1:1.5 1:2 1:2 1:1 - Accessories and rack levels Oven mode Temperature Baking pan (level 2) Baking pan Baking pan Steam Steam Steam 210˚F ( - Thermador PRD606WCSG | Instructions for Use - Page 70
Food Weight Accessories and rack levels Oven mode BEEF Pot-roasted beef* 3.5 lbs. (1.5 kg) Wire rack + baking pan (level 2) Reheat Filet of beef, medium* 2 lbs. (1 kg) Wire rack + baking pan (level 2) Reheat Thin slice of roast beef, medium* 2 lbs. (1 kg) Wire rack + baking pan (level 2) - Thermador PRD606WCSG | Instructions for Use - Page 71
Food Weight Accessories and rack levels Oven mode Trout, whole per 0.5 lbs. Perforated (level 3) + Steam (0.2 kg) baking pan (level 1) Cod, filet per 0.33 lbs. Perforated (level 3) + Steam (0.15 kg) baking pan (level 1) Salmon, filet per 0.33 lbs. Perforated (level 3) + Steam (0.15 kg) - Thermador PRD606WCSG | Instructions for Use - Page 72
Desserts, compotes Compote: Weigh out the fruit, add approximately 1/3 of water and add sugar and spices to taste. Rice pudding: Weigh out the rice and add 2.5 times as much milk. Add the rice and milk no higher than 1 inch up the side of the accessory. Stir after cooking. The remaining milk will be - Thermador PRD606WCSG | Instructions for Use - Page 73
Food Accessories and rack levels Oven mode Bundt® Savory cakes Apple tart SHEET CAKES Yeast cake Swiss roll Bundt® cake pan + wire rack (level 2) Quiche dish + wire rack (level 2) Flan base cake pan + wire rack (level 2) True conv True conv True conv Baking pan (level 2) Baking pan (level 2) - Thermador PRD606WCSG | Instructions for Use - Page 74
Reheating foods Food Accessories and rack levels Oven mode Dinner plate Vegetables Wire rack (level 2) Baking pan (level 3) Reheat Reheat Noodles, potatoes, rice Bread rolls* Baguettes* Bread* Pizza *Preheat for 5 minutes Baking pan (level 3) Reheat Baking pan + Wire rack (level 2) Steam - Thermador PRD606WCSG | Instructions for Use - Page 75
mode Temperature Steam 210˚F (100˚C) Steam 210˚F (100˚C) Cooking time 30 - 45 min. 40 - 50 min. Frozen products Follow the manufacturer's instructions on packaging. The specified cooking times apply to dishes placed in a cold oven. Food Accessories and rack levels French fries Baking pan - Thermador PRD606WCSG | Instructions for Use - Page 76
Food Frozen fish fillets Salmon fillets Broccoli Cauliflower Green beans Peas Carrots Mixed vegetables Brussels sprouts *Add a little liquid Accessories and rack levels Baking pan + wire rack (level 2) Perforated (level 3) + Baking pan (level 1) Perforated (level 3) + Baking pan (level 1) - Thermador PRD606WCSG | Instructions for Use - Page 77
DRAWER ENTER 5. Place your food in the steam oven as instructed in the display. Close the oven door and press ENTER. 0.70 lb, 30min 00s Rack on universal pan, level 3 Cooking instructions... Press Enter to save To set a steam program 1. Turn the mode knob to - Thermador PRD606WCSG | Instructions for Use - Page 78
To continue cooking After the program has ended you have the ability to continue cooking. 1. Press ENTER. Program completed Continue cooking with Enter TIMERS DRAWER ENTER 2. Press the right ( or ) to adjust the time and press ENTER. Continue Cooking 06:30 œ 30min 00s x 10min 00s - Thermador PRD606WCSG | Instructions for Use - Page 79
Steam program charts This section covers all of the programs available for automatic programming. Read the instructions before using a program to prepare the food. Food Default weight Min. weight Max. weight Accessories and rack levels VEGETABLES Wait until after cooking to season - Thermador PRD606WCSG | Instructions for Use - Page 80
Food Default weight Min. weight Max. weight Accessories and rack levels Sirloin, medium, slow cook (sear before cooking) 2.2 lbs. (1 kg) 2.2 lbs. (1 kg) 4.2 lbs. (2 kg) Baking pan (level 2) PORK Cut the rind from the center outward before cooking. The shoulder cut is the best cut for a - Thermador PRD606WCSG | Instructions for Use - Page 81
Using the warming drawer Using the warming drawer - Thermador PRD606WCSG | Instructions for Use - Page 82
- Thermador PRD606WCSG | Instructions for Use - Page 83
Warming drawer Operating the warming drawer To turn the warming drawer on 1. Press DRAWER on the display panel. 06:30 off Warming Drawer IMPORTANT: Use ONLY heat-safe dishes in the warming drawer. The warming drawer will keep hot, cooked foods at serving temperature. Always start with hot food. DO - Thermador PRD606WCSG | Instructions for Use - Page 84
Keeping food warm It is okay to leave food in the cookware it was prepared in. You can also transfer food to a heat-safe serving dish before placing it in the warming drawer. Aluminum foil may be used to cover food. Warming plates and bowls 1. Place plates and bowls in warming drawer. 2. Set heat - Thermador PRD606WCSG | Instructions for Use - Page 85
Care and maintenance Care and maintenance - Thermador PRD606WCSG | Instructions for Use - Page 86
- Thermador PRD606WCSG | Instructions for Use - Page 87
imperative that all cleaning products be used in strict accordance with the instructions on its package. About self-clean • The self-cleaning mode of THE OVEN TO SELF-CLEAN • Remove all utensils. • Remove racks and rack guides. • Clean the oven front frame and outer door edges. • Wipe up large - Thermador PRD606WCSG | Instructions for Use - Page 88
OFF. To set end time of self-clean 1. Remove all utensils, racks, and rack guides. Ensure the oven door is shut. 2. Turn the mode knob to SELF CLEAN. traces of cleaners used in the steam oven by carefully following all instructions for wiping out the oven and running rinse cycles. • Cleaner residues - Thermador PRD606WCSG | Instructions for Use - Page 89
Descale You will need to descale the steam oven at regular intervals. Once you have set your water hardness level (see page 63), the steam oven display will automatically inform you when descaling is needed. Water hardness Operation hour counter 1 - softened 2 - soft 3 - medium 4 - hard 5 - very - Thermador PRD606WCSG | Instructions for Use - Page 90
back into the grill before using the grill again. • New ceramic briquettes can be purchased from the Thermador eShop (order number PABRICKBKN). See the back cover for support information. Door(s) / stainless steel 9 CAUTION: Ceramic briquettes must be replaced when they begin to turn black. This - Thermador PRD606WCSG | Instructions for Use - Page 91
Steel Liquid Cleaner -- Cleaner polish: Stainless Steel Magic® to protect the finish from staining and pitting; enhances appearance. -- Thermador Stainless Steel Conditioner (00576697) -- For hard water spots use household vinegar. For heat discoloration; rinse and dry immediately: -- Barkeepers - Thermador PRD606WCSG | Instructions for Use - Page 92
Part/material Griddle / aluminum with • non-stick coating • • • • Griddle grease tray • • • Grill grates / porcelain • enamel on cast iron • • • • Igniters / ceramic • • Oven cavity / porcelain • enamel on steel • • Cleaning notes NEVER flood a hot griddle with cold water. This - Thermador PRD606WCSG | Instructions for Use - Page 93
Part/material Oven racks and rack • guides • • • • Surface spill trays / • porcelain enamel • • • • Seal / door gasket • • Steam oven • Warming drawer interior • and exterior / • polished stainless steel • • Cleaning notes Some commercial oven cleaners cause - Thermador PRD606WCSG | Instructions for Use - Page 94
bulb in any oven. Call Thermador Customer Care Center at 1-800-735-4328 or your nearest Thermador dealer to determine the proper replacement screw driver between the holder clip and the lamp housing (figure, A). 4. Support the glass lens cover with fingers along the bottom edge to prevent the cover - Thermador PRD606WCSG | Instructions for Use - Page 95
steam oven light bulb Heat-resistant 120V / 25 Watt halogen bulbs with seals can be purchased through retail stores or customer service. When purchasing through customer service provide the appliance model and serial numbers. 1. Turn off power to the appliance at the main power supply (breaker box - Thermador PRD606WCSG | Instructions for Use - Page 96
for service Before calling for service, check the following to avoid unnecessary service charges. Troubleshooting Guide. • Oven door may not be sealing properly. • Clean the oven door gasket. Replace if worn. • Appliance not level. • Refer to the Installation Instructions for instructions - Thermador PRD606WCSG | Instructions for Use - Page 97
service access to the appliance 1. Contact customer support (see back page). Follow the instructions given to you by the technician. - The display screen as customer support on the registration card, including the points ( ). PHOTOREGISTERSM THERMADOR 2. Text the photo to 21432. (USA only, text - Thermador PRD606WCSG | Instructions for Use - Page 98
any display, floor, "As Is", or "B" stock appliances. Repair/replace as your exclusive remedy During this warranty period, Thermador or one of its authorized service providers will repair your Product without charge to you (subject to certain limitations stated herein) if your Product proves to - Thermador PRD606WCSG | Instructions for Use - Page 99
or damage that are not the direct fault of Thermador, including without limitation, one or more of the follow operating instructions, mishandling, unauthorized service (including nothing wrong with the Product; correction of installation problems (you are solely responsible for any structure and - Thermador PRD606WCSG | Instructions for Use - Page 100
- Thermador PRD606WCSG | Instructions for Use - Page 101
to help you with cleaning and care instructions, cooking tips, accessories, troubleshooting, and more. USA: 1-800-735-4328 thermador.com/customer-care Canada: 1-800-735-4328 thermador.ca/support Accessories and parts Filters, Thermador cleaners, teppanyaki pans, griddles, replacement parts, and
-
 1
1 -
 2
2 -
 3
3 -
 4
4 -
 5
5 -
 6
6 -
 7
7 -
8
-
9
-
10
-
11
-
12
-
13
-
14
-
15
-
16
-
17
-
18
-
19
-
20
-
21
-
22
-
23
-
24
-
25
-
26
-
27
-
28
-
29
-
30
-
31
-
32
-
33
-
34
-
35
-
36
-
37
-
38
-
39
-
40
-
41
-
42
-
43
-
44
-
45
-
46
-
47
-
48
-
49
-
50
-
51
-
52
-
53
-
54
-
55
-
56
-
57
-
58
-
59
-
60
-
61
-
62
-
63
-
64
-
65
-
66
-
67
-
68
-
69
-
70
-
71
-
72
-
73
-
74
-
75
-
76
-
77
-
78
-
79
-
80
-
81
-
82
-
83
-
84
-
85
-
86
-
87
-
88
-
89
-
90
-
91
-
92
-
93
-
94
-
95
-
96
-
97
-
98
-
99
-
100
-
101
 |
 |

THERMADOR.COM
Use and care
GUIDE
Professional Series Pro Grand
®
Dual Fuel Steam and 60-Inch Pro Grand Ranges