Timex T248T User Manual - Page 4
Installation and Maintenance, Setting Date, Setting Clock Time
 |
View all Timex T248T manuals
Add to My Manuals
Save this manual to your list of manuals |
Page 4 highlights
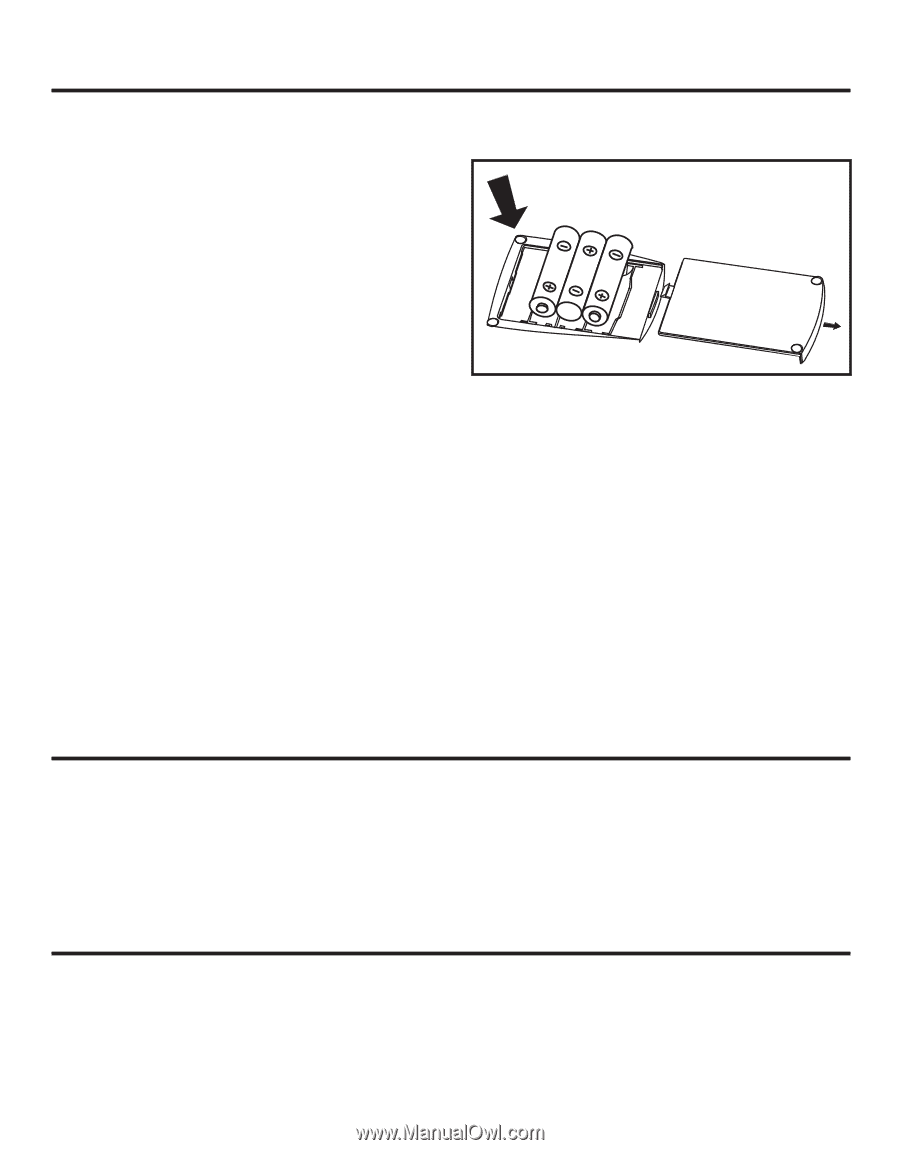
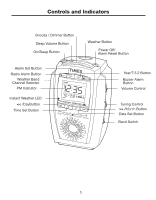
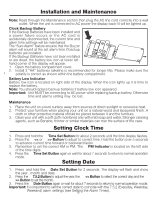
Installation and Maintenance Note: Read through the Maintenance section then plug the AC line cord correctly into a wall outlet. When the unit is connected to AC power the display back-lit will be lighted up. Clock Backup Battery If the Backup Batteries have been installed and a power failure occurs or the AC cord is accidentally disconnected, the current time and alarm time settings will be maintained. The "Sure Alarm" feature ensures that the Buzzer alarm will sound at the set alarm time if backup batteries are installed. If the Backup Batteries have not been installed or are dead, the battery low icon at lower left- hand corner of the display will appear. 1. Open the battery compartment cover. 2. Install 3 "AA" batteries (alkaline is recommended for longer life). Please make sure the n polarity is correct as shown within the battery compartment. Battery Low Indicator Battery low icon is located on right side of the display. When the icon lights up it is time to replace the battery. Note: You should replace backup batteries if battery low icon appeared. Important: Unit MUST be connecting to AC power while replacing backup battery. Otherwise time and alarms setting may be lost. Maintenance 1. Place the unit on a level surface away from sources of direct sunlight or excessive heat. 2. Protect your furniture when placing your unit on a natural wood and lacquered finish. A cloth or other protective material should be placed between it and the furniture. 3. Clean your unit with a soft cloth moistened only with mild soap and water. Stronger cleaning agents, such as Benzine, thinner or similar materials can mar the surface of the case. Setting Clock Time 1. Press and hold the Time Set Button for about 2 seconds until the time display flashes. 2. Press the > Button to adjust to correct time. Hold the button over 5 seconds to advance current time forward or backward faster. 3. Remember to set the correct AM or PM. The PM Indicator is located on the left side of the time digits. 4. Press the Time Set Button again or wait for about 7 seconds to return to normal operation mode. Setting Date 1. Press and hold the Date Set Button for 2 seconds. The display will flash and show the year , month and date. 2. Press the 7.5.2 Button to adjust the year, the > Button to set the month . 3. Press the Date Button again or wait for about 7 seconds to return to normal operation mode. Important: It is important to set the correct date to coincide with the 7.5.2 (Everyday, Weekday, Weekend) alarm settings (see Sett6ing the Alarm Times).
-
 1
1 -
 2
2 -
 3
3 -
 4
4 -
 5
5 -
 6
6 -
 7
7 -
 8
8
 |
 |