Timex T256S User Guide - Page 4
Installation and Maintenance, Dimmer Switch, Setting Clock Time and Alarm Time, Listening to Radio - clock radio
 |
View all Timex T256S manuals
Add to My Manuals
Save this manual to your list of manuals |
Page 4 highlights
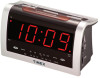
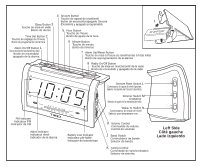
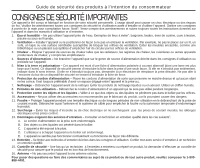
Installation and Maintenance 1. Remove battery compartment cover and install a 9V battery. We recommend using an alkaline battery for longest dependable life. The battery will maintain the correct time in the event of power failure or accidental line cord disconnection, even though the display is darkened. Note: In the case of power failure, if a battery is not installed or the battery is dead, the display will begin flashing once AC power resumes indicating the clock and alarm must be reset. Replace the battery every six months or after a power outage of approximately 10 hours or longer. 2. Place the unit on a level surface away from sources of direct sunlight or excessive heat. Note: Protect your furniture when placing your unit on a natural wood and lacquered finish. A cloth or other protective material should be placed between it and the furniture. 3. Fully extend FM wire antenna. Do not connect the FM wire antenna to an external antenna. 4. Plug AC line cord into wall outlet. When the unit is connected to AC power for the first time the display will be blinks. Set the correct time. 5. Clean your unit with a soft cloth moistened only with mild soap and water. Stronger cleaning agents, such as Benzine, thinner or similar materials can mar the surface of the case. Note: Make sure to unplug your unit from AC outlet before cleaning. Dimmer Switch 1. Set the M Dimmer Switch to Hi or Low depending on the brightness in the room. Setting Clock Time and Alarm Time Setting Clock Time 1. Press and hold the 2 Time Set Button and the 5 Hour Button until the correct hour digit is displayed. A small dot in the upper left corner of the display is the PM indicator. 2. Press and hold the 2 Time Set Button and the 6 Minute Button until the correct time is displayed. Setting Alarm Time 1. Pressing and hold the 7 Alarm Set/Reset Button and the 5 Hour Button until the correct hour digit is displayed. A small dot in the upper left corner of the display is the PM indicator. 2. Press and hold the 7 Alarm Set/Reset Button and the 6 Minute Button until correct time is displayed. Listening to Radio Note: Extend FM wire antenna fully for best FM reception. Rotate radio, as required, for best AM reception. 1. Push the 8 Radio On/Off Button to "down" position. 2. Set the J Band Switch at the right-hand side to the desired band, AM or FM. Rotate the K Tuning Control to select a station. Adjust the 9 Volume Control as desired. 3. When listening is completed push the 8 Radio On/Off Button again to "up" position. 4
-
 1
1 -
 2
2 -
 3
3 -
 4
4 -
 5
5 -
 6
6 -
 7
7 -
 8
8 -
 9
9 -
 10
10 -
11
-
12
-
13
-
14
-
15
-
16
 |
 |