Timex T312S User Guide - Page 5
Installation and Maintenance, Getting Started - alarm clock
 |
UPC - 758859205717
View all Timex T312S manuals
Add to My Manuals
Save this manual to your list of manuals |
Page 5 highlights
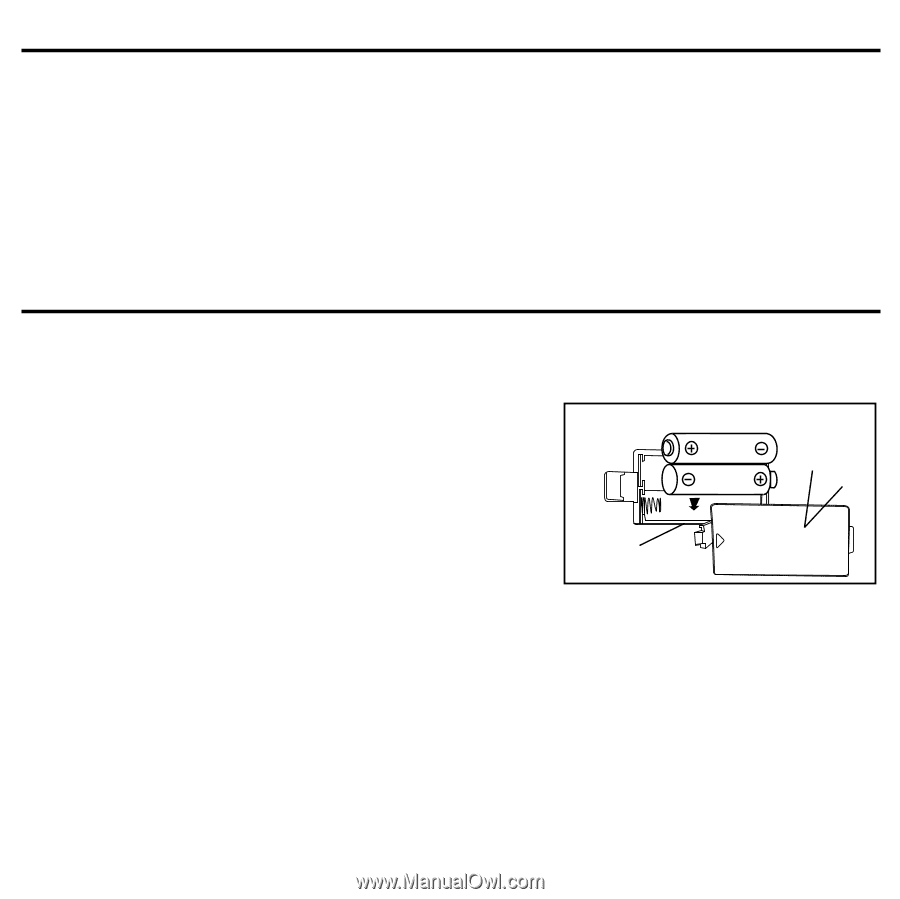
Installation and Maintenance 1. Place unit on a level surface away from sources of direct sunlight or excessive heat. Note: Protect your furniture when placing your unit on a natural oil or lacquered finish. A cloth or other protective material should be placed between it and the furniture. 2. For automatically hourly chime alarm, the unit should place in suitable light environment. 3. Open battery compartment and install batteries as Getting Started. 4. Clean your unit with a soft cloth moistened only with mild soap and water. Stronger cleaning agents, such as Benzine, thinner or similar materials can mar the surface of the case. 5. If the unit is not to be used for a prolonged period, such as a month or longer, remove the batteries to prevent possible corrosion. Should the battery compartment become corroded or dirty, clean the compartment thoroughly and replace all the batteries. Getting Started Installation After installing the backup batteries (see below) and reading the Maintenance notes, plug the AC cord into an outlet. Install Clock Backup Battery The T-312 uses 2 AAA batteries to provide continuous alarm operation and clock settings in the event of a power failure. If the Backup Batteries have been installed and a power failure occurs or the AC cord is accidentally disconnected, the display backlight will not remain lit, but current time and alarm time settings will be temporarily maintained. Otherwise, you must reset the time and alarm settings. ᕡ ᕣ If the Battery Low Icon located on the left of the display is flashing, it is time to replace the backup batteries. ᕢ 1. Please make sure the AC power is connected. Otherwise all settings may be lost during battery replacement. 2. Open backup battery compartment door located on the bottom of the unit. 3. Insert 2 AAA batteries, checking that the polarity (+ and - ends of the battery) matches the drawing inside the battery compartment. Close the compartment door. Note: Make sure you dispose of batteries properly (see your local regulations). 3
-
 1
1 -
 2
2 -
 3
3 -
 4
4 -
 5
5 -
 6
6 -
 7
7 -
 8
8 -
 9
9 -
 10
10
 |
 |