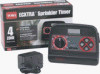
Toro 53765 User Guide - Page 14
Connecting the Power Source, Connecting a Pump Start Relay
 |
UPC - 021038537658
View all Toro 53765 manuals
Add to My Manuals
Save this manual to your list of manuals |
Page 14 highlights
Connecting a Pump Start Relay CAUTION: To prevent timer damage, ensure the relay current draw does not exceed 0.30 Amps. Do not connect the timer directly to the pump starter. 1. For pump relay wires, install a 1/2" conduit adapter and conduit. 2. Connect a wire pair to the pump relay terminals and route the cable through the conduit and into the timer housing. 3. Connect one wire to the terminal labeled COM (12). Connect the remaining wire to the terminal labeled PUMP/MV (13) as shown below. Jumper Wire 12 13 24 V a.c. Valve Common Wire Pump Relay CAUTION: To prevent pump damage due to "dead-heading," connect a jumper wire from any unused zone terminal to a zone terminal with a valve connected. Note: Refer to "Pump Control" section on page 29 for 12 important pump circuit control information. Connecting the Power Source WARNING: AC power wiring must be installed and connected by qualified personnel only. All electrical components and installation procedures must comply with all applicable local and national electrical codes. Some codes may require a means of disconnection from the AC power source installed in the fixed wiring and having a contact separation of at least 0.120" in the line and neutral poles. Make sure the power source is OFF prior to connecting the timer. 1. Route the power and equipment ground wires from the power source, through the conduit and into the timer transformer compartment. Note: The timer terminal block accepts wire size up to 14 gauge. 2. Remove 3/8" insulation from the wire ends. 3. Using a small flat blade screwdriver, secure the wires as shown to the terminal block as follows: Line or Line 1 (L1) to L, Neutral or Line 2 (L2) to N and Equipment Ground to . 4. Install and secure the transformer compartment cover. 5. Apply power to the timer. Note: The display will begin flashing 12:00 AM. Press any button to stop the display from flashing.
-
 1
1 -
2
-
3
-
4
-
5
-
6
-
7
-
8
-
 9
9 -
 10
10 -
 11
11 -
 12
12 -
 13
13 -
 14
14 -
 15
15 -
 16
16 -
 17
17 -
 18
18 -
 19
19 -
20
-
21
-
22
-
23
-
24
-
25
-
26
-
27
-
28
-
29
-
30
-
31
-
32
-
33
-
34
-
35
-
36
-
37
-
38
-
39
-
40
-
41
-
42
-
43
-
44
 |
 |
