Toshiba 13A21 Owners Manual - Page 4
To Memorize Channels, Troubleshooting Guide, Connection To Other Equipment, Adjusting Picture - model no
 |
View all Toshiba 13A21 manuals
Add to My Manuals
Save this manual to your list of manuals |
Page 4 highlights
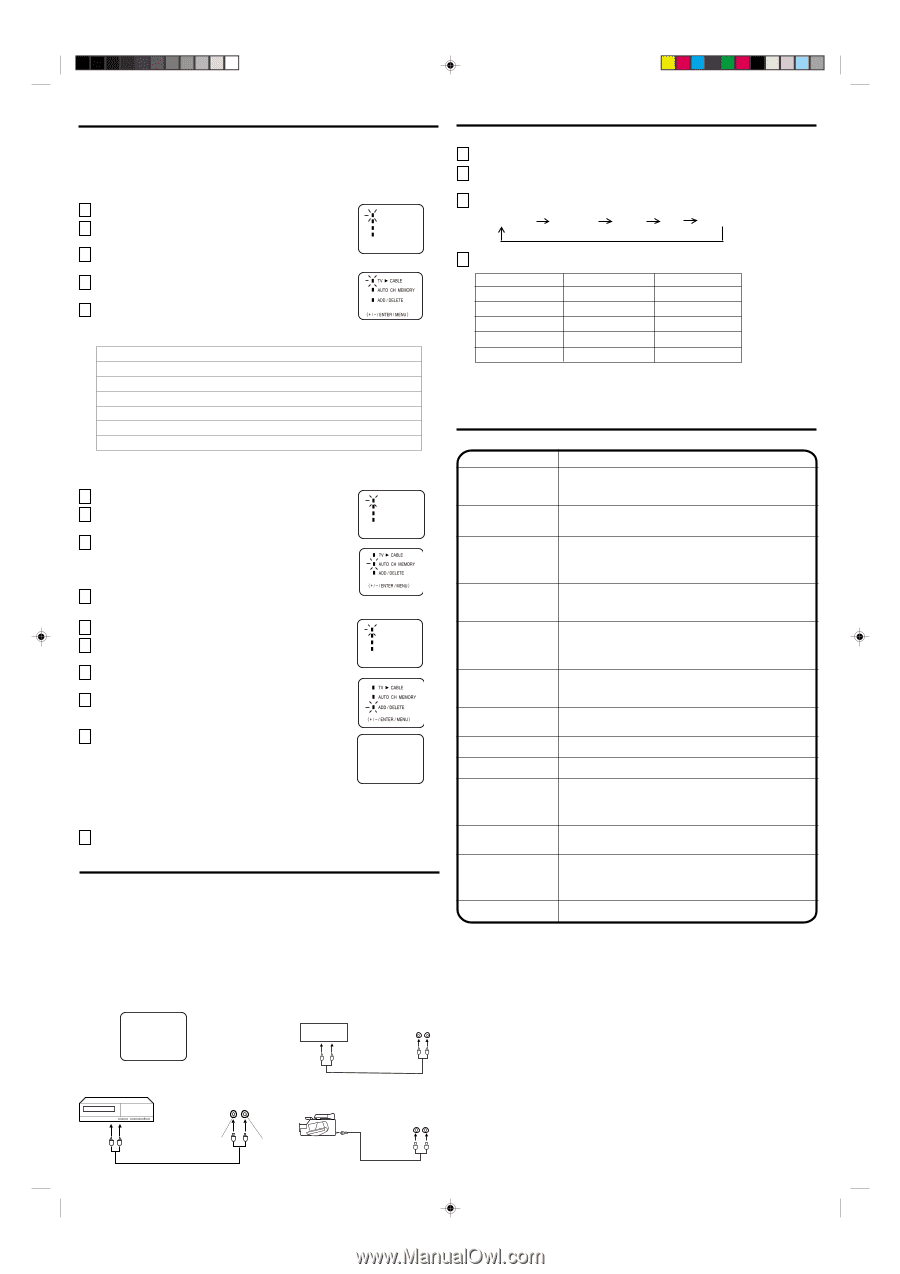
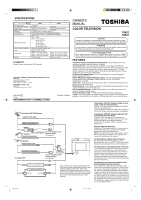
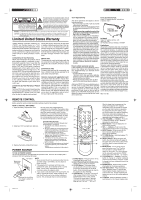
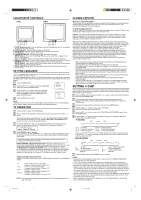
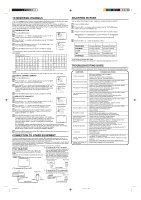
TO MEMORIZE CHANNELS This TV is equipped with a channel memory feature which allows channels to skip up or down to the next channel set into memory, skipping over unwanted channels. Before selecting channels, they must be programmed into the TV's memory. In addition to normal VHF and UHF channels, this TV can receive up to 113 Cable TV channels. To use this TV with an antenna, set the TV/CABLE menu option to the TV setting. When shipped from the factory, this menu option is in the CABLE setting. TV/CABLE SELECTION 1 Press the MENU button. 2 Press the SET + or - button until the indicator next to "CH SET" begins to flash, then press the ENTER button. 3 Press the SET + or - button until the indicator next to "TV/CABLE" begins to flash. MENU CH SET PICTURE LANGUAGE V-CHIP SET 〈 + / - / ENTER / MENU 〉 4 Press the ENTER button to select the TV or CABLE mode. The arrow indicates the selected mode. 5 Press the MENU button twice to return to normal TV viewing. The chart below is typical of many cable system channel allocations. CATV CHART TV CABLE AUTO CH MEMORY ADD / DELETE á+ / Ð / ENTER / MENU ñ Number on this TV Corresponding CATV channel 14 15 16 17 18 19 20 21 22 ABCDE FGH I 23 24 25 26 27 28 29 30 31 J K LMNOPQR 41 42 43 44 45 46 47 48 49 EE FF GG HH II JJ KK LL MM 59 60 61 62 63 64 65 66 67 WW AAA BBB CCC DDD EEE FFF GGG HHH 77 78 79 80 81 82 83 84 85 RRR SSS TTT UUU VVV WWW XXX YYY ZZZ 95 96 97 98 99 100 101 102 103 A-5 A-4 A-3 A-2 A-1 100 101 102 103 113 114 115 116 117 118 119 120 121 113 114 115 116 117 118 119 120 121 32 33 34 35 36 37 38 39 40 S T U V W AA BB CC DD 50 51 52 53 54 55 56 57 58 NN OO PP QQ RR SS TT UU VV 68 69 70 71 72 73 74 75 76 III JJJ KKK LLL MMM NNN OOO PPP QQQ 86 87 88 89 90 91 92 93 94 86 87 88 89 90 91 92 93 94 104 105 106 107 108 109 110 111 112 104 105 106 107 108 109 110 111 112 122 123 124 125 01 122 123 124 125 5A NOTE: Contact your cable company to determine the type of cable system used in your area. AUTOMATIC CHANNEL MEMORY 1 Press the MENU button. 2 Press the SET + or - button until the indicator next to "CH SET" begins to flash, then press the ENTER button. 3 Press the SET + or - button until the indicator next to "AUTO CH MEMORY" begins to flash, then press the ENTER button. The TV will begin memorizing all the channels available in your area. Channel numbers will remain red until auto memorizing is complete. 4 Press the MENU button twice to return to normal TV viewing. MENU CH SET PICTURE LANGUAGE V-CHIP SET 〈 + / - / ENTER / MENU 〉 TV CABLE AUTO CH MEMORY ADD / DELETE á+ / Ð / ENTER / MENU ñ TO ADD/DELETE CHANNELS 1 Press the MENU button. 2 Press the SET + or - button until the indicator next to "CH SET" begins to flash, then press the ENTER button. 3 Press the SET + or - button until the indicator next to "ADD/ DELETE" begins to flash, then press the ENTER button. 4 Select the desired channels to be added or deleted using the Direct Channel Selection buttons (10 keys. 0-9), the CH + or - button or the SET + or - button. MENU CH SET PICTURE LANGUAGE V-CHIP SET 〈 + / - / ENTER / MENU 〉 TV CABLE AUTO CH MEMORY ADD / DELETE á+ / Ð / ENTER / MENU ñ 5 Press the ENTER button to select ADD or DELETE. If an unmemorized channel was selected (step 4), the channel ADD CH 012 indication will be red. Press the ENTER button if you wish to ADD the unmemorized channel. The channel indicator will change from red to green when a channel is added and the channel will be memorized. 〈 + / - / ENTER / MENU 〉 If a memorized channel was selected (step 4), the channel indication will be green. Press the ENTER button if you wish to DELETE the channel from memory. The channel indicator will change from green to red when a channel is deleted. Repeat Steps 4 and 5 for each channel to be added or deleted. 6 Press the MENU button three times after adding or deleting all of the desired channels, to return to normal TV viewing. CONNECTION TO OTHER EQUIPMENT The exact arrangement you use to interconnect various video and audio components to the TV is dependent on the model and features of each component. Check the Owner's Manual provided with each component for the location of video and audio inputs and outputs. The connection diagrams in the following are offered as suggestions. You may need to modify them to accommodate your particular assortment of components. The diagrams are intended to show compo- nent video and audio interconnections only. Press the TV/VIDEO selector button to select the AV mode to use the TV as a monitor. Operate your VCR as usual. 2. To connect the TV to a TV Game TV/AV SELECTION The TV can also be used as a display device If you connect the TV to VCR, camcorder or TV game, you can select by pressing the TV/VIDEO button. Press the TV/VIDEO button repeatedly to select the desired mode. "VIDEO" will display on the screen for 4 seconds. for many video games. However, due to the wide variety of different types of signal generated by these devices and subsequent hook-up variations required, they have not all been included in the suggested connection diagrams. You'll need to consult each component's Owner's Manual for additional information. VIDEO To Audio/Video OUT Front of TV TV GAME VIDEO AUDIO ADJUSTING PICTURE You can adjust the settings for color, sharpness, contrast, brightness and tint. 1 Press the MENU button. 2 Press the SET + or - button until the indicator next to "PICTURE" begins to flash, then press the ENTER button. 3 Press the ENTER button repeatedly to select the item you want to adjust. BRIGHTNESS CONTRAST COLOR TINT SHARPNESS 4 Press the SET + or - button to adjust the setting. BRIGHTNESS CONTRAST COLOR TINT SHARPNESS + - increase brightness decrease brightness increase contrast decrease contrast be brilliant color be pale color be greenish color be reddish color makes picture clearer makes picture softer TO RETURN TO INITIAL SETTING Press the RESET button while the picture adjusting mode appears on-screen. TROUBLESHOOTING GUIDE Before requesting service, please refer to the following chart for the symptom and possible solution. SYMPTOMS POSSIBLE SOLUTIONS TV does not operate • Make sure the power cord is plugged in. • Try another AC outlet. • Power is off, check fuse or circuit breaker. • Unplug unit for an hour, then plug it back in. • Station or CATV experiencing problems, tune to another station. Poor sound or No sound • Check sound adjustments (VOLUME and MUTE). • Check for sources of possible interference. Poor picture or No picture Poor reception on some channels • Station or CATV experiencing problems, tune to another station. • Make sure channels are set into memory. • Check antenna or CATV connections, adjust antenna. • Check for sources of possible interference. • Check picture control adjustments. • Station or CATV experiencing problems, tune to another station. • Make sure channels are set into memory. • Station is weak, adjust antenna to receive desired station. • Check for sources of possible interference. Poor color or no color • Station or CATV experiencing problems, tune to another station. • Make sure channels are set into memory. • Check picture control adjustments. • Check antenna or CATV connections, reorient antenna. • Check for sources of possible interference. Picture wobbles or drifts No CATV reception Horizontal or diagonal bars on screen • Station or CATV experiencing problems, tune to another station. • Make sure channels are set into memory. • CATV company is scrambling signal. • Adjust antenna. • Check all CATV connections. • Set TV/CABLE menu option to the CABLE mode. • Station or CATV system problems, try another station. • Check antenna connections, reorient antenna. • Check for sources of possible interference. No reception above channel 13 No Remote operation • Make sure TV/CABLE menu option is in the appropriate mode. • If using antenna, check UHF antenna connections. • Batteries are weak, dead or inserted incorrectly. • Remote is out of range, move closer to TV (within 15 feet). • Make sure Remote is aimed at sensor. • Confirm there are no obstructions between the Remote and the TV. • Make sure the power cord is plugged in. TV shuts off Closed - Caption is not activated Display is not shown in your language • No broadcast on station tuned. • Sleep Timer is set. • Power interrupted. • TV station experiencing problems or program tuned is not closed captioned. Try another channel. • Check CATV connection or VHF/UHF antenna, reposition or rotate antenna. • Press CAP/TEXT button to turn on the closed caption decoder. • Select proper language in the menu options. 1. To connect the TV to a VCR (not supplied) VCR Front of TV VIDEO AUDIO 3. To connect the TV to a camcorder To playback from the camcorder, connect the camcorder to the TV as shown. Front of TV To Audio/Video OUT VIDEO (not supplied) AUDIO To AV OUT jack VIDEO AUDIO (not supplied) 3J81301A E 5 5/2/01, 5:31 PM
-
 1
1 -
 2
2 -
 3
3 -
 4
4
 |
 |