Toshiba 20AS23 Owners Manual - Page 6
Location of Controls, VHF/UHF IN ANT. Jack
 |
View all Toshiba 20AS23 manuals
Add to My Manuals
Save this manual to your list of manuals |
Page 6 highlights
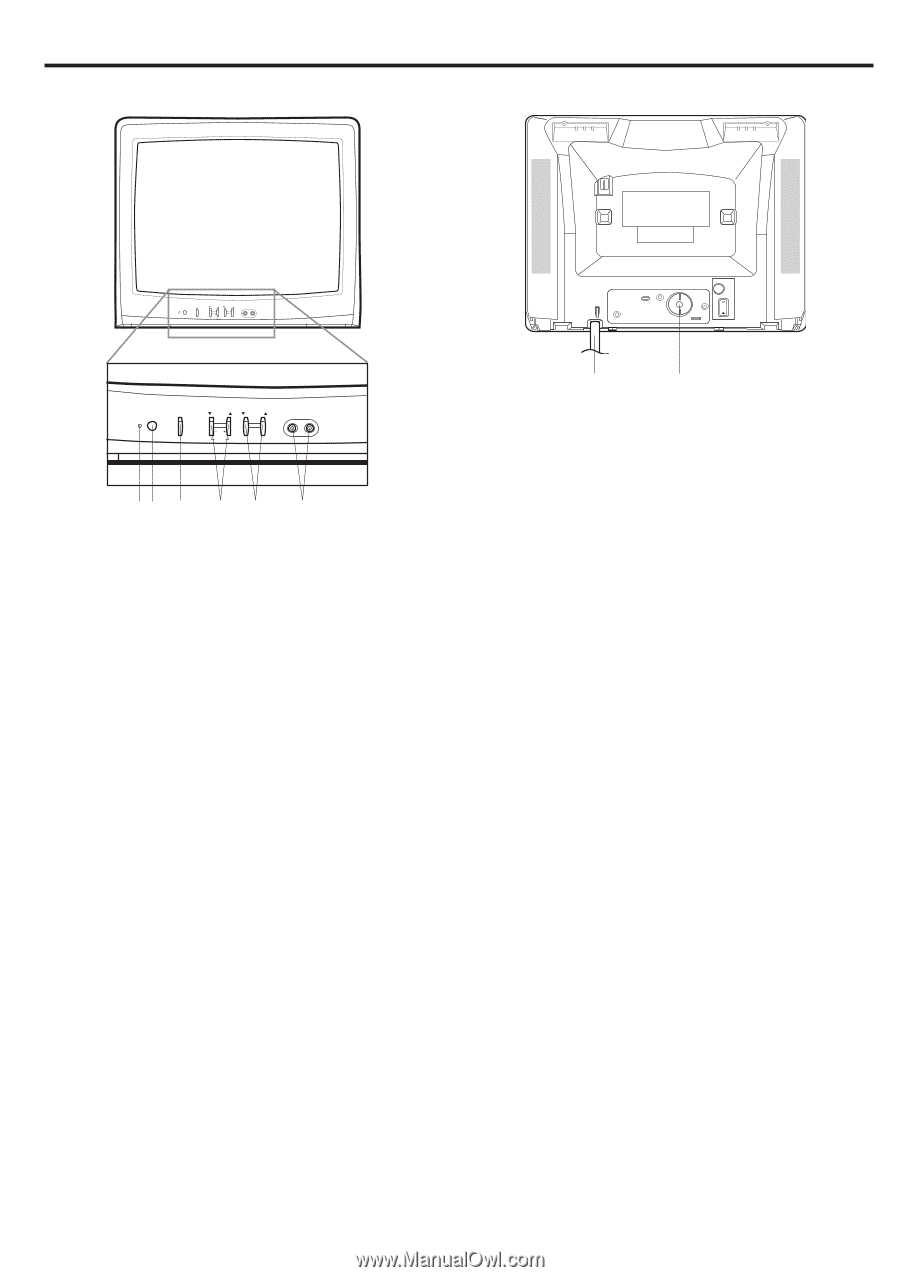
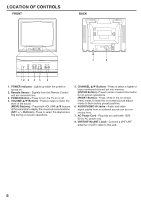
LOCATION OF CONTROLS FRONT BACK POWER VOLUME CHANNEL SET MENU ENTER RESET VIDEO AUDIO POWER VOLUME CHANNEL SET MENU ENTER RESET VIDEO AUDIO ANT. 7 8 12 3 4 5 6 1. POWER indicator - Lights up when the power is turned on. 2. Remote Sensor - Signals from the Remote Control unit are received here. 3. POWER Button - Press to turn the TV on or off. 4. VOLUME L/M Buttons - Press to raise or lower the level of the sound. (MENU Buttons) - Press both VOLUME L/M buttons at the same time to display the on-screen menu functions. (SET + / - Buttons) - Press to select the desired setting during on-screen operations. 5. CHANNEL L/M Buttons - Press to select a higher or lower numbered channel set into memory. (ENTER Button) - Press to enter or select information for on-screen operations. (RESET Button) - Press, while in the on-screen menu mode, to reset the on-screen picture adjustments to their factory preset positions. 6. AUDIO/VIDEO IN Jacks - Audio and video signal cables from an external source can be con- nected here. 7. AC Power Cord - Plug into an outlet with 120V, 60 Hz AC power only. 8. VHF/UHF IN (ANT.) Jack - Connect a VHF/UHF antenna or CATV cable to this jack. 6
-
 1
1 -
 2
2 -
 3
3 -
 4
4 -
 5
5 -
 6
6 -
 7
7 -
 8
8 -
 9
9 -
 10
10 -
 11
11 -
 12
12 -
13
-
14
 |
 |