Toshiba 46G300U User Manual - Page 33
Setting the HDMI, audio mode, Viewing the digital signal meter, Setting the time zone
 |
View all Toshiba 46G300U manuals
Add to My Manuals
Save this manual to your list of manuals |
Page 33 highlights
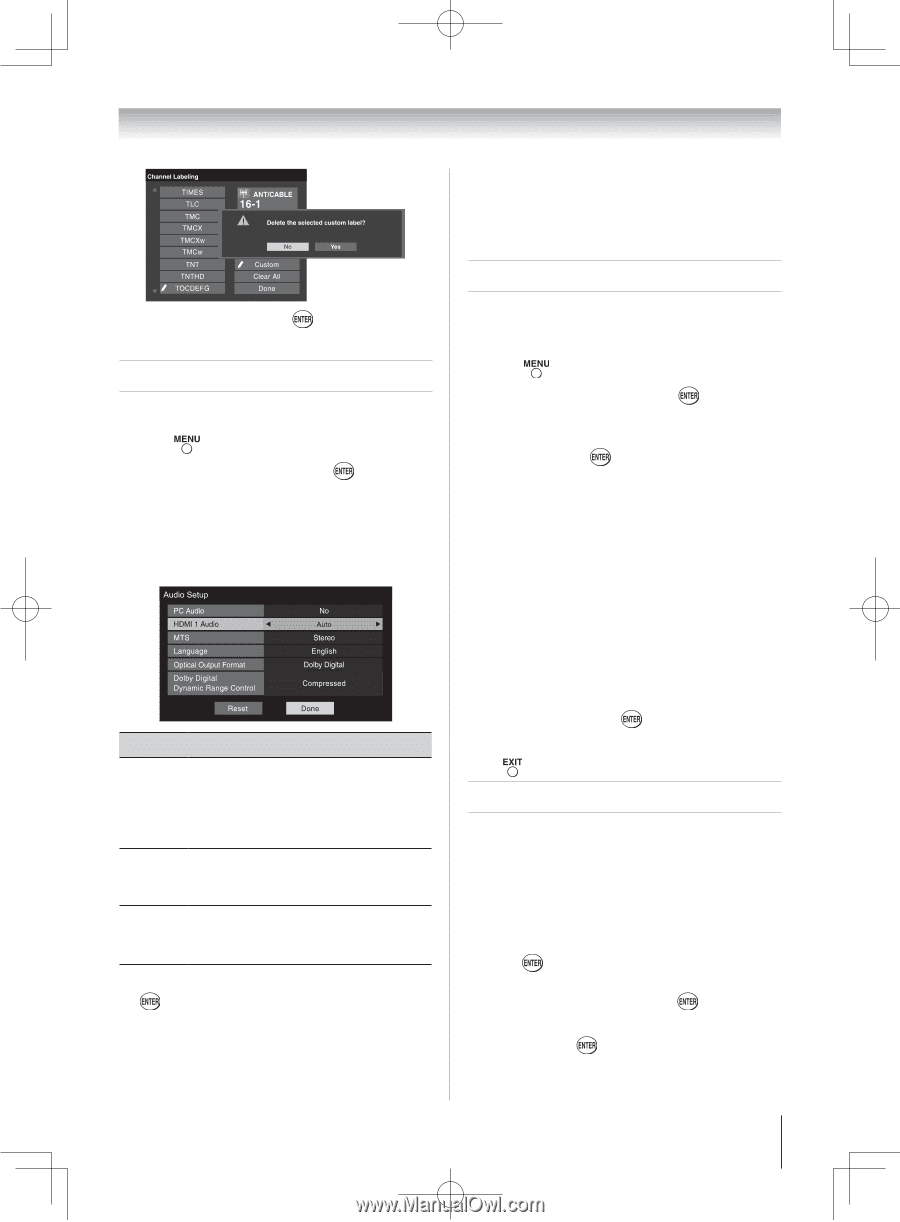
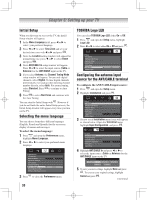
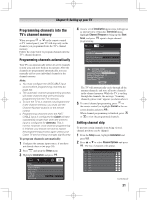
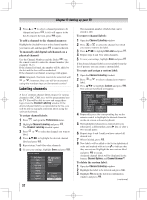
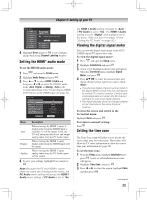
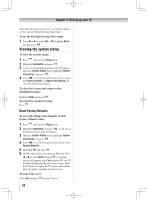
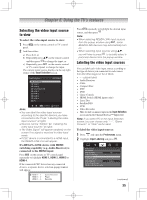
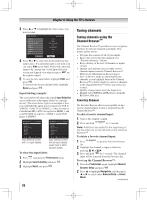
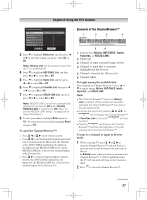
Chapter 5: Setting up your TV 4無 Highlight Done and press to save changes, and go back to the Channel Labeling window. Setting the HDMI® audio mode To set the HDMI audio mode: 1無 Press and open the Sound menu. 2無 Highlight Audio Setup and press . 3無 Press p or q to select HDMI 1 Audio and then press t or u to select the HDMI 1 audio mode (Auto, Digital, or Analog). (Auto is the recommended mode.) See "Connecting an HDMI or DVI device to the HDMI input" ( page 16). Mode Description Auto When viewing the HDMI 1 input, if digital audio from the HDMI input is available, it will be output. If not, the TV will automatically detect and output analog audio from the PC Audio input. Digital When viewing the HDMI 1 input, digital audio from the HDMI input will be output. Analog When viewing the HDMI 1 input, analog audio from the PC Audio input will be output. 4無 To save your settings, highlight Done and press . Note: Because the PC and HDMI-1 inputs share the same set of analog audio inputs, the PC Audio menu setting influences the HDMI 1 Audio menu setting. If PC Audio is set to "No," the HDMI 1 Audio setting changes to "Auto." If PC Audio is set to "Yes," the HDMI 1 Audio setting is set to "Digital" and is grayed out in the menu. (Also see item 4 on page 12 and "Setting the PC Audio" on page 50.) Viewing the digital signal meter You can view the digital signal meter in the ANT/ CABLE digital TV input source only. To view the digital signal meter: 1無 Press and open the Setup menu. 2無 Highlight Installation and press . 3無 A new set of Installation menu icons will appear. Open the Terrestrial menu, highlight Signal Meter, and press . 4無 Press pqtu to select the antenna input and digital channel whose signal you want to check. Note: • The physical digital channel number listed in the Signal Meter screen may not correspond to a virtual TV channel number. Contact your local broadcasters to obtain the RF channel numbers for your local digital stations. • The signal strength does not change between virtual channels on the same physical channel. To close the screen and return to the Terrestrial menu: Highlight Done and press . To return to normal viewing: Press . Setting the time zone The Time Zone setup will allow you to specify the correct time zone for your region. This feature will allow the TV status information to show the correct time zone information ( page 58). To set the time zone: 1無 From the Setup menu, highlight Installation and press . A new set of Installation menu icons will appear. 2無 Highlight Time Zone, and press . 3無 Press t or u to select the region, highlight Done, and then press . (continued) 33
-
 1
1 -
2
-
3
-
4
-
5
-
6
-
7
-
8
-
9
-
10
-
11
-
12
-
13
-
14
-
15
-
16
-
17
-
18
-
19
-
20
-
21
-
22
-
23
-
24
-
25
-
26
-
27
-
 28
28 -
 29
29 -
 30
30 -
 31
31 -
 32
32 -
 33
33 -
 34
34 -
 35
35 -
 36
36 -
 37
37 -
 38
38 -
39
-
40
-
41
-
42
-
43
-
44
-
45
-
46
-
47
-
48
-
49
-
50
-
51
-
52
-
53
-
54
-
55
-
56
-
57
-
58
-
59
-
60
-
61
-
62
-
63
-
64
-
65
-
66
-
67
-
68
-
69
-
70
-
71
-
72
 |
 |