Toshiba 46LX177 Owner's Manual - English - Page 41
Setup/Installation menu layout, THINC
 |
UPC - 022265000809
View all Toshiba 46LX177 manuals
Add to My Manuals
Save this manual to your list of manuals |
Page 41 highlights
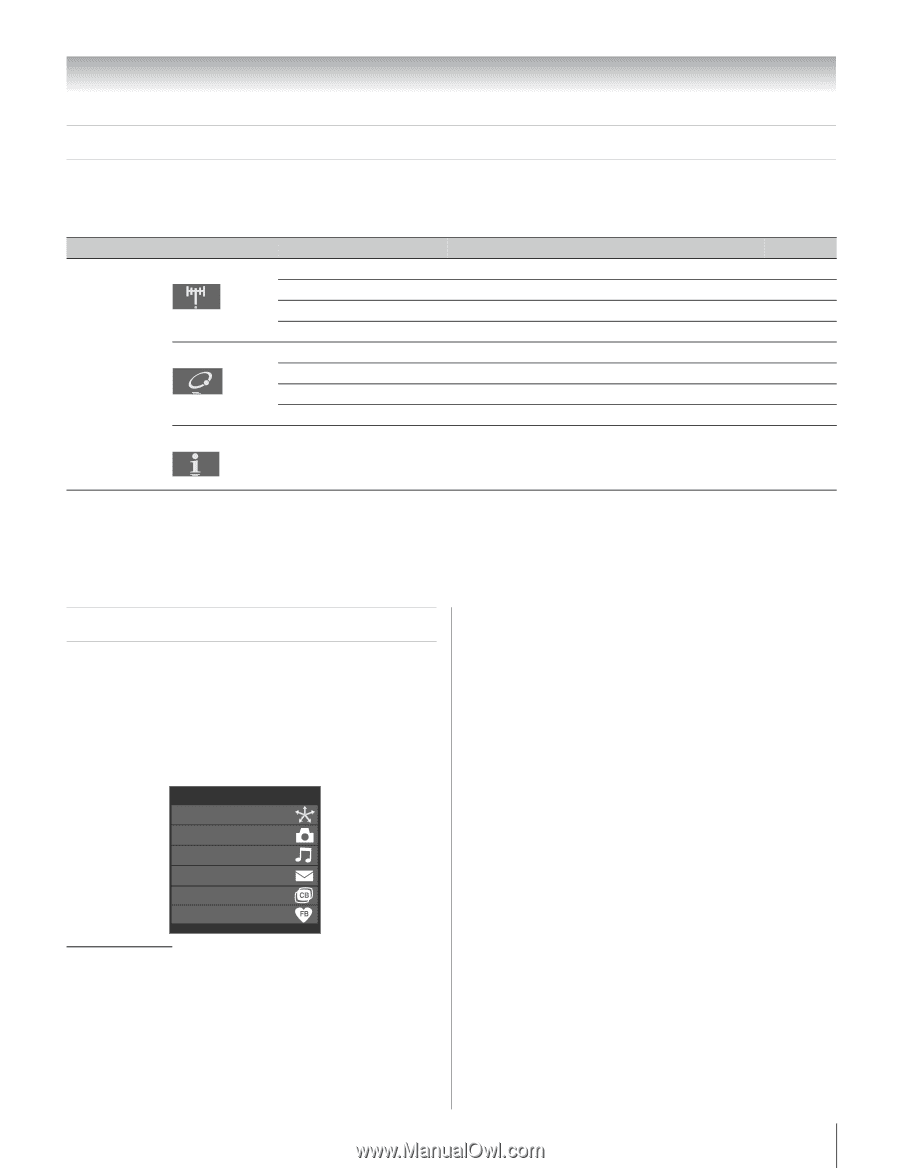
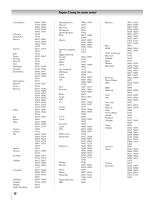
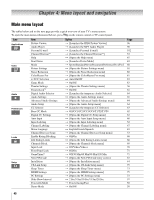
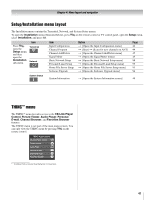
Chapter 4: Menu layout and navigation Setup/Installation menu layout The Installation menu contains the Terrestrial, Network, and System Status menus. To open the Installation menu (illustrated below), press Y on the remote control or TV control panel, open the Setup menu, select Installation, and press T. Press Y, open the Setup menu, and then open the Installation sub-menu. Icon Terrestrial Network Item Input Configuration Channel Program Channel Add/Delete Signal Meter Basic Network Setup Personal E-mail Setup Home File Server Setup Software Upgrade Option S [Opens the Input Configuration menu] S [Start] S [Scans for new channels on ANT] S [Opens the Channel Add/Delete menu] S [Opens the Signal Meter menu] S [Opens the Basic Network Setup menu] S [Opens the Personal E-mail Setup menu] S [Opens the Home File Server Setup menu] S [Opens the Software Upgrade menu] Page 44 44 45 49 88 99 93 94 System Status System Information S [Opens the System Information screen] 49 THINC™ menu The THINC* menu provides access to the CE-Link Player Control, Picture Viewer, Audio Player, Personal E-mail, Channel Browser, and Favorites Browser features. The THINC menu is not part of the main menu system. You can only view the THINC menu by pressing C on the remote control. THINC Applications CE-Link Player Control Picture Viewer Audio Player Personal E-mail Channel Browser CB Favorites Browser * Toshiba Home Interactive Network Connection. 41
-
 1
1 -
2
-
3
-
4
-
5
-
6
-
7
-
8
-
9
-
10
-
11
-
12
-
13
-
14
-
15
-
16
-
17
-
18
-
19
-
20
-
21
-
22
-
23
-
24
-
25
-
26
-
27
-
28
-
29
-
30
-
31
-
32
-
33
-
34
-
35
-
 36
36 -
 37
37 -
 38
38 -
 39
39 -
 40
40 -
 41
41 -
 42
42 -
 43
43 -
 44
44 -
 45
45 -
 46
46 -
47
-
48
-
49
-
50
-
51
-
52
-
53
-
54
-
55
-
56
-
57
-
58
-
59
-
60
-
61
-
62
-
63
-
64
-
65
-
66
-
67
-
68
-
69
-
70
-
71
-
72
-
73
-
74
-
75
-
76
-
77
-
78
-
79
-
80
-
81
-
82
-
83
-
84
-
85
-
86
-
87
-
88
-
89
-
90
-
91
-
92
-
93
-
94
-
95
-
96
-
97
-
98
-
99
-
100
-
101
-
102
-
103
-
104
-
105
-
106
-
107
-
108
-
109
-
110
-
111
-
112
-
113
-
114
-
115
-
116
-
117
-
118
 |
 |