Toshiba 55SL500U Owners Manual - Page 68
Using the software keyboard, Setting up the Media Renderer, feature
 |
View all Toshiba 55SL500U manuals
Add to My Manuals
Save this manual to your list of manuals |
Page 68 highlights
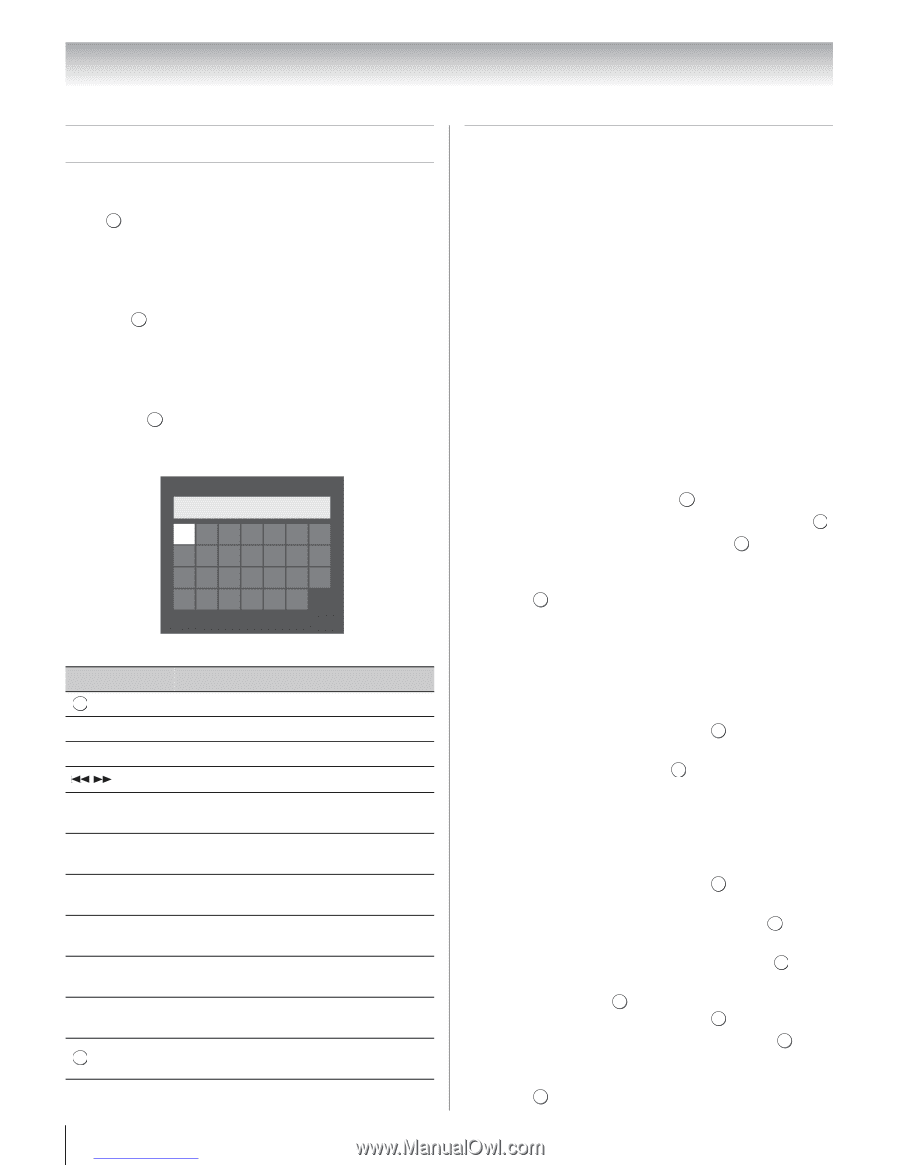
Chapter 8: Advanced features Using the software keyboard You can enter text by using the Software Keyboard. The Software Keyboard window will appear when you press OK on a field that accepts character input. To enter text using the software keyboard: 1 Highlight the desired character on the on-screen software keyboard. 2 Press . OK 3 Repeat steps 1 and 2 until you have entered all desired text. 4 Press the BLUE button to close the software keyboard and return to the previous screen. Note: If RETURN is pressed, changes are not saved and the software keyboard window is closed. The text will remain as it was before starting the keyboard. AAA| A a 1@ ABCDE FG H I J K LMN OP QR S T U VWX Y Z Input operation on the remote control: Button Description OK Inputs the selected character. 0-9 Bb Cc Inputs the number directly. Moves the character highlight. Moves the cursor. Z Moves the cursor to the head of a character string. z Moves the cursor to the end of a character string. RED Deletes 1 character to the left of the cursor. GREEN Cycles through upper case, lower case, numbers, and symbols, if available. YELLOW Chooses an accented version of the current letter, if applicable. BLUE Saves changes and closes the Software Keyboard window. Closes the Software Keyboard window RETURN without saving changes. 68 Downloaded from www.Manualslib.com manuals search engine Setting up the Media Renderer feature Term meaning: DMS: DLNA CERTIFIED™ Server DMR: DLNA CERTIFIED™ Renderer DMC: DLNA CERTIFIED™ Controller The TV can be configured as a DMR. When operating as a DMR, the TV is displaying content provided by a DMS. The selection of the media is done by the DMC - the TV does not select the input. The TV can play photo, movie, or audio files when operating as a DMR. Installation You can configure the DMR settings individually, or use Installation mode to be prompted for each setting in order. 1 From the PREFERENCES menu, highlight Media Renderer Setup and press . OK 2 Press B or b to highlight Installation, and press . OK 3 Press C or c to select On, and press . OK 4 If you want to change the device name as a Renderer, highlight the Device Name field and press OK . The Software Keyboard window will appear. 5 Input the Device Name by using the Software Keyboard (- page 68). To save your setting, press the BLUE button. Note: The Device Name can be up to 127 characters long. 6 Highlight Done, and then press . OK 7 If you want to change the password, press C or c to select Yes, and then press . OK 8 Change the password by using the Software Keyboard (- page 68), and then press the BLUE button. Note: The Web Password can be up to 15 characters long. 9 Highlight Done, and then press . OK 10 If you want to limit access from unexpected DMCs, press C or c to select On, and then press . OK 11 If you want to proceed with registration of DMCs, press C or c to select Yes, and then press . OK 12 Press B or b to highlight the item you want to accept, and press OK . A check will appear in the box. To remove the check, press OK again. 13 Press c to highlight Done, and then press . OK 14 The Maximum Volume Setup window appear. Press C or c to adjust to the desired volume. Then, press . OK
-
 1
1 -
2
-
3
-
4
-
5
-
6
-
7
-
8
-
9
-
10
-
11
-
12
-
13
-
14
-
15
-
16
-
17
-
18
-
19
-
20
-
21
-
22
-
23
-
24
-
25
-
26
-
27
-
28
-
29
-
30
-
31
-
32
-
33
-
34
-
35
-
36
-
37
-
38
-
39
-
40
-
41
-
42
-
43
-
44
-
45
-
46
-
47
-
48
-
49
-
50
-
51
-
52
-
53
-
54
-
55
-
56
-
57
-
58
-
59
-
60
-
61
-
62
-
 63
63 -
 64
64 -
 65
65 -
 66
66 -
 67
67 -
 68
68 -
 69
69 -
 70
70 -
 71
71 -
 72
72 -
 73
73 -
74
-
75
-
76
-
77
-
78
-
79
-
80
-
81
-
82
-
83
-
84
-
85
-
86
-
87
-
88
-
89
-
90
-
91
-
92
-
93
-
94
 |
 |