Toshiba Excite AT205 User Guide 1 - Page 26
Battery Notice, Charging the battery - case
 |
View all Toshiba Excite AT205 manuals
Add to My Manuals
Save this manual to your list of manuals |
Page 26 highlights
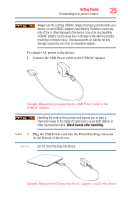
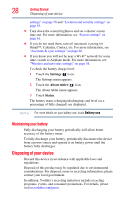
26 Getting Started Battery Notice 3 Connect the USB/AC adaptor to a live electrical outlet. The Power light glows white. Never attempt to connect or disconnect a power plug with wet hands. Failure to follow this instruction could result in an electric shock, possibly resulting in serious injury. The device's power light gives you an indication of the current power state: ❖ Glows white while the USB/AC adaptor is connected ❖ Is unlit when the USB/AC adaptor is not plugged into the device or an AC outlet Battery Notice Actual battery life may vary depending on settings, application usage, features or tasks selected, network configuration, operating temperature and many other factors. The battery life cited in the product specifications is only achieved on the select models and configurations tested by Toshiba under the specific test settings at the time of publication and is not an estimate of a system's battery life under any conditions other than the specific test settings. Recharge time varies depending on usage. The battery may not charge while the device is consuming full power. After a period of time, the battery will lose its ability to perform at maximum capacity and will need to be replaced. This is normal for all batteries. Charging the battery If the device is leaking or its case is cracked, put on protective gloves to handle it. Your device contains a rechargeable battery that may need to be charged prior to use. To use external power or to charge the battery you must attach the USB/AC adaptor. See "Connecting to a power source" on page 24. To charge the device plug it into a power source.
-
 1
1 -
2
-
3
-
4
-
5
-
6
-
7
-
8
-
9
-
10
-
11
-
12
-
13
-
14
-
15
-
16
-
17
-
18
-
19
-
20
-
 21
21 -
 22
22 -
 23
23 -
 24
24 -
 25
25 -
 26
26 -
 27
27 -
 28
28 -
 29
29 -
 30
30 -
 31
31 -
32
-
33
-
34
-
35
-
36
-
37
-
38
-
39
-
40
-
41
-
42
-
43
-
44
-
45
-
46
-
47
-
48
-
49
-
50
-
51
-
52
-
53
-
54
-
55
-
56
-
57
-
58
-
59
-
60
-
61
-
62
-
63
-
64
-
65
-
66
-
67
-
68
-
69
-
70
-
71
-
72
-
73
-
74
-
75
-
76
-
77
-
78
-
79
-
80
-
81
-
82
-
83
-
84
-
85
-
86
-
87
-
88
-
89
-
90
-
91
-
92
-
93
-
94
-
95
-
96
-
97
-
98
-
99
-
100
-
101
-
102
-
103
-
104
-
105
-
106
-
107
-
108
-
109
-
110
-
111
-
112
-
113
-
114
-
115
-
116
-
117
 |
 |