Toshiba M505 S4945 Satellite M505 Resource Guide - Page 43
Optical drive component, Drive in-use indicator light, Eject button, Manual eject hole
 |
View all Toshiba M505 S4945 manuals
Add to My Manuals
Save this manual to your list of manuals |
Page 43 highlights
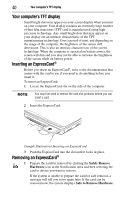
Using the optical drive 43 For optimum DVD performance, it is recommended that you play DVDs while running the computer on AC power. When viewing DVD movies use the DVD Player software that came with your computer. Optical drive components The optical drive is located on the side of the computer. The Media control buttons are located above the keyboard and can be accessed when the display panel is open. Depending on the type of drive on your computer, the procedure to insert and remove optical discs may differ. ❖ If your computer includes a slot style optical drive (available on certain models), see "Inserting an optical disc (slot-type drive)" on page 44 for more information. ❖ If your computer includes a standard tray style optical drive (available on certain models), see "Inserting an optical disc (tray-type drive)" on page 45 for more information. Your optical drive may look like this: Drive in-use indicator light Eject button Manual eject hole (tray-type drive only) (Sample Illustration) Optical drive Drive in-use indicator light-Indicates when the drive is in use. Eject button-Press to release the disc tray. Do not press the eject button or turn off the computer while the drive in-use indicator light is glowing. Doing so could damage the disc or the drive. When the disc tray is open, be careful not to touch the lens or the area around it. Doing so could cause the drive to malfunction. Manual eject hole (tray-type drive only)-Use if you need to release the disc tray when the power is off. Use a straightened paper clip or other narrow object to press the manual eject button located inside the hole. Never use a pencil to press the manual eject button. Pencil lead can break off inside the computer and damage it.
-
 1
1 -
2
-
3
-
4
-
5
-
6
-
7
-
8
-
9
-
10
-
11
-
12
-
13
-
14
-
15
-
16
-
17
-
18
-
19
-
20
-
21
-
22
-
23
-
24
-
25
-
26
-
27
-
28
-
29
-
30
-
31
-
32
-
33
-
34
-
35
-
36
-
37
-
 38
38 -
 39
39 -
 40
40 -
 41
41 -
 42
42 -
 43
43 -
 44
44 -
 45
45 -
 46
46 -
 47
47 -
 48
48 -
49
-
50
-
51
-
52
-
53
-
54
-
55
-
56
-
57
-
58
-
59
-
60
-
61
-
62
-
63
-
64
 |
 |
