Toshiba P42LSA Owners Manual - Page 20
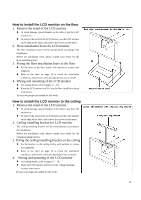
How to install the monitor on the wall
 |
View all Toshiba P42LSA manuals
Add to My Manuals
Save this manual to your list of manuals |
Page 20 highlights
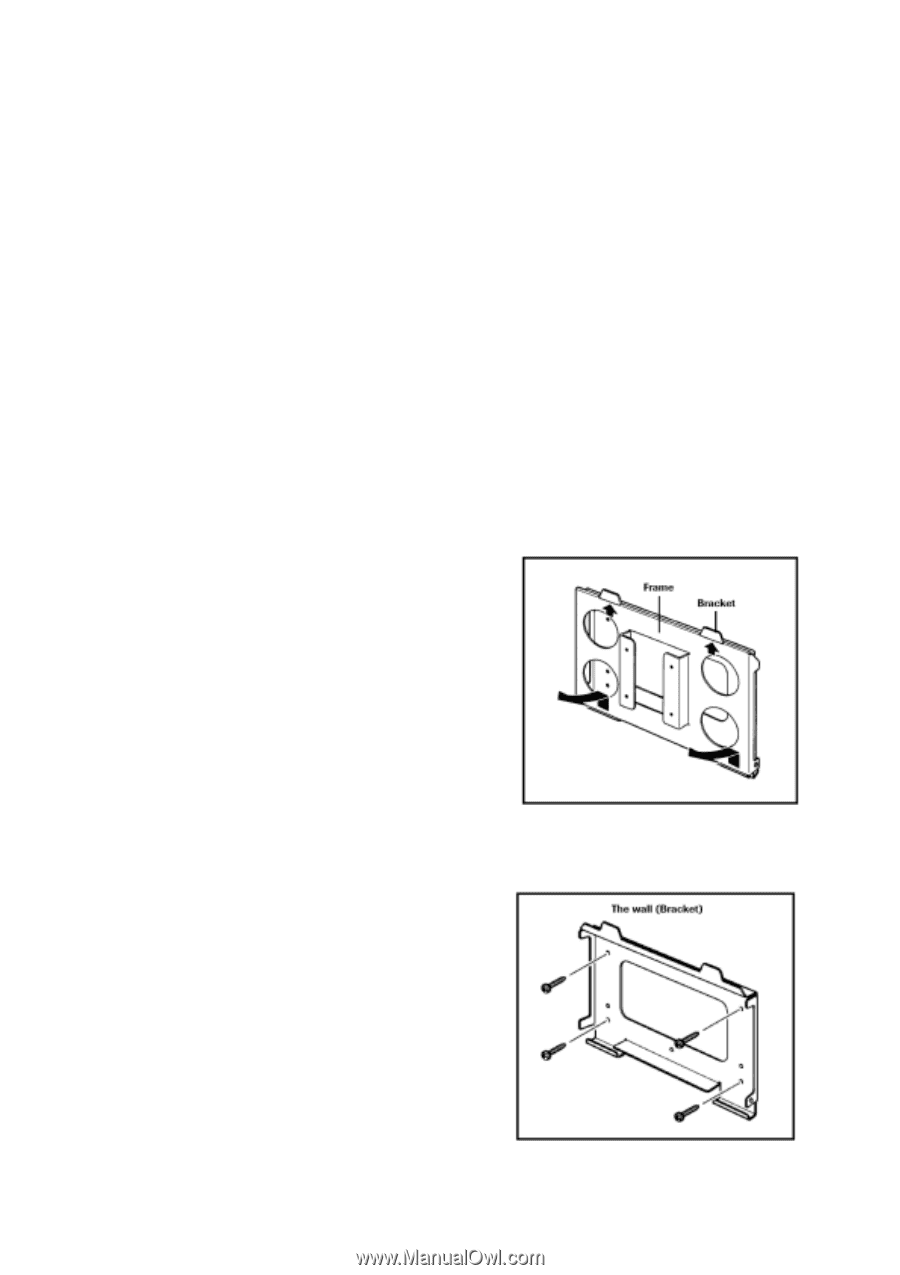
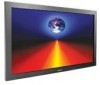
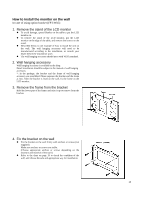
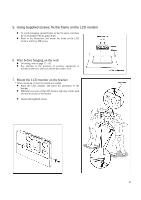
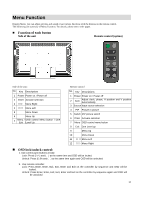
How to install the monitor on the wall In case of using option bracket (FPT-WA5) 1. Remove the stand of the LCD monitor To avoid damage, spread blanket on the table to put the LCD monitor on. To remove the stand of the LCD monitor, put the LCD monitor on the edge of the table, and remove the screws on the stand. Described below is one example of how to install the unit on the wall. The wall hanging accessory will need to be manufactured according to the installation, so consult your dealer before the installation work The wall hanging accessory should meet with VESA standard. 2. Wall hanging accessory Wall hanging accessory is available at the shop. Detail installation should be subject to the manual of wall hanging accessory. *: In the package, the bracket and the frame of wall hanging accessory are assembled. Please separate the bracket and the frame at first. After the bracket is fixed on the wall, fix the frame on the LCD monitor. 3. Remove the frame from the bracket Hold the lower part of the frame and raise it up to remove from the bracket. 4. Fix the bracket on the wall Fix the bracket on the wall firmly with anchors or screws (not supplied). Make sure anchors or screws are stable. (Choose appropriate anchors or screws depending on the structure and material of the wall.) Refer to the chart on page 19 to check the condition of the wall, and choose the safe and appropriate way for installation. 20
-
 1
1 -
2
-
3
-
4
-
5
-
6
-
7
-
8
-
9
-
10
-
11
-
12
-
13
-
14
-
 15
15 -
 16
16 -
 17
17 -
 18
18 -
 19
19 -
 20
20 -
 21
21 -
 22
22 -
 23
23 -
 24
24 -
 25
25 -
26
-
27
-
28
-
29
-
30
-
31
 |
 |