Toshiba SD7300KU Owners Manual - Page 13
Connecting to a TV
 |
View all Toshiba SD7300KU manuals
Add to My Manuals
Save this manual to your list of manuals |
Page 13 highlights
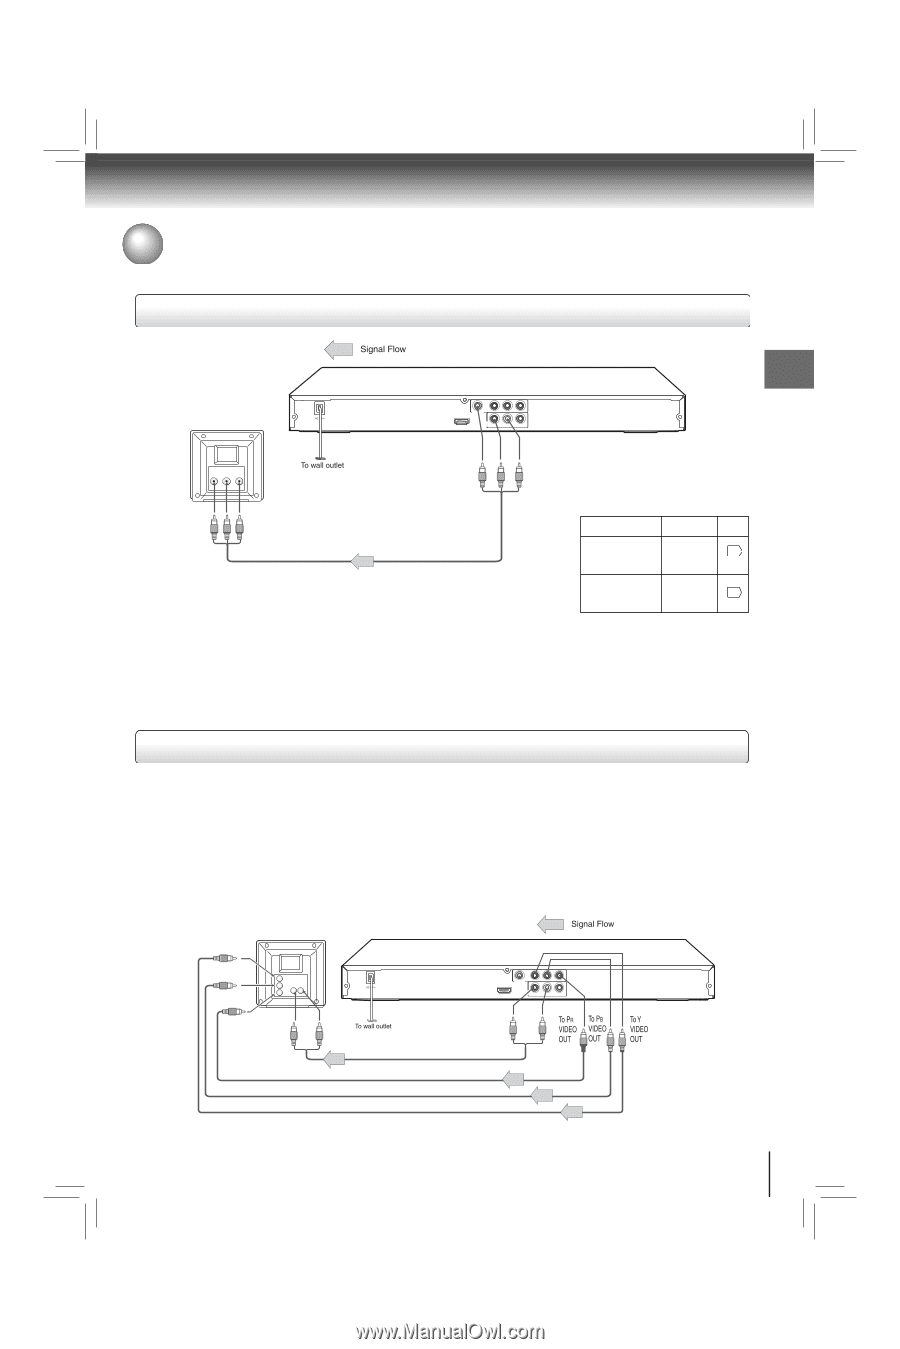
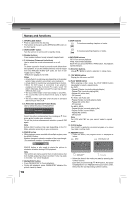
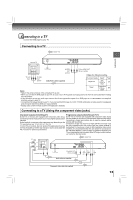
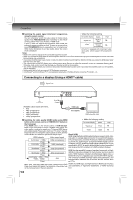
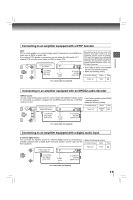
Connecting to a TV Connect the DVD player to your TV. Connecting to a TV Connections Normal TV VIDEO Y PB PR VIDEO OUT HDMI OUT AUDIO OUT R ANALOG L COAXIAL DIGITAL To audio input To video input (yellow) To VIDEO OUT (yellow) Audio/Video cables (supplied) To 2ch AUDIO OUT (R: red, L:white) • Make the following setting. On-screen display Select: Page "Digital out" "Off", "PCM" or 22 "Raw" "Video" Component P-Scan 22 Notes HDMI • Refer to the owner's manual of the connected TV as well. • When you connect the DVD player to your TV, be sure to turn off the power and unplug both units from the wall outlet before making any connections. • If your television set has one audio input, connect the left and right audio outputs of the DVD player to a Y cable adapter (not supplied) and then connect to your TV. • Connect the DVD player directly to your TV. If you connect the DVD player to a VCR, TV/VCR combination or video selector, the playback picture may be distorted as DVDs are copy protected. • Analog audio out will not have sound if DTS playback is selected. Connecting to a TV (Using the component video jacks) Interlaced outputs (ColorStream®) Progressive outputs (ColorStream Pro®) Some TVs or monitors are equipped with component video inputs. Some TVs or monitors are equipped with component video inputs Connecting to these inputs allows you to enjoy higher quality picture that are capable of reproducing a progressively scanned video signal. playback. Connecting to these inputs allows you to view the highest quality Actual labels for component video inputs may vary depending on the pictures with less flicker. TV manufacturer. (ex. Y, R-Y, B-Y or Y, CB, CR) Consumers should note that not all high definition television sets In some TVs or monitors, the color levels of the playback picture may are fully compatible with this product and may cause artifacts to be reduced slightly or the tint may change. In such a case, adjust the be displayed in the picture. In case of 480 progressive scan picture TV or monitor for optimum performance. problems, it is recommended that the user switch the connection to the "standard definition" output. If there are questions regarding our TV set compatibility with this model 480p DVD player, please contact our Customer Service Center. To Y video input To PB video input To PR video input To audio input VIDEO Y PB PR VIDEO OUT HDMI OUT AUDIO OUT R ANALOG L COAXIAL DIGITAL To 2ch AUDIO OUT (R: red, L:white) Audio cable (not supplied) Component video cable (not supplied) 13
-
 1
1 -
2
-
3
-
4
-
5
-
6
-
7
-
 8
8 -
 9
9 -
 10
10 -
 11
11 -
 12
12 -
 13
13 -
 14
14 -
 15
15 -
 16
16 -
 17
17 -
 18
18 -
19
-
20
-
21
-
22
-
23
-
24
-
25
-
26
-
27
-
28
 |
 |