Toshiba Satellite A355-S6931 Maintenance Manual - Page 155
Removing the ODD Bay module, Removing the FM Tuner
 |
View all Toshiba Satellite A355-S6931 manuals
Add to My Manuals
Save this manual to your list of manuals |
Page 155 highlights
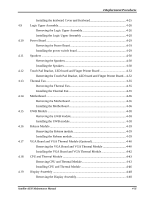
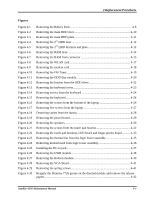
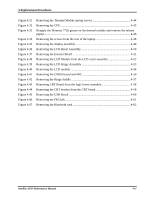
4 Replacement Procedures Figures Figure 4.1 Figure 4.2 Figure 4.3 Figure 4.4 Figure 4.5 Figure 4.6 Figure 4.7 Figure 4.8 Figure 4.9 Figure 4.10 Figure 4.11 Figure 4.12 Figure 4.13 Figure 4.14 Figure 4.15 Figure 4.16 Figure 4.17 Figure 4.18 Figure 4.19 Figure 4.20 Figure 4.21 Figure 4.22 Figure 4.23 Figure 4.24 Figure 4.25 Figure 4.26 Figure 4.27 Figure 4.28 Figure 4.29 Figure 4.30 Removing the Battery Pack 4-8 Removing the main HDD door 4-10 Removing the main HDD plate 4-11 Removing the 2nd HDD door 4-12 Removing the 2nd HDD brackets and plate 4-12 Removing the RAM door 4-14 Removing the RAM from connector 4-15 Removing the WLAN card 4-17 Removing the modem card 4-18 Removing the FM Tuner 4-19 Removing the ODD Bay module 4-20 Removing the bracket from the ODD drive 4-22 Removing the keyboard cover 4-23 Removing screws from the keyboard 4-24 Removing the keyboard 4-24 Removing the screws from the bottom of the laptop 4-26 Removing five screws from the laptop 4-27 Detaching cables from the laptop 4-28 Removing the power board 4-29 Removing the speakers 4-30 Removing the screws from the touch pad bracket 4-32 Removing the touch pad brackets, LED board and finger printer board........... 4-33 Removing the thermal fan from the logic lower assembly 4-35 Removing motherboard from logic lower assembly 4-36 Installing the DC-in jack 4-37 Removing the UWB module 4-38 Removing the Robson module 4-39 Removing the VGA Board 4-41 Removing the spring screws 4-41 Reapply the Shinetsu 7726 grease on the thermal module and remove the release papers ...4-42 Satellite A350 Maintenance Manual 4-v
-
 1
1 -
2
-
3
-
4
-
5
-
6
-
7
-
8
-
9
-
10
-
11
-
12
-
13
-
14
-
15
-
16
-
17
-
18
-
19
-
20
-
21
-
22
-
23
-
24
-
25
-
26
-
27
-
28
-
29
-
30
-
31
-
32
-
33
-
34
-
35
-
36
-
37
-
38
-
39
-
40
-
41
-
42
-
43
-
44
-
45
-
46
-
47
-
48
-
49
-
50
-
51
-
52
-
53
-
54
-
55
-
56
-
57
-
58
-
59
-
60
-
61
-
62
-
63
-
64
-
65
-
66
-
67
-
68
-
69
-
70
-
71
-
72
-
73
-
74
-
75
-
76
-
77
-
78
-
79
-
80
-
81
-
82
-
83
-
84
-
85
-
86
-
87
-
88
-
89
-
90
-
91
-
92
-
93
-
94
-
95
-
96
-
97
-
98
-
99
-
100
-
101
-
102
-
103
-
104
-
105
-
106
-
107
-
108
-
109
-
110
-
111
-
112
-
113
-
114
-
115
-
116
-
117
-
118
-
119
-
120
-
121
-
122
-
123
-
124
-
125
-
126
-
127
-
128
-
129
-
130
-
131
-
132
-
133
-
134
-
135
-
136
-
137
-
138
-
139
-
140
-
141
-
142
-
143
-
144
-
145
-
146
-
147
-
148
-
149
-
 150
150 -
 151
151 -
 152
152 -
 153
153 -
 154
154 -
 155
155 -
 156
156 -
 157
157 -
 158
158 -
 159
159 -
 160
160 -
161
-
162
-
163
-
164
-
165
-
166
-
167
-
168
-
169
-
170
-
171
-
172
-
173
-
174
-
175
-
176
-
177
-
178
-
179
-
180
-
181
-
182
-
183
-
184
-
185
-
186
-
187
-
188
-
189
-
190
-
191
-
192
-
193
-
194
-
195
-
196
-
197
-
198
-
199
-
200
-
201
-
202
-
203
-
204
-
205
-
206
-
207
-
208
-
209
-
210
-
211
-
212
-
213
-
214
-
215
-
216
-
217
-
218
-
219
-
220
-
221
-
222
-
223
-
224
-
225
-
226
-
227
-
228
-
229
-
230
-
231
-
232
-
233
-
234
-
235
-
236
-
237
-
238
-
239
-
240
-
241
-
242
-
243
-
244
-
245
-
246
-
247
-
248
-
249
-
250
-
251
-
252
-
253
-
254
-
255
-
256
-
257
-
258
-
259
-
260
-
261
-
262
-
263
-
264
-
265
-
266
-
267
-
268
-
269
-
270
-
271
-
272
-
273
-
274
-
275
-
276
-
277
-
278
 |
 |