Toshiba Satellite L300 PSLB8C-15601X Users Manual Canada; English - Page 90
How to Delete the Face Recognition Data, How to launch the help file
 |
View all Toshiba Satellite L300 PSLB8C-15601X manuals
Add to My Manuals
Save this manual to your list of manuals |
Page 90 highlights
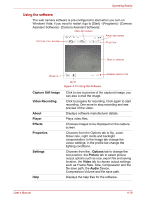
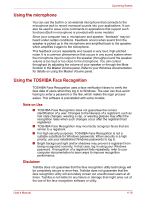
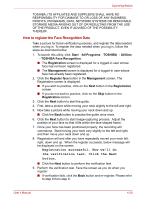
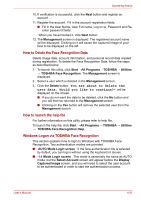
Operating Basics 10. If verification is successful, click the Next button and register an account. 11. Register the account. Fill in the account registration fields. ■ Fill in the User Name, User Full name, Log on to, Password and Reenter password fields. When you have finished it, click Next button. 12. The Management screen is displayed. The registered account name will be displayed. Clicking on it will cause the captured image of your face to be displayed on the left. How to Delete the Face Recognition Data Delete image data, account information, and personal record data created during registration. To delete the Face Recognition Data, follow the steps as described below: 1. To launch this utility, click Start→All Programs→TOSHIBA→ Utilities → TOSHIBA Face Recognition. The Management screen is displayed. 2. Select a user which is deleted in the Management screen. 3. Click the Delete button. You are about to delete the user data. Would you like to continue?" will be displayed on the screen. ■ If you do not want the data to be deleted, click the No button and you will then be returned to the Management screen. ■ Clicking on the Yes button will remove the selected user from the Management screen. How to launch the help file For further information on this utility, please refer to help file. To launch the help file, click Start → All Programs → TOSHIBA → Utilities → TOSHIBA Face Recognition Help. Windows Logon via TOSHIBA Face Recognition This section explains how to login to Windows with TOSHIBA Face Recognition. Two authentication modes are provided. ■ AUTO Mode Login screen : If the face authentication tile is selected by default, you can log in without using the keyboard or mouse. ■ 1:1 Mode Login screen : This mode is essentially the same as AUTO mode, but the Select Account screen will appear before the Display Captured Image screen, and you will need to select the user account to be authenticated in order to start the authentication process. User's Manual 4-21
-
 1
1 -
2
-
3
-
4
-
5
-
6
-
7
-
8
-
9
-
10
-
11
-
12
-
13
-
14
-
15
-
16
-
17
-
18
-
19
-
20
-
21
-
22
-
23
-
24
-
25
-
26
-
27
-
28
-
29
-
30
-
31
-
32
-
33
-
34
-
35
-
36
-
37
-
38
-
39
-
40
-
41
-
42
-
43
-
44
-
45
-
46
-
47
-
48
-
49
-
50
-
51
-
52
-
53
-
54
-
55
-
56
-
57
-
58
-
59
-
60
-
61
-
62
-
63
-
64
-
65
-
66
-
67
-
68
-
69
-
70
-
71
-
72
-
73
-
74
-
75
-
76
-
77
-
78
-
79
-
80
-
81
-
82
-
83
-
84
-
 85
85 -
 86
86 -
 87
87 -
 88
88 -
 89
89 -
 90
90 -
 91
91 -
 92
92 -
 93
93 -
 94
94 -
 95
95 -
96
-
97
-
98
-
99
-
100
-
101
-
102
-
103
-
104
-
105
-
106
-
107
-
108
-
109
-
110
-
111
-
112
-
113
-
114
-
115
-
116
-
117
-
118
-
119
-
120
-
121
-
122
-
123
-
124
-
125
-
126
-
127
-
128
-
129
-
130
-
131
-
132
-
133
-
134
-
135
-
136
-
137
-
138
-
139
-
140
-
141
-
142
-
143
-
144
-
145
-
146
-
147
-
148
-
149
-
150
-
151
-
152
-
153
-
154
-
155
-
156
-
157
-
158
-
159
-
160
-
161
-
162
-
163
-
164
-
165
-
166
-
167
-
168
-
169
-
170
-
171
-
172
-
173
-
174
-
175
-
176
-
177
-
178
-
179
-
180
-
181
-
182
-
183
-
184
-
185
-
186
-
187
 |
 |