Toshiba Satellite L305D-S5868 Satellite L300 Series (GMAD00162011_SatL300_08Ar - Page 99
Inserting an optical disc, Stop button, Previous track button, Next track button
 |
View all Toshiba Satellite L305D-S5868 manuals
Add to My Manuals
Save this manual to your list of manuals |
Page 99 highlights
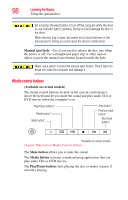
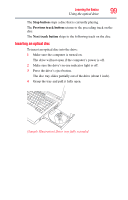
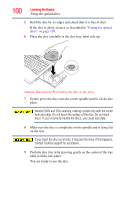
Learning the Basics 99 Using the optical drive The Stop button stops a disc that is currently playing. The Previous track button returns to the preceding track on the disc. The Next track button skips to the following track on the disc. Inserting an optical disc To insert an optical disc into the drive: 1 Make sure the computer is turned on. The drive will not open if the computer's power is off. 2 Make sure the drive's in-use indicator light is off. 3 Press the drive's eject button. The disc tray slides partially out of the drive (about 1 inch). 4 Grasp the tray and pull it fully open. (Sample Illustration) Drive tray fully extended
-
 1
1 -
2
-
3
-
4
-
5
-
6
-
7
-
8
-
9
-
10
-
11
-
12
-
13
-
14
-
15
-
16
-
17
-
18
-
19
-
20
-
21
-
22
-
23
-
24
-
25
-
26
-
27
-
28
-
29
-
30
-
31
-
32
-
33
-
34
-
35
-
36
-
37
-
38
-
39
-
40
-
41
-
42
-
43
-
44
-
45
-
46
-
47
-
48
-
49
-
50
-
51
-
52
-
53
-
54
-
55
-
56
-
57
-
58
-
59
-
60
-
61
-
62
-
63
-
64
-
65
-
66
-
67
-
68
-
69
-
70
-
71
-
72
-
73
-
74
-
75
-
76
-
77
-
78
-
79
-
80
-
81
-
82
-
83
-
84
-
85
-
86
-
87
-
88
-
89
-
90
-
91
-
92
-
93
-
 94
94 -
 95
95 -
 96
96 -
 97
97 -
 98
98 -
 99
99 -
 100
100 -
 101
101 -
 102
102 -
 103
103 -
 104
104 -
105
-
106
-
107
-
108
-
109
-
110
-
111
-
112
-
113
-
114
-
115
-
116
-
117
-
118
-
119
-
120
-
121
-
122
-
123
-
124
-
125
-
126
-
127
-
128
-
129
-
130
-
131
-
132
-
133
-
134
-
135
-
136
-
137
-
138
-
139
-
140
-
141
-
142
-
143
-
144
-
145
-
146
-
147
-
148
-
149
-
150
-
151
-
152
-
153
-
154
-
155
-
156
-
157
-
158
-
159
-
160
-
161
-
162
-
163
-
164
-
165
-
166
-
167
-
168
-
169
-
170
-
171
-
172
-
173
-
174
-
175
-
176
-
177
-
178
-
179
-
180
-
181
-
182
-
183
-
184
-
185
-
186
-
187
-
188
-
189
-
190
-
191
-
192
-
193
-
194
-
195
-
196
-
197
-
198
-
199
-
200
-
201
-
202
-
203
-
204
-
205
-
206
-
207
-
208
-
209
-
210
-
211
-
212
-
213
-
214
-
215
-
216
-
217
-
218
-
219
-
220
-
221
-
222
-
223
-
224
-
225
-
226
-
227
-
228
-
229
-
230
 |
 |
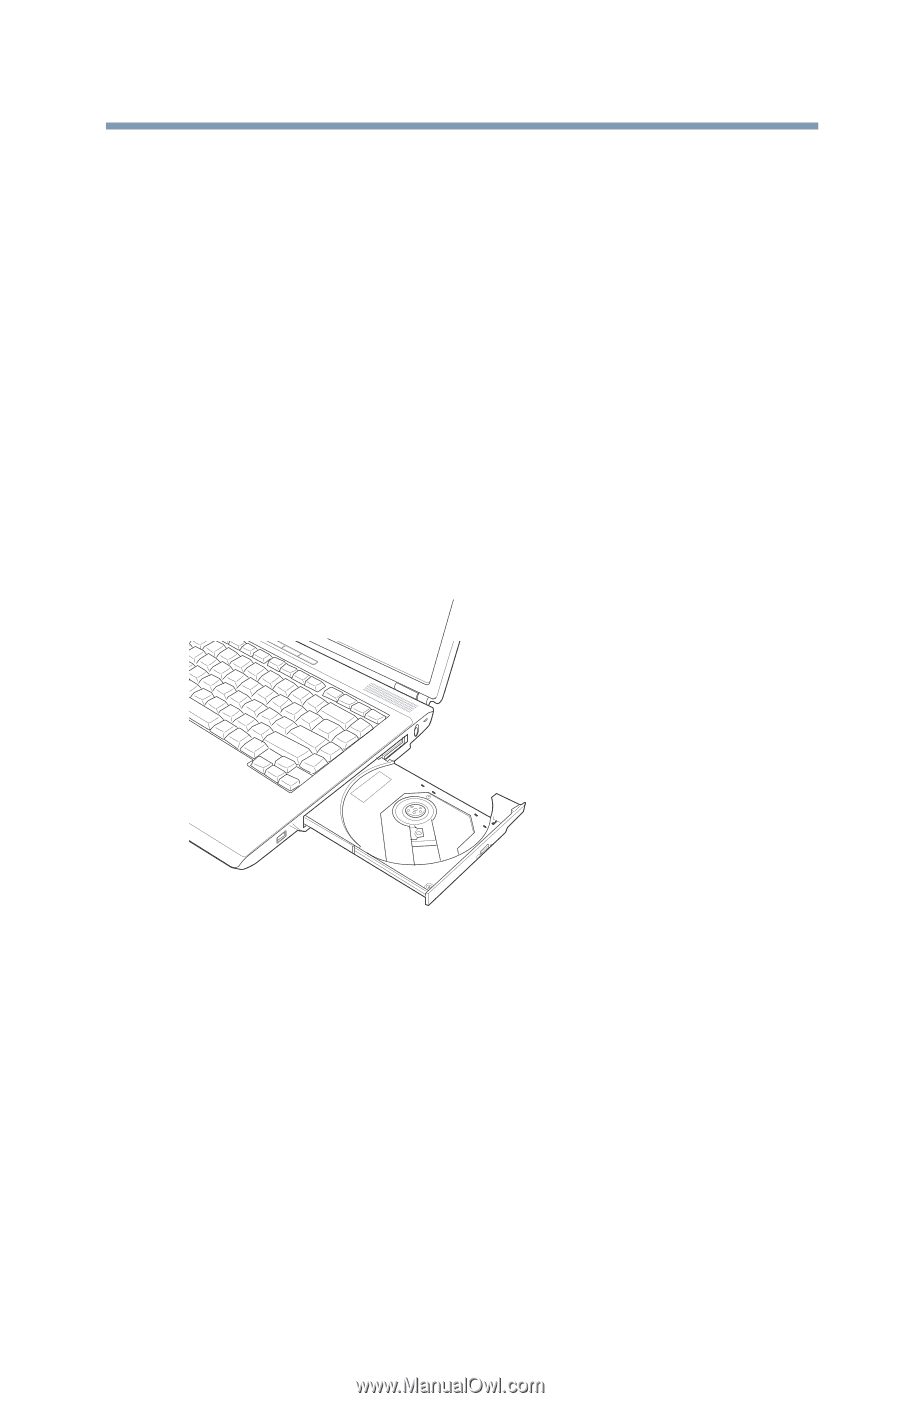
99
Learning the Basics
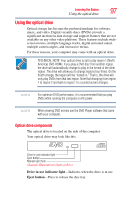
Using the optical drive
The
Stop button
stops a disc that is currently playing.
The
Previous track button
returns to the preceding track on the
disc.
The
Next track button
skips to the following track on the disc.
Inserting an optical disc
To insert an optical disc into the drive:
1
Make sure the computer is turned on.
The drive will not open if the computer’s power is off.
2
Make sure the drive’s in-use indicator light is off.
3
Press the drive’s eject button.
The disc tray slides partially out of the drive (about 1 inch).
4
Grasp the tray and pull it fully open.
(Sample Illustration) Drive tray fully extended