Toshiba Satellite P200 PSPB3C-MR608C Users Manual Canada; English - Page 88
FingerPrint Single Sign-On Feature
 |
View all Toshiba Satellite P200 PSPB3C-MR608C manuals
Add to My Manuals
Save this manual to your list of manuals |
Page 88 highlights
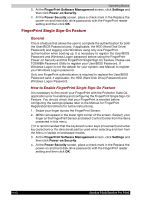
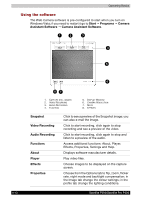
Operating Basics 3. At the FingerPrint Software Management screen, click Settings and then click Power-on Security. 4. At the Power Security screen, place a check mark in the Replace the power-on and hard disk drive passwords with the FingerPrint reader setting and then click OK. FingerPrint Single Sign-On Feature General This is a feature that allows the user to complete the authentication for both the User/BIOS Password (and, if applicable, the HDD (Hard Disk Drive) Password) and logging onto Windows using only one FingerPrint authentication when booting up. It is necessary to register the User/BIOS Password and Windows Logon password before using the FingerPrint Power-on Security and this FingerPrint Single Sign On Feature. Please use TOSHIBA Password Utility to register your User/BIOS Password. If Windows Logon is not the default for your system, see Manual to register your Windows Logon password. Only one FingerPrint authentication is required to replace the User/BIOS Password (and, if applicable, the HDD (Hard Disk Drive) Password) and Windows Logon Password. How to Enable FingerPrint Single Sign-On Feature It is necessary to first enroll your FingerPrint with the Protector Suite QL application prior to enabling and configuring the FingerPrint Single Sign-On Feature. You should check that your FingerPrint is enrolled before configuring the settings (please refer to the Manual for FingerPrint Registration/Enrollment for furthe instructions). 1. Swipe your finger across the FingerPrint Sensor. 2. MENU will appear in the lower right corner of the screen. Swipe(*) your finger on the FingerPrint Sensor and select Control Center from the items presented in this menu. (*) It is recommended that the keyboard cursor keys (movement) and enter key (selection) or the directional pad be used when selecting and item from the Menu in laptop or landscape modes. 3. At the FingerPrint Software Management screen, click Settings and then click Power-on Security. 4. At the Power Security screen, place a check mark in the Replace the power-on and hard disk drive passwords with the FingerPrint reader setting and then click OK. 4-10 Satellite P200/Satellite Pro P200
-
 1
1 -
2
-
3
-
4
-
5
-
6
-
7
-
8
-
9
-
10
-
11
-
12
-
13
-
14
-
15
-
16
-
17
-
18
-
19
-
20
-
21
-
22
-
23
-
24
-
25
-
26
-
27
-
28
-
29
-
30
-
31
-
32
-
33
-
34
-
35
-
36
-
37
-
38
-
39
-
40
-
41
-
42
-
43
-
44
-
45
-
46
-
47
-
48
-
49
-
50
-
51
-
52
-
53
-
54
-
55
-
56
-
57
-
58
-
59
-
60
-
61
-
62
-
63
-
64
-
65
-
66
-
67
-
68
-
69
-
70
-
71
-
72
-
73
-
74
-
75
-
76
-
77
-
78
-
79
-
80
-
81
-
82
-
 83
83 -
 84
84 -
 85
85 -
 86
86 -
 87
87 -
 88
88 -
 89
89 -
 90
90 -
 91
91 -
 92
92 -
 93
93 -
94
-
95
-
96
-
97
-
98
-
99
-
100
-
101
-
102
-
103
-
104
-
105
-
106
-
107
-
108
-
109
-
110
-
111
-
112
-
113
-
114
-
115
-
116
-
117
-
118
-
119
-
120
-
121
-
122
-
123
-
124
-
125
-
126
-
127
-
128
-
129
-
130
-
131
-
132
-
133
-
134
-
135
-
136
-
137
-
138
-
139
-
140
-
141
-
142
-
143
-
144
-
145
-
146
-
147
-
148
-
149
-
150
-
151
-
152
-
153
-
154
-
155
-
156
-
157
-
158
-
159
-
160
-
161
-
162
-
163
-
164
-
165
-
166
-
167
-
168
-
169
-
170
-
171
-
172
-
173
-
174
-
175
-
176
-
177
-
178
-
179
-
180
-
181
-
182
-
183
-
184
-
185
-
186
-
187
-
188
-
189
-
190
-
191
-
192
-
193
-
194
-
195
-
196
-
197
-
198
-
199
-
200
-
201
-
202
-
203
-
204
-
205
-
206
-
207
-
208
-
209
-
210
-
211
-
212
-
213
-
214
-
215
-
216
-
217
-
218
-
219
-
220
 |
 |