Toshiba Satellite P25-S520 User Manual - Page 66
may damage the printer, the computer, or both.
 |
View all Toshiba Satellite P25-S520 manuals
Add to My Manuals
Save this manual to your list of manuals |
Page 66 highlights
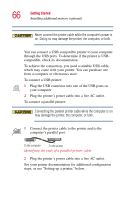
66 Getting Started Installing additional memory (optional) Never connect the printer cable while the computer's power is on. Doing so may damage the printer, the computer, or both. You can connect a USB-compatible printer to your computer through the USB ports. To determine if the printer is USBcompatible, check its documentation. To achieve the connection, you need a suitable USB cable, which may come with your printer. You can purchase one from a computer or electronics store. To connect a USB printer: 1 Plug the USB connector into one of the USB ports on your computer 2 Plug the printer's power cable into a live AC outlet. To connect a parallel printer: Connecting the parallel printer cable while the computer is on may damage the printer, the computer, or both. 1 Connect the printer cable to the printer and to the computer's parallel port. To the computer To the printer Identifying the ends of a parallel printer cable 2 Plug the printer's power cable into a live AC outlet. See your printer documentation for additional configuration steps, or see "Setting up a printer," below.
-
 1
1 -
2
-
3
-
4
-
5
-
6
-
7
-
8
-
9
-
10
-
11
-
12
-
13
-
14
-
15
-
16
-
17
-
18
-
19
-
20
-
21
-
22
-
23
-
24
-
25
-
26
-
27
-
28
-
29
-
30
-
31
-
32
-
33
-
34
-
35
-
36
-
37
-
38
-
39
-
40
-
41
-
42
-
43
-
44
-
45
-
46
-
47
-
48
-
49
-
50
-
51
-
52
-
53
-
54
-
55
-
56
-
57
-
58
-
59
-
60
-
 61
61 -
 62
62 -
 63
63 -
 64
64 -
 65
65 -
 66
66 -
 67
67 -
 68
68 -
 69
69 -
 70
70 -
 71
71 -
72
-
73
-
74
-
75
-
76
-
77
-
78
-
79
-
80
-
81
-
82
-
83
-
84
-
85
-
86
-
87
-
88
-
89
-
90
-
91
-
92
-
93
-
94
-
95
-
96
-
97
-
98
-
99
-
100
-
101
-
102
-
103
-
104
-
105
-
106
-
107
-
108
-
109
-
110
-
111
-
112
-
113
-
114
-
115
-
116
-
117
-
118
-
119
-
120
-
121
-
122
-
123
-
124
-
125
-
126
-
127
-
128
-
129
-
130
-
131
-
132
-
133
-
134
-
135
-
136
-
137
-
138
-
139
-
140
-
141
-
142
-
143
-
144
-
145
-
146
-
147
-
148
-
149
-
150
-
151
-
152
-
153
-
154
-
155
-
156
-
157
-
158
-
159
-
160
-
161
-
162
-
163
-
164
-
165
-
166
-
167
-
168
-
169
-
170
-
171
-
172
-
173
-
174
-
175
-
176
-
177
-
178
-
179
-
180
-
181
-
182
-
183
-
184
-
185
-
186
-
187
-
188
-
189
-
190
-
191
-
192
-
193
-
194
-
195
-
196
-
197
-
198
-
199
-
200
-
201
-
202
-
203
-
204
-
205
-
206
-
207
-
208
-
209
-
210
-
211
-
212
-
213
-
214
-
215
-
216
-
217
-
218
-
219
-
220
-
221
-
222
-
223
-
224
-
225
-
226
-
227
-
228
-
229
-
230
 |
 |
