Toshiba Satellite Pro L550 PSLWTC Users Manual Canada; English - Page 171
Real Time Clock, Battery, Power saver, Select a, power plan, Power Options, Problem, Procedure, System
 |
View all Toshiba Satellite Pro L550 PSLWTC manuals
Add to My Manuals
Save this manual to your list of manuals |
Page 171 highlights
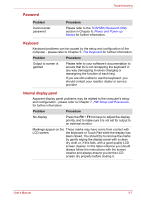
Troubleshooting Problem Battery doesn't power the computer as long as expected Procedure Check whether the battery is hot or cold to the touch - if so, it will not charge properly and should be allowed to reach room temperature before you try again. Unplug the AC adaptor and remove the battery to make sure its connecting terminals are clean - if necessary wipe them with a soft dry cloth lightly dipped in alcohol. Connect the AC adaptor and replace the battery, taking care to ensure that it is securely seated in the computer. Check the Battery indicator - if it does not glow, allow the computer to charge the battery for at least twenty minutes. If the Battery indicator starts to glow after this period, allow the battery to continue to charge for at least another twenty minutes before turning on the computer. However, if the indicator still does not glow, the battery may be at the end of its operating life and should be replaced. However, if you do not believe the battery is at the end of its operating life, you should speak to your reseller, dealer or service provider. If you frequently recharge a partially charged battery, the battery might not charge to its full potential - in these instances you should fully discharge the battery and then attempt to charge it again. Check the Power saver option under Select a power plan in the Power Options. Real Time Clock Problem The following message is displayed on the LCD: RTC battery is low or CMOS checksum is inconsistent. Press [F2] key to set Date/Time. Procedure The RTC battery charge has become exhausted, you should set the date and time in within the BIOS setup screen through the following steps: 1. Press [F2] key. BIOS setup will boot up. 2. Press [F5]/[F6] to set the date in [System Date]. 3. Press [F5]/[F6] to set the time in [System Time]. User's Manual 9-6
-
 1
1 -
2
-
3
-
4
-
5
-
6
-
7
-
8
-
9
-
10
-
11
-
12
-
13
-
14
-
15
-
16
-
17
-
18
-
19
-
20
-
21
-
22
-
23
-
24
-
25
-
26
-
27
-
28
-
29
-
30
-
31
-
32
-
33
-
34
-
35
-
36
-
37
-
38
-
39
-
40
-
41
-
42
-
43
-
44
-
45
-
46
-
47
-
48
-
49
-
50
-
51
-
52
-
53
-
54
-
55
-
56
-
57
-
58
-
59
-
60
-
61
-
62
-
63
-
64
-
65
-
66
-
67
-
68
-
69
-
70
-
71
-
72
-
73
-
74
-
75
-
76
-
77
-
78
-
79
-
80
-
81
-
82
-
83
-
84
-
85
-
86
-
87
-
88
-
89
-
90
-
91
-
92
-
93
-
94
-
95
-
96
-
97
-
98
-
99
-
100
-
101
-
102
-
103
-
104
-
105
-
106
-
107
-
108
-
109
-
110
-
111
-
112
-
113
-
114
-
115
-
116
-
117
-
118
-
119
-
120
-
121
-
122
-
123
-
124
-
125
-
126
-
127
-
128
-
129
-
130
-
131
-
132
-
133
-
134
-
135
-
136
-
137
-
138
-
139
-
140
-
141
-
142
-
143
-
144
-
145
-
146
-
147
-
148
-
149
-
150
-
151
-
152
-
153
-
154
-
155
-
156
-
157
-
158
-
159
-
160
-
161
-
162
-
163
-
164
-
165
-
 166
166 -
 167
167 -
 168
168 -
 169
169 -
 170
170 -
 171
171 -
 172
172 -
 173
173 -
 174
174 -
 175
175 -
 176
176 -
177
-
178
-
179
-
180
-
181
-
182
-
183
-
184
-
185
-
186
-
187
-
188
-
189
-
190
-
191
-
192
-
193
-
194
-
195
-
196
-
197
-
198
-
199
-
200
-
201
-
202
-
203
-
204
-
205
-
206
-
207
-
208
-
209
-
210
-
211
-
212
-
213
-
214
-
215
-
216
-
217
-
218
-
219
-
220
-
221
-
222
-
223
-
224
-
225
-
226
-
227
 |
 |
