Toshiba Satellite Pro U500 PSU83A-00N00D Users Manual AU/NZ - Page 159
Additional battery pack, Additional AC adaptor, External monitor, HDMI
 |
View all Toshiba Satellite Pro U500 PSU83A-00N00D manuals
Add to My Manuals
Save this manual to your list of manuals |
Page 159 highlights
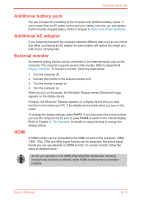
Optional Devices Additional battery pack You can increase the portability of the computer with additional battery packs. If you're away from an AC power source and your battery runs low, you can replace it with a freshly charged battery. Refer to Chapter 6, Power and Power-Up Modes. Additional AC adaptor If you frequently transport the computer between different sites such as your home and office, purchasing an AC adaptor for each location will reduce the weight and bulk of your carrying load. External monitor An external analog monitor can be connected to the external monitor port on the computer. The computer supports several video modes. Refer to Appendix B, Display Controller. To connect a monitor, follow the steps below. 1. Turn the computer off. 2. Connect the monitor to the external monitor port. 3. Turn the monitor's power on. 4. Turn the computer on. When you turn on the power, the Windows® Bootup screen (Windows® Logo) appears on the display device. However, the Windows® Desktop appears on a display device that you used last time to shut down your PC, if the display device exists when you turn on the power. To change the display settings, press Fn+F5. If you disconnect the monitor before you turn the computer off, be sure to press Fn+F5 to switch to the internal display. Refer to Chapter 5, The Keyboard, for details on using hot keys to change the display setting. HDMI A HDMI monitor can be connected to the HDMI out port on the computer. 1080p, 1080i, 720p, 576p and 480p signal formats can be supported. But actual signal format you can use depends on HDMI monitor. To connect monitor, follow the steps as detailed below: As the port operation of all HDMI (High-Definition Multimedia Interface) monitors has not been confirmed, some HDMI monitors may not function properly. User's Manual 8-11
-
 1
1 -
2
-
3
-
4
-
5
-
6
-
7
-
8
-
9
-
10
-
11
-
12
-
13
-
14
-
15
-
16
-
17
-
18
-
19
-
20
-
21
-
22
-
23
-
24
-
25
-
26
-
27
-
28
-
29
-
30
-
31
-
32
-
33
-
34
-
35
-
36
-
37
-
38
-
39
-
40
-
41
-
42
-
43
-
44
-
45
-
46
-
47
-
48
-
49
-
50
-
51
-
52
-
53
-
54
-
55
-
56
-
57
-
58
-
59
-
60
-
61
-
62
-
63
-
64
-
65
-
66
-
67
-
68
-
69
-
70
-
71
-
72
-
73
-
74
-
75
-
76
-
77
-
78
-
79
-
80
-
81
-
82
-
83
-
84
-
85
-
86
-
87
-
88
-
89
-
90
-
91
-
92
-
93
-
94
-
95
-
96
-
97
-
98
-
99
-
100
-
101
-
102
-
103
-
104
-
105
-
106
-
107
-
108
-
109
-
110
-
111
-
112
-
113
-
114
-
115
-
116
-
117
-
118
-
119
-
120
-
121
-
122
-
123
-
124
-
125
-
126
-
127
-
128
-
129
-
130
-
131
-
132
-
133
-
134
-
135
-
136
-
137
-
138
-
139
-
140
-
141
-
142
-
143
-
144
-
145
-
146
-
147
-
148
-
149
-
150
-
151
-
152
-
153
-
 154
154 -
 155
155 -
 156
156 -
 157
157 -
 158
158 -
 159
159 -
 160
160 -
 161
161 -
 162
162 -
 163
163 -
 164
164 -
165
-
166
-
167
-
168
-
169
-
170
-
171
-
172
-
173
-
174
-
175
-
176
-
177
-
178
-
179
-
180
-
181
-
182
-
183
-
184
-
185
-
186
-
187
-
188
-
189
-
190
-
191
-
192
-
193
-
194
-
195
-
196
-
197
-
198
-
199
-
200
-
201
-
202
-
203
-
204
-
205
-
206
-
207
-
208
-
209
-
210
-
211
-
212
-
213
-
214
-
215
-
216
-
217
-
218
-
219
-
220
 |
 |
