Toshiba TDP-P3-US User Guide - Page 26
Turn Auto Image off., than Widescreen Letterbox.
 |
View all Toshiba TDP-P3-US manuals
Add to My Manuals
Save this manual to your list of manuals |
Page 26 highlights
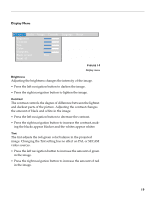
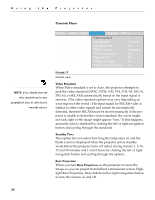
Using the Projector NOTE: The Manual Sync, Manual Tracking, Horiz. Position and Vert. Position options are available only for computer sources. The projector sets these options automatically for video sources. For video sources, Resize allows you to select from among four different re-sizing options. The default is Standard, which resizes the image from its original version to fit a standard 4x3 aspect ratio screen. Widescreen Letterbox preserves the 16x9 aspect ratio of the original theater version, but the image is placed in a 4x3 space, so black bars appear at the top and bottom of the image. Enhanced Widescreen also preserves the aspect ratio of the original theater version and is designed to be used with content that is Enhanced for Widescreen TVs. This option yields more detail than Widescreen Letterbox. Native reduces the Standard size to match the height of Enhanced Widescreen. Manual Sync The projector adjusts signal synchronization automatically for most computers. But if the projected computer image looks fuzzy or streaked, try turning Auto Image off then back on again. If the image still looks bad, try adjusting the signal synchronization manually: 1 Turn Auto Image off. 2 Highlight Manual sync, then press the left or right navigation button repeatedly until the image is sharp and free of streaks. Manual Tracking The projector adjusts tracking automatically to match the video signal from your computer. However, if the display shows evenly spaced, fuzzy, vertical lines or if the projected image is too wide or too narrow for the screen, try turning Auto Image off then back on again. If the image is still bad, try adjusting the tracking manually: 1 Turn Auto Image off. 2 Highlight Manual tracking, then press the left or right navigation button repeatedly until the fuzzy vertical bars are gone. 22
-
 1
1 -
2
-
3
-
4
-
5
-
6
-
7
-
8
-
9
-
10
-
11
-
12
-
13
-
14
-
15
-
16
-
17
-
18
-
19
-
20
-
 21
21 -
 22
22 -
 23
23 -
 24
24 -
 25
25 -
 26
26 -
 27
27 -
 28
28 -
 29
29 -
 30
30 -
 31
31 -
32
-
33
-
34
-
35
-
36
-
37
-
38
-
39
-
40
-
41
-
42
-
43
-
44
-
45
-
46
-
47
-
48
-
49
-
50
-
51
-
52
-
53
-
54
-
55
-
56
-
57
-
58
 |
 |
