Toshiba Tecra A7-S712 Resource Guide for Tecra A7 - Page 36
Removing a disc with the computer on, Moving the computer
 |
View all Toshiba Tecra A7-S712 manuals
Add to My Manuals
Save this manual to your list of manuals |
Page 36 highlights
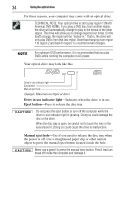
36 Moving the computer 9 Push the disc tray in by pressing gently on the center of the tray until it clicks into place. You are ready to use the disc. Removing a disc with the computer on To remove a disc (CD or DVD) with the computer turned on: 1 Press the eject button on the drive. Do not press the eject button while the in-use indicator light is glowing. Doing so could damage the disc or the drive. Also, if the disc is still spinning when you open the disc tray, wait for it to stop spinning before you remove it. 2 Pull the tray out until it is fully open, remove the disc, and place it in its protective cover. 3 Gently press the tray in to close it. Removing a disc with the computer off To remove a disc with the computer turned off: 1 Insert a slender object, such as a straightened paper clip, into the manual eject hole. The disc tray slides partially out of the drive (about 1 inch). Never use a pencil to press the manual eject button. Pencil lead can break off inside the computer and damage it. 2 Pull the tray out until it is fully open, remove the disc, and place it in its protective cover. 3 Gently press the tray in to close it. Moving the computer Before moving your computer, even across the room, make sure all disk activity has ended (the drive indicator light stops glowing) and all external peripheral cables are disconnected. Do not pick up the computer by its display panel or by the back (where the ports are located). Doing so could damage the system.
-
 1
1 -
2
-
3
-
4
-
5
-
6
-
7
-
8
-
9
-
10
-
11
-
12
-
13
-
14
-
15
-
16
-
17
-
18
-
19
-
20
-
21
-
22
-
23
-
24
-
25
-
26
-
27
-
28
-
29
-
30
-
 31
31 -
 32
32 -
 33
33 -
 34
34 -
 35
35 -
 36
36 -
 37
37 -
 38
38 -
 39
39 -
 40
40 -
 41
41 -
42
-
43
-
44
-
45
-
46
-
47
-
48
-
49
-
50
-
51
-
52
 |
 |