Toshiba Tecra R10 PTRB3C-00D09C Users Manual Canada; English - Page 75
Removing a memory module, Start, Control Panel, System and Maintenance, System, Power
 |
View all Toshiba Tecra R10 PTRB3C-00D09C manuals
Add to My Manuals
Save this manual to your list of manuals |
Page 75 highlights
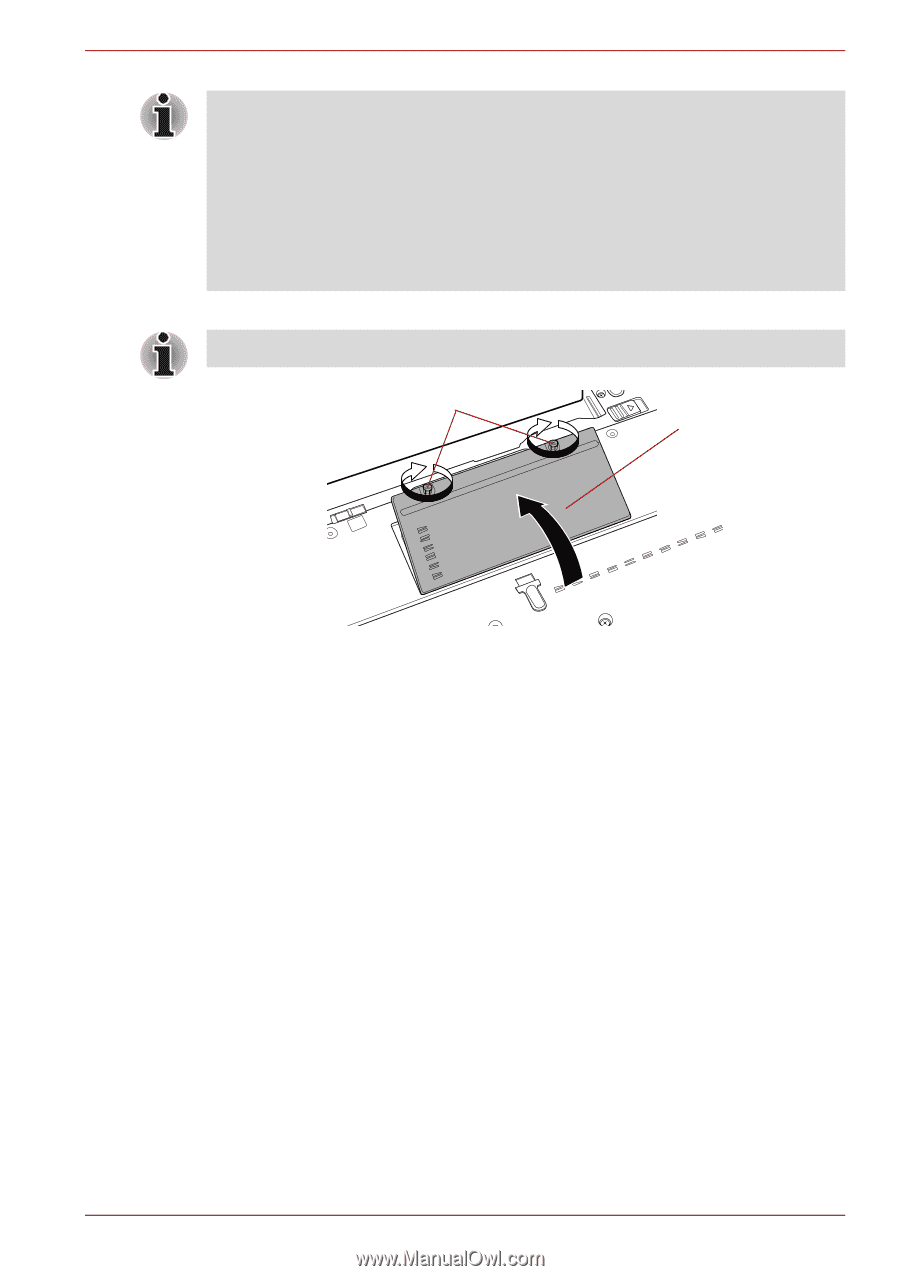
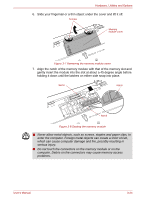
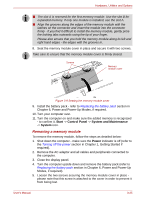
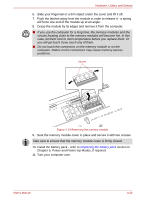
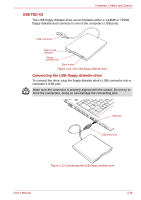
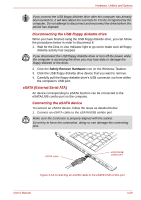
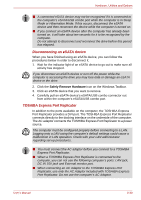
Hardware, Utilities and Options ■ The slot A is reserved for the first memory module. Use the slot B for expanded memory. If only one module is installed, use the slot A. ■ Align the grooves along the edges of the memory module with the latches on the connector and insert the module into the connector firmly - if you find it difficult to install the memory module, gently prise the locking tabs outwards using the tip of your finger. Please also ensure that you hold the memory module along its left and right hand edges - the edges with the grooves in. 8. Seat the memory module cover in place and secure it with two screws. Take care to ensure that the memory module cover is firmly closed. Screws Memory module cover Figure 3-9 Seating the memory module cover 9. Install the battery pack - refer to Replacing the battery pack section in Chapter 6, Power and Power-Up Modes, if required. 10. Turn your computer over. 11. Turn the computer on and make sure the added memory is recognized - to confirm it, Start -> Control Panel -> System and Maintenance -> System icon. Removing a memory module To remove the memory module, follow the steps as detailed below: 1. Shut down the computer - make sure the Power indicator is off (refer to the Turning off the power section in Chapter 1, Getting Started if required). 2. Remove the AC adaptor and all cables and peripherals connected to the computer. 3. Close the display panel. 4. Turn the computer upside down and remove the battery pack (refer to Replacing the battery pack section in Chapter 6, Power and Power-Up Modes, if required). 5. Loosen the two screws securing the memory module cover in place please note that this screw is attached to the cover in order to prevent it from being lost. User's Manual 3-25
-
 1
1 -
2
-
3
-
4
-
5
-
6
-
7
-
8
-
9
-
10
-
11
-
12
-
13
-
14
-
15
-
16
-
17
-
18
-
19
-
20
-
21
-
22
-
23
-
24
-
25
-
26
-
27
-
28
-
29
-
30
-
31
-
32
-
33
-
34
-
35
-
36
-
37
-
38
-
39
-
40
-
41
-
42
-
43
-
44
-
45
-
46
-
47
-
48
-
49
-
50
-
51
-
52
-
53
-
54
-
55
-
56
-
57
-
58
-
59
-
60
-
61
-
62
-
63
-
64
-
65
-
66
-
67
-
68
-
69
-
 70
70 -
 71
71 -
 72
72 -
 73
73 -
 74
74 -
 75
75 -
 76
76 -
 77
77 -
 78
78 -
 79
79 -
 80
80 -
81
-
82
-
83
-
84
-
85
-
86
-
87
-
88
-
89
-
90
-
91
-
92
-
93
-
94
-
95
-
96
-
97
-
98
-
99
-
100
-
101
-
102
-
103
-
104
-
105
-
106
-
107
-
108
-
109
-
110
-
111
-
112
-
113
-
114
-
115
-
116
-
117
-
118
-
119
-
120
-
121
-
122
-
123
-
124
-
125
-
126
-
127
-
128
-
129
-
130
-
131
-
132
-
133
-
134
-
135
-
136
-
137
-
138
-
139
-
140
-
141
-
142
-
143
-
144
-
145
-
146
-
147
-
148
-
149
-
150
-
151
-
152
-
153
-
154
-
155
-
156
-
157
-
158
-
159
-
160
-
161
-
162
-
163
-
164
-
165
-
166
-
167
-
168
-
169
-
170
-
171
-
172
-
173
-
174
-
175
-
176
-
177
-
178
-
179
-
180
-
181
-
182
-
183
-
184
-
185
-
186
-
187
-
188
-
189
-
190
-
191
-
192
-
193
-
194
-
195
-
196
-
197
-
198
-
199
-
200
-
201
-
202
-
203
-
204
-
205
-
206
-
207
-
208
-
209
-
210
-
211
-
212
-
213
-
214
-
215
-
216
-
217
 |
 |