Toshiba U305-S2804 Toshiba Online Users Guide for Satellite U300/U305 - Page 189
General tips for installing hardware and software, Start, Control Panel, System and Maintenance
 |
View all Toshiba U305-S2804 manuals
Add to My Manuals
Save this manual to your list of manuals |
Page 189 highlights
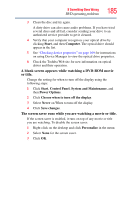
If Something Goes Wrong Develop good computing habits 189 Follow these steps to back up your computer or files to CDs, DVDs, or a hard drive: NOTE You can not back up the computer while running on battery power. Connect the AC adaptor before continuing. 1 Prepare your backup target by connecting it and/or inserting a blank CD or DVD in the drive. 2 Click Start. 3 Click Control Panel. 4 Click System and Maintenance. 5 Click Backup and Restore Center. 6 You can choose to back up some files or the entire computer. Click either Back up files or Back up computer. NOTE If you choose to back up your entire computer, you will be setting up a scheduled backup that will be performed periodically, and will only include the changes made since the last backup. 7 Follow the on-screen help to complete your backup. For more help, click Start, Help and Support, and search for "back up." General tips for installing hardware and software Here are a few tips to help ensure safe and easy installation of new hardware (printers, pointing devices, external hard drives, DVD writers, scanners, etc.) and software (applications like Microsoft® Office and Adobe® Photoshop®, or utility software such as special toolbars for your web browser). ❖ Create a Restore Point (refer to "Saving system configuration with Restore Points" on page 187). Before installing anything, use the System Restore utility to set a Restore Point (see the section titled Restore Points). If anything goes wrong, you will then be able to easily restore the Windows® operating system to the state it was in prior to the installation, undoing any changes that the installation process introduced. ❖ Back up your critical data (see "Backing up your data or your entire computer with the Windows® operating system" on page 188).
-
 1
1 -
2
-
3
-
4
-
5
-
6
-
7
-
8
-
9
-
10
-
11
-
12
-
13
-
14
-
15
-
16
-
17
-
18
-
19
-
20
-
21
-
22
-
23
-
24
-
25
-
26
-
27
-
28
-
29
-
30
-
31
-
32
-
33
-
34
-
35
-
36
-
37
-
38
-
39
-
40
-
41
-
42
-
43
-
44
-
45
-
46
-
47
-
48
-
49
-
50
-
51
-
52
-
53
-
54
-
55
-
56
-
57
-
58
-
59
-
60
-
61
-
62
-
63
-
64
-
65
-
66
-
67
-
68
-
69
-
70
-
71
-
72
-
73
-
74
-
75
-
76
-
77
-
78
-
79
-
80
-
81
-
82
-
83
-
84
-
85
-
86
-
87
-
88
-
89
-
90
-
91
-
92
-
93
-
94
-
95
-
96
-
97
-
98
-
99
-
100
-
101
-
102
-
103
-
104
-
105
-
106
-
107
-
108
-
109
-
110
-
111
-
112
-
113
-
114
-
115
-
116
-
117
-
118
-
119
-
120
-
121
-
122
-
123
-
124
-
125
-
126
-
127
-
128
-
129
-
130
-
131
-
132
-
133
-
134
-
135
-
136
-
137
-
138
-
139
-
140
-
141
-
142
-
143
-
144
-
145
-
146
-
147
-
148
-
149
-
150
-
151
-
152
-
153
-
154
-
155
-
156
-
157
-
158
-
159
-
160
-
161
-
162
-
163
-
164
-
165
-
166
-
167
-
168
-
169
-
170
-
171
-
172
-
173
-
174
-
175
-
176
-
177
-
178
-
179
-
180
-
181
-
182
-
183
-
 184
184 -
 185
185 -
 186
186 -
 187
187 -
 188
188 -
 189
189 -
 190
190 -
 191
191 -
 192
192 -
 193
193 -
 194
194 -
195
-
196
-
197
-
198
-
199
-
200
-
201
-
202
-
203
-
204
-
205
-
206
-
207
-
208
-
209
-
210
-
211
-
212
-
213
-
214
-
215
-
216
-
217
-
218
-
219
-
220
-
221
-
222
-
223
-
224
-
225
-
226
-
227
-
228
-
229
-
230
-
231
 |
 |