Toshiba WR01A Operation Manual - Page 14
Connecting to a Video Monitor - ik
 |
UPC - 032017316379
View all Toshiba WR01A manuals
Add to My Manuals
Save this manual to your list of manuals |
Page 14 highlights
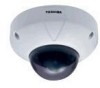
Connecting to a Video Monitor Connecting to a Video Monitor You can view camera images on the video monitor. Video Monitor Installation/Set up Viewing and Operation Rear LAN cable Either PoE AC24V or DC12V • On the power supply, use a PoE compatible hub, or connect AC24V or DC12V power plug. Recording 24V AC UL Listed Class 2 power supply / 12V DC power supply CAUTION : Never input AC/DC and PoE at the same time. It may cause a malfunction of the camera. Ensure that the PoE/POWER SELECT switch is properly set before inputting power. In case of DC12V, connect "+12" to red cable and "GND" to black cable. Setting up Do not overload power supply Since this camera uses 24V AC UL Listed Class 2 power supply or 12V DC power supply, it should be connected to a power supply that allows for at least 5w consumption. Because the IK-WR01A uses a mechanism, a sufficient power supply with adequate current specifications is required. Important G Power plugs of connected equipment must be disconnected before installation. G A 75-ohm coaxial cable (3C-2V or 5C-2V) is required for standard connection. G For details of wiring and operation of equipment to be connected, refer to their Others operation manuals. G Coaxial cables for video signals, LAN cable and the power cord are not supplied with the camera. G Do not connect AC24V and DC12V at the same time. It may cause a malfunction of the camera or AC adapter. G Use a 4 pair twisted cable for the LAN cable to connect the camera to a PoE compatible hub. G Use IEEE802.3af-compliant PoE devices. G An AC adapter is not supplied with the network camera. When using an AC adapter, a 10 watt or greater AC adapter is required. 14 G The camera takes about 30 seconds to start after the power is turned on. Downloaded from www.Manualslib.com manuals search engine
-
 1
1 -
2
-
3
-
4
-
5
-
6
-
7
-
8
-
 9
9 -
 10
10 -
 11
11 -
 12
12 -
 13
13 -
 14
14 -
 15
15 -
 16
16 -
 17
17 -
 18
18 -
 19
19 -
20
-
21
-
22
-
23
-
24
-
25
-
26
-
27
-
28
-
29
-
30
-
31
-
32
-
33
-
34
-
35
-
36
-
37
-
38
-
39
-
40
-
41
-
42
-
43
-
44
-
45
-
46
-
47
-
48
-
49
-
50
-
51
-
52
-
53
-
54
-
55
-
56
-
57
-
58
-
59
-
60
-
61
-
62
-
63
-
64
-
65
-
66
-
67
-
68
-
69
-
70
-
71
-
72
-
73
-
74
-
75
-
76
-
77
-
78
-
79
-
80
-
81
-
82
-
83
-
84
-
85
-
86
-
87
-
88
-
89
-
90
-
91
-
92
-
93
-
94
 |
 |
