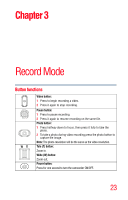
Toshiba X416 User Guide - Page 28
Photo recording, Using Digital Light or Light function, Using the Zoom function
 |
View all Toshiba X416 manuals
Add to My Manuals
Save this manual to your list of manuals |
Page 28 highlights
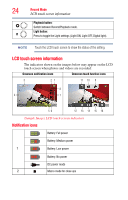
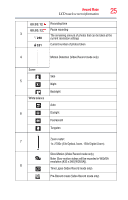
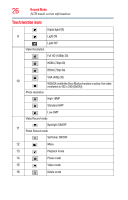
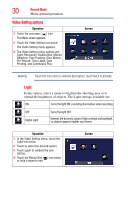
28 Record Mode Photo recording Photo recording Press the Photo ( ) button halfway down until the focusing frame turns from white to green. Then press it fully down to take a photo. Press the Playback button or touch the onscreen ( ) icon to view the photo. The Resolution settings available are: Image Quality High-16MP: 4608 x 3456 Standard-5MP: 2592 x 1944 Low-3MP: 2048 x 1536 Using Digital Light or Light function This setting allows you to brighten the subject or extend the dynamic range of high contrast and backlight, so objects appear brighter and clearer. 1 Press the Light button. The Digital Light ( ) icon appears on the screen. 2 Press the Light button again. The Light ( ) icon appears on the screen. The light turns ON, providing illumination while recording. 3 Press the Video/Photo button to start recording or to take a photo. 4 Press the Light button again to turn it OFF. NOTE The light is disabled automatically when battery power is low. Using the Zoom function The Zoom function magnifies images when recording Videos or taking Photos. ❖ Press the Tele/Wide (T/W) buttons to zoom IN/OUT. The camcorder zooms in by Optical Zoom first. When the Optical Zoom factor is at maximum, zooming stops temporarily. Press and hold the Tele (T) button when you want to zoom in beyond the Optical Zoom range. The Digital Zoom is activated and zooming continues.
-
 1
1 -
2
-
3
-
4
-
5
-
6
-
7
-
8
-
9
-
10
-
11
-
12
-
13
-
14
-
15
-
16
-
17
-
18
-
19
-
20
-
21
-
22
-
 23
23 -
 24
24 -
 25
25 -
 26
26 -
 27
27 -
 28
28 -
 29
29 -
 30
30 -
 31
31 -
 32
32 -
 33
33 -
34
-
35
-
36
-
37
-
38
-
39
-
40
-
41
-
42
-
43
-
44
-
45
-
46
-
47
-
48
-
49
-
50
-
51
-
52
-
53
-
54
-
55
-
56
-
57
-
58
-
59
-
60
-
61
-
62
-
63
-
64
-
65
-
66
-
67
-
68
-
69
-
70
-
71
-
72
-
73
-
74
-
75
-
76
-
77
-
78
-
79
-
80
-
81
-
82
-
83
-
84
-
85
-
86
-
87
-
88
-
89
-
90
-
91
-
92
-
93
-
94
-
95
-
96
-
97
-
98
-
99
-
100
-
101
-
102
-
103
-
104
-
105
-
106
-
107
-
108
-
109
-
110
-
111
-
112
-
113
-
114
-
115
-
116
-
117
-
118
-
119
-
120
-
121
-
122
-
123
-
124
-
125
-
126
-
127
-
128
-
129
-
130
-
131
-
132
-
133
-
134
-
135
-
136
-
137
-
138
-
139
-
140
-
141
-
142
-
143
-
144
-
145
-
146
-
147
-
148
 |
 |
