Toshiba XDE500 Owner's Manual - English - Page 31
View Mode, Video Output, JPEG Interval, HDMI Resolution, Picture Modes
 |
UPC - 022265001912
View all Toshiba XDE500 manuals
Add to My Manuals
Save this manual to your list of manuals |
Page 31 highlights
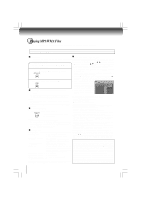
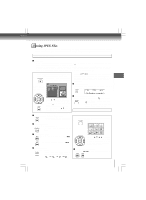
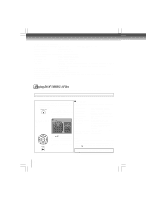
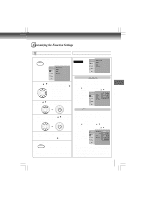
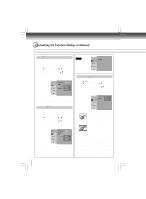
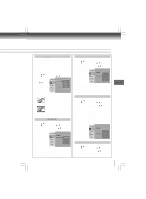
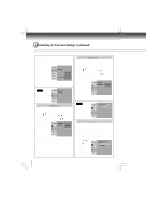
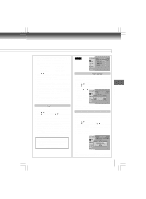
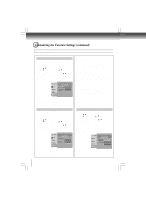
View Mode DVD The user may select one of the following options: Fill: Fill the screen with decoded image. Original: Display image as it original size. "Original" is preferred for Jpeg viewing. Auto Fit: Automatically fit the decoded image on screen without distortion. Pan Scan: Automatically display decoded image on full screen without distortion. 1) Press SETUP button. 2) Press / button to select Video. 3) Press button, then use the / button to select View Mode. 4) Press ENTER button, then use Aspect Ratio : 16 : 9 the / button to select the options Video out (Fill, Original, Auto HDMI Resolution Fit or Pan Scan). JPEG Interval 5) Press ENTER Picture Modes : Sharp button. 6) Press SETUP button to exit the menu. Pan Scan Select when a standard 4:3 TV is connected. Displays pictures cropped to fill your TV screen. Either or both sides of the picture are cut off. Auto Fit Automatically fit the decoded image on screen without distortion. Black bars will be present on top/bottom or left/right of screen. Note: Depending on the DVDs, you may not be able to view the mode as selected. Video Output 1) Press SETUP button. 2) Press / button to select Video. 3) Press button, then use the / button to select Video out. 4) Press ENTER button, then use the / button to select the output mode (Component, S-VIDEO, P-Scan or HDMI). 5) Press ENTER button. 6) Press SETUP button to exit the Aspect Ratio : 16 : 9 : Auto Fit menu. Video out Component:Select if you connect the DVD to your TV which has component video HDMI Resolution JPEG Interval Picture Modes S-VIDEO P-Scan HDMI inputs. S-VIDEO: Select if you connect the DVD to your TV via S-video input. P-Scan: Select if you connect the DVD to your TV which has component video inputs that support progressive scan. HDMI: High Definition Multimedia Interface. Select if you connect the DVD to TV via HDMI input. HDMI Resolution 1) Press SETUP button. 2) Press / button to select Video. 3) Press button, then use the / button to select HDMI Resolution. 4) Press ENTER button, then use the / button to select the options (Auto, 480p, 720p, 1080i, 1080p or 1080p/ Aspect Ratio : 16 : 9 24F). 5) Press ENTER button. 6) Press SETUP button to exit the menu. Video out : Auto Fit Auto 480p HDMI Resolution 720p JPEG Interval 1080i Picture Modes 1080p Notes • If the Video Output is not set to "HDMI", you cannot select the "HDMI Resolution". • When the picture mode is Sharp, Color or Contrast, HDMI resolution cannot be set to 480p and 720p. • Select the HDMI resolution according to the performance of the connected TV. JPEG Interval 1) Press SETUP button. 2) Press / button to select Video. 3) Press button, then use the / button to select JPEG Interval. 4) Press ENTER button, then use the / button to shift and change the JPEG Interval. 5) Press ENTER button. 6) Press SETUP button to exit the menu. Off: Plays back one file at a time. 5 seconds: Plays back images in the form of a slide show at 5 seconds interval. 10 seconds: Plays back images in the form of a slide show at 10 seconds interval. 15 seconds: Plays back images in the form of a slide show at 15 seconds interval. Aspect Ratio : 16 : 9 : Auto Fit Video out HDMI Resolution JPEG Interval : HDMI Off 5 seconds 10 seconds Picture Modes 15 seconds Picture Modes 1) Press SETUP button. 2) Press / button to select Video. 3) Press button, then use the / button to select Picture Modes. 4) Press ENTER button, then use the / button to select picture mode (Sharp, Color, Contrast or Off). 5) Press ENTER button. 6) Press SETUP button to exit the menu. 31 Function setup
-
 1
1 -
2
-
3
-
4
-
5
-
6
-
7
-
8
-
9
-
10
-
11
-
12
-
13
-
14
-
15
-
16
-
17
-
18
-
19
-
20
-
21
-
22
-
23
-
24
-
25
-
 26
26 -
 27
27 -
 28
28 -
 29
29 -
 30
30 -
 31
31 -
 32
32 -
 33
33 -
 34
34 -
 35
35 -
 36
36 -
37
-
38
-
39
-
40
 |
 |
