Tripp Lite B097048 Quick Start Guide for B097-016 and B097-048 Multi-language - Page 2
Hardware Assembly, Connect the Console Server
 |
View all Tripp Lite B097048 manuals
Add to My Manuals
Save this manual to your list of manuals |
Page 2 highlights
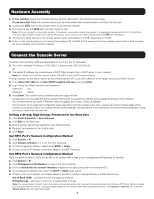
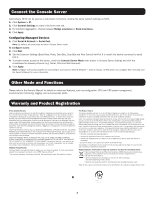
Hardware Assembly 1. If free standing: Attach the included adhesive-backed rubber feet to the console server's base. If rack-mounted: Attach the included rack-mount kit to the sides of the console server to be fixed onto the rack. 2. Connect the NET1 port on the console server to your primary network. 3. If you plan to use the NET2 port, you may connect it now. Note: NET2 can connect to a secondary network. For example, a secondary network may consist of a segregated management LAN or to the WAN via your Out-of-Band (OOB) management network. Alternatively, it can connect to the same primary network as NET1 for redundancy. 4. Connect your serial devices to the console server's serial ports labeled 1-16/48 (depending on model). 5. Power on the console server by connecting the included C13 to NEMA 5-15P power cords to the console server's built-in dual universal AC power supplies (with automatic failover). Connect the Console Server The B097-016 and B097-048 are addressable at one of the two IP addresses: 1. The built-in (default) IP address of 192.168.0.1 (subnet mask 255.255.255.0). or 2. The default IP address the console server's DHCP Client accepts from a DHCP server on your network. Note: The console server will now respond at both 192.168.0.1 and its DHCP-supplied address. If using a browser on the same network as the console server's NET1 port (192.168.0.X, or the range used by your DHCP server): 3. Enter https://192.168.0.1/ or http://[DHCP-supplied address]/ and press Enter. 4. Log in using the default username and password. Username: root Password: default 5. Press Enter. The console server's interface welcome page will load. Configuration and management options present themselves in expanded by-default menus along the left side of the interface. The top-level menus are Serial & Network, Alerts & Logging, and System, Status & Manage. The remainder of the page lists configuration tasks required to turn the console server into a usable unit. Some of these tasks will be marked as completed due to the console server's factory settings. The procedures in the next section document initial configuration using the menus, rather than the task list. Setting a Strong, High-Entropy Password for the Root User 1. Click Serial & Network > User & Groups. 2. Click Edit for the Root User. 3. Enter a strong, high-entropy password in the Password field. 4. Re-enter the passcode in the Confirm field. 5. Click Apply. Set NET1 Port's Network Configuration Method 1. Click System > IP. 2. Click Network Interface (if it is not the front-most tab). 3. For the Configuration Method, select either DHCP or Static. 4. If Static, enter an IP Address and Subnet Mask for the NET1 interface. Set NET2 Port's Network Configuration Method NET2 is inactive by default. NET2 can be set up for failover/OOB access or as a management LAN gateway. To activate: 1. Click System > IP. 2. Click Management LAN Interface to make it the front-most tab. 3. Click the Deactivate this network interface checkbox to de-select this option and activate NET2. 4. For Configuration Method, click either the DHCP or Static radio button. 5. If Static, enter an IP Address and Subnet Mask for the NET2 interface (leaving Gateway and DNS fields blank). Out-of-Band (OOB) - set these for your management network. IP Passthrough - set these to match an unused private IP range. Note: The console server's firewall determines which protocols and services can be used to access which ports and devices. HTTPS and SSH are enabled to the console server by default. To change access settings for the console server and connected serial ports, click System > Services. Then click the Service Access tab and adjust accordingly. 2
-
 1
1 -
 2
2 -
 3
3 -
 4
4 -
 5
5 -
 6
6 -
 7
7 -
 8
8 -
9
-
10
-
11
-
12
 |
 |
