Tripp Lite BC350 Owner's Manual for InternetOffice and BCPersonal UPS 932292 - Page 3
Quick Installation - battery
 |
View all Tripp Lite BC350 manuals
Add to My Manuals
Save this manual to your list of manuals |
Page 3 highlights
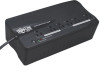
Quick Installation 1 Plug the UPS into a properly grounded AC outlet. After plugging the UPS into a wall outlet, push the ON/OFF/TEST button for one second to turn the UPS on (see Basic Operation section). Please Note! The UPS will not turn on automatically in the presence of live utility power. 2 Plug your equipment into the UPS. Select outlets (see Basic Operation section) will provide battery backup and surge protection; plug your computer, monitor and other critical devices here.* Select outlets (see Basic Operation section) will provide surge protection only; plug your printer and other non-essential devices here. * Your UPS is designed to support electronic equipment only. You will overload the UPS if the total VA ratings for all the equipment you connect to the Battery Backup Protected/Surge Protected outlets exceeds the UPS's output capacity. To find your equipment's VA ratings, look on their nameplates. If the equipment is listed in amps, multiply the number of amps by 120 to determine VA. (Example: 1 amp × 120 = 120 VA). If you are unsure if you have overloaded the Battery Backup Protected/Surge Protected outlets, run a self-test (see "ON/OFF/TEST" Button description). If the LINE POWER indicator light does not illuminate when the UPS is turned ON, try the following: 1. Make sure that the UPS is plugged into a live AC outlet. 2. If your UPS has a sliding ON/OFF switch, place it back in the OFF position, wait several seconds, then place it in the ON position again. 3. If your UPS had an ON/OFF button, you must press it for at least one second to start the UPS. (A beep should sound when the UPS starts.) 4. If the UPS still does not start, contact Tripp Lite Tech Support for assistance. 3 201004182 93-2292.indb 3 5/6/2010 11:30:36 AM
-
 1
1 -
 2
2 -
 3
3 -
 4
4 -
 5
5 -
 6
6 -
 7
7 -
 8
8 -
 9
9 -
10
-
11
-
12
-
13
-
14
-
15
-
16
-
17
-
18
-
19
-
20
-
21
-
22
-
23
-
24
 |
 |
