Tripp Lite SUINT1000XL Owner's Manual for SUINT1000XL/SUINT2000XL/SUINT3000XL - Page 3
Quick Installation - power supply
 |
View all Tripp Lite SUINT1000XL manuals
Add to My Manuals
Save this manual to your list of manuals |
Page 3 highlights
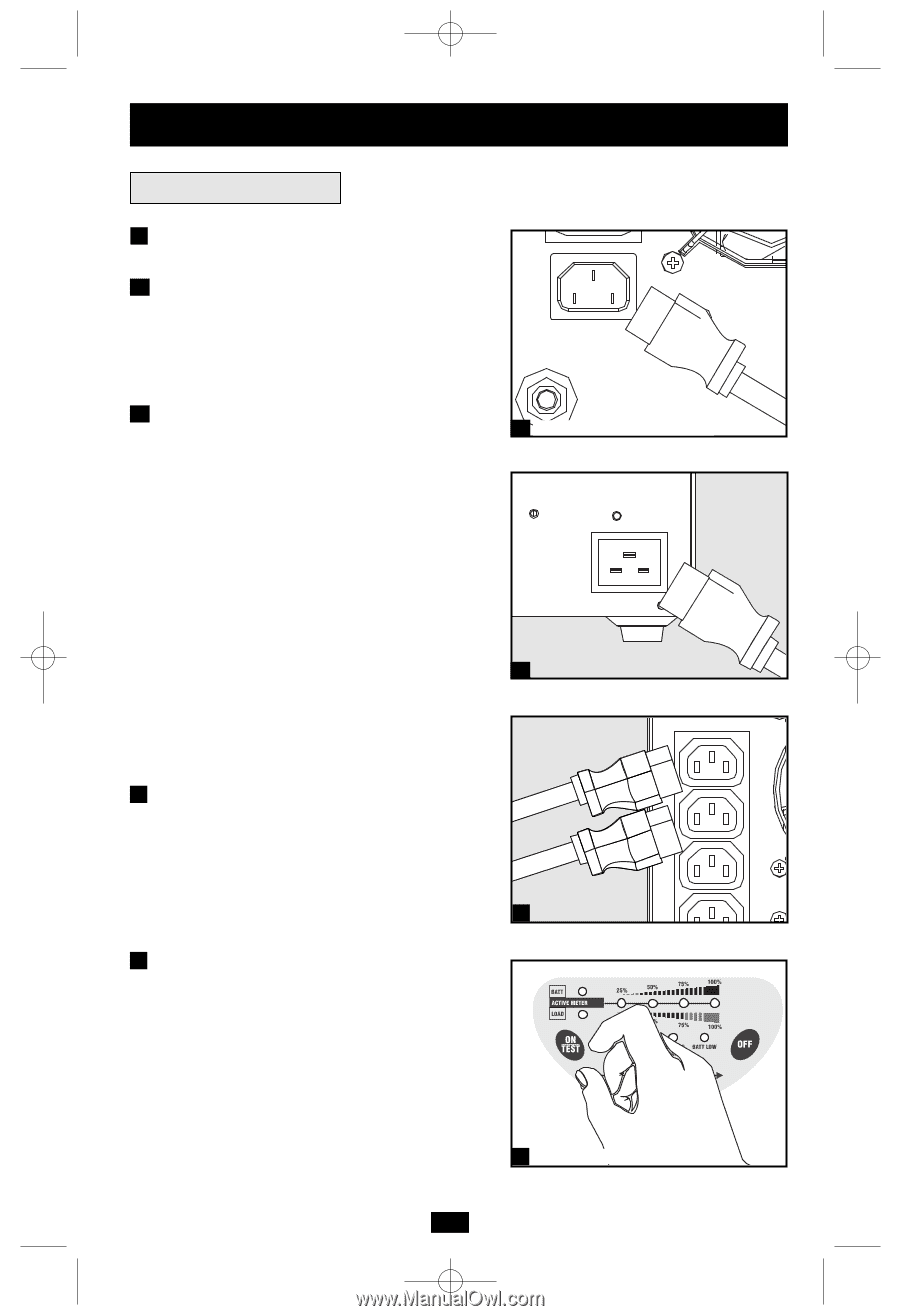
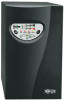
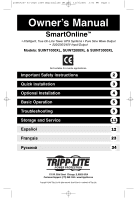
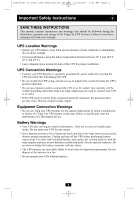
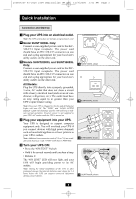
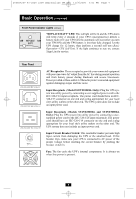
200607207 93-2525 230V Smartonline OM.qxd 11/9/2006 3:51 PM Page 3 Quick Installation Connection and Start-Up 1 Plug your UPS into an electrical outlet. Note: The UPS system does not include an input power cord. 1A Model SUINT1000XL Only: Connect a user-supplied power cord to the IEC320-C14 input receptacle. The power cord should have an IEC-320-C13 connector on one end and a plug appropriate for your local site's utility outlets on the other end. 1B Models SUINT2000XL and SUINT3000XL Only: Connect a user-supplied power cord to the IEC320-C20 input receptacle. The power cord should have an IEC-320-C19 connector on one end and a plug appropriate for your local site's utility outlets on the other end. All Models: Plug the UPS directly into a properly grounded, 3-wire, AC outlet that does not share a circuit with a heavy electrical load (such as an air conditioner, refrigerator, etc.). The outlet must have an amp rating equal to or greater than your UPS's input breaker rating. Note: Once your UPS is plugged in, the fan and all Indicator Lights will turn ON. The "LINE" and "LOAD ACTIVE METER" LEDs will illuminate and the UPS will beep to indicate normal operation. However, power is not supplied to your UPS's AC outlets until the UPS is turned on. 2 Plug your equipment into your UPS. Your UPS is designed to support computer equipment only. You will overload your UPS if you connect devices with high power demands such as household appliances or laser printers to your UPS's outlets. Note: Additional interconnection cords (C13 to C14) are available from Tripp Lite. Call 773-869-1234 (Part # P004-006). 3 Turn your UPS ON: • Press the "ON/TEST" Switch • Hold it for several seconds until you hear a beep • Release it The "ON LINE" LED will now light, and your UPS will begin providing power to its AC outlets. Note: During the initial installation of the UPS, or after prolonged storage, the internal batteries must charge for 2-4 hours before the UPS can support connected equipment during a power failure. 1A SUINT1000XL shown 1B SUINT2000XL shown 2 SUINT2000XL shown 3 SUINT1000XL shown 3
-
 1
1 -
 2
2 -
 3
3 -
 4
4 -
 5
5 -
 6
6 -
 7
7 -
 8
8 -
 9
9 -
10
-
11
-
12
-
13
-
14
-
15
-
16
-
17
-
18
-
19
-
20
-
21
-
22
-
23
-
24
-
25
-
26
-
27
-
28
-
29
-
30
-
31
-
32
-
33
-
34
-
35
-
36
-
37
-
38
-
39
-
40
-
41
-
42
-
43
-
44
 |
 |