Troy-Bilt Pony CRT Service Manual - Page 8
Troy-Bilt Pony CRT Manual
 |
View all Troy-Bilt Pony CRT manuals
Add to My Manuals
Save this manual to your list of manuals |
Page 8 highlights
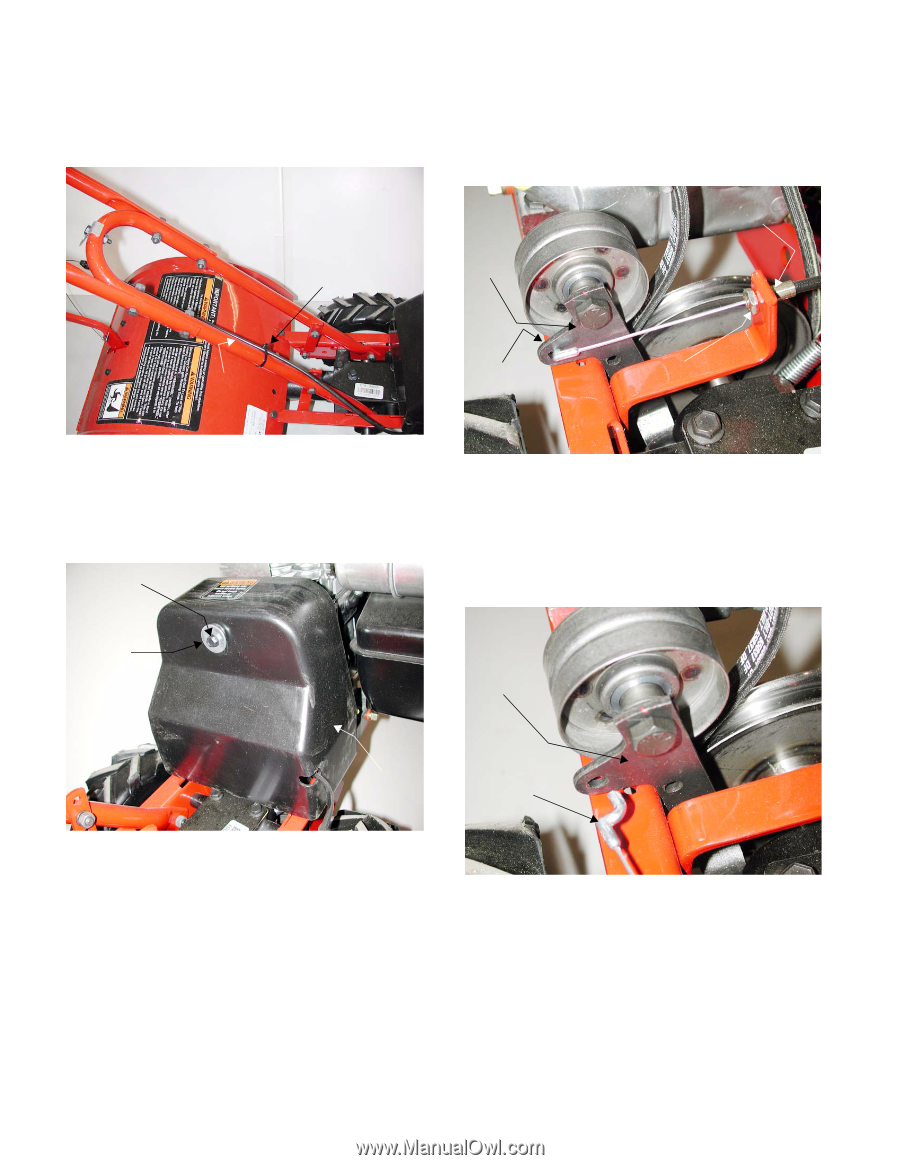
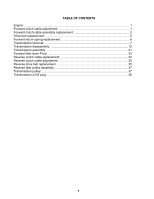
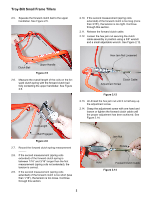
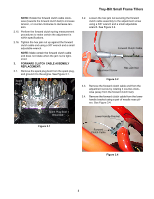
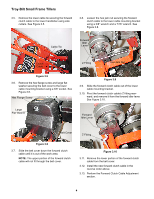
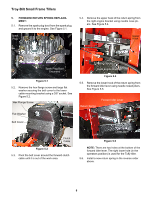
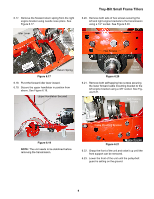
Troy-Bilt Small Frame Tillers 3.5. Remove the lower cable tie securing the forward clutch cable to the lower handlebar using side cutters. See Figure 3.5. Cable Tie 3.8. Loosen the hex jam nut securing the forward clutch cable to the lower cable mounting bracket using a 3/8" wrench and a 7/16" wrench. See Figure 3.8. Forward Idler Lever Forward Clutch Cable Clutch Cable Z Fitting Hex Jam Nut Figure 3.5 3.6. Remove the hex flange screw and large flat washer securing the belt cover to the lower cable mounting bracket using a 3/8" socket. See Figure 3.6. Hex Flange Screw Figure 3.8 3.9. Slide the forward clutch cable out of the lower cable mounting bracket. 3.10. Pivot the forward clutch cable's Z fitting rearward, and remove it from the forward idler lever. See Figure 3.10. Large Flat Washer Forward Idler Lever Belt Cover Z Fitting Figure 3.6 3.7. Slide the belt cover down the forward clutch cable until it is out of the work area. NOTE: The upper portion of the forward clutch cable will not fit through the belt cover. Figure 3.10 3.11. Remove the lower portion of the forward clutch cable from the belt cover. 3.12. Install the new forward clutch cable in the reverse order above. 3.13. Perform the Forward Clutch Cable Adjustment section. 4
-
 1
1 -
2
-
 3
3 -
 4
4 -
 5
5 -
 6
6 -
 7
7 -
 8
8 -
 9
9 -
 10
10 -
 11
11 -
 12
12 -
 13
13 -
14
-
15
-
16
-
17
-
18
-
19
-
20
-
21
-
22
-
23
-
24
-
25
-
26
-
27
-
28
-
29
-
30
-
31
-
32
-
33
-
34
-
35
-
36
-
37
-
38
-
39
-
40
-
41
-
42
 |
 |