URC HDA-8100 Owners Manual - Page 10
NetworkSetup
 |
View all URC HDA-8100 manuals
Add to My Manuals
Save this manual to your list of manuals |
Page 10 highlights
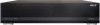
Total Control 2.0 Network Setup When using more than one (1) HDA devices, URC's HDA-SW5 Network Switch is REQUIRED on the local network. For more information of the HDA-SW5 Network Switch, please refer to the HDA-SW5 Owner's Manual. Although 3rd Party AVB switches may be utilized, they are not supported by URC's Technical Support team. Connecting the HDA-8100 to the Network: 1. Connect an ethernet cable to an available LAN port on the head-end network switch. If no switch is connected to the network then connect the ethernet cable to an available LAN port on the local router (Luxul preferred). 2. Connect the ethernet cable from the previous step to any available LAN port on the HDA-SW5. 3. Connect another ethernet cable to an available LAN port on the HDA-SW5 Network Switch. 4. Connect the ethernet cable from the previous step to the ethernet port found at the rear of the HDA-8100 (page 5). 5. Configure the HDA-8100 to a DHCP/MAC reservation within the local router and program the device into the new or existing Total Control system. A certified URC integrator is REQUIRED to integrate the HDA-8100 into a new or existing Total Control system. 8 Local Router 1 HDA-8100 Owner's Manual HDA-SW5 Network Switch 2 HDA-8100
-
 1
1 -
2
-
3
-
4
-
 5
5 -
 6
6 -
 7
7 -
 8
8 -
 9
9 -
 10
10 -
 11
11 -
 12
12 -
 13
13 -
 14
14 -
 15
15 -
16
-
17
-
18
-
19
 |
 |
