URC MRF-260 Owners Manual - Page 9
Front Blaster Overload, Disabling the Front Blaster - Step by Step via PC - manual
 |
View all URC MRF-260 manuals
Add to My Manuals
Save this manual to your list of manuals |
Page 9 highlights
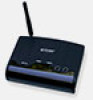
MRF-260 BASE STATION Front Blaster Overload A few models of audio/video components can be overloaded by the Front Blaster. If you are having intermittent or inconsistent results with a particular component, try repositioning the MRF-260 and facing the Front Blaster in a different direction. If this improves the situation but is impractical, it may be necessary to utilize the selfadhesive flashers only and follow the steps below to Disable the Front Blaster. This will limit the number of components your MRF260 can control to four. If you have more than four components you can purchase an additional MRF-260 or upgrade to an MRF350. Disabling the Front Blaster - Step by Step via PC Note: If you are programming a URC MX "addressable" remote control that sets up without a PC, refer to the owners manual to disable the Front Blaster. Open the PC software, then plug the MX PC programmable remote control into the PC. Open your saved configuration and follow these steps to turn off the front blaster: Step 1 - Open the RF Setup Window The RF Setup window opens after selecting RF Control or Settings from the Program Menu of most MX/TX editors or from the Main Menu of the ProWizard. Step 2 - Setup the Receiver Extend the RF Setup window by clicking on the RECEIVERS button. Step 3 - Turn off the Front Blaster Click on the cell in the IR LED OUTPUT/IR BLASTER column. A list box will appear. Select OFF from the list. Next, click on Close to apply your change. Page 6
-
 1
1 -
2
-
3
-
 4
4 -
 5
5 -
 6
6 -
 7
7 -
 8
8 -
 9
9 -
 10
10 -
 11
11 -
 12
12 -
 13
13 -
 14
14 -
15
-
16
 |
 |
