URC PSX-1 Setup Guide - Page 7
Front panel PSX label, Using the front panel PSX label back light, Connecting two or more PSX
 |
View all URC PSX-1 manuals
Add to My Manuals
Save this manual to your list of manuals |
Page 7 highlights
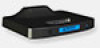
PSX Installation Manual (PSX-1 and PSX-2) ver. 1.1 Front panel PSX label The PSX ships with a Universal Remote Control label in the dock label holder. This label can be removed and replaced with a customized label like "Dad's iPod Dock". Use a paper clip or a small eyeglasses screw driver and gently pull in one of the corners of the plastic label cover. The cover easily flexes and then can be removed. Place the new label in position and reinstall the plastic label cover. Using the front panel PSX label back light The PSX is equipped with a dock label backlight. The light makes it easy to place an iPod into the appropriate dock by illuminating the name of the dock. The light is controlled by a small switch located on the far left side of the PSX back panel. Press the switch once to turn the light on, press it again to turn the light off. Connecting two or more PSX's together The PSX comes equipped with a metal connecting bracket when two or more docks need to be connected together and held in place. Locate the metal connecting bracket. Remove any iPods from the docks to be connected together. Turn the first dock over so the bottom is facing up. Slide the metal connector bracket into the connector bracket slot located in the middle of the dock. The bracket will snap into place when fully inserted. Turn the second dock over and slide it onto the extended connector bracket. It will also snap into place connecting the two docks. Note: The metal dock connector bracket can be removed by exerting light downward pressure on the docks plastic center tab, while gently pulling it away from the dock. 7
-
 1
1 -
 2
2 -
 3
3 -
 4
4 -
 5
5 -
 6
6 -
 7
7 -
 8
8 -
 9
9 -
 10
10 -
 11
11 -
 12
12 -
13
-
14
-
15
-
16
-
17
 |
 |
