URC Vivido-Dimmers Owners Manual - Page 2
IMPORTANT! How to identify Common Wires, Two location
 |
View all URC Vivido-Dimmers manuals
Add to My Manuals
Save this manual to your list of manuals |
Page 2 highlights
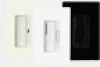
Single Location Control Installation (requires one RF Master Dimmer) 11.31 Bare Black - Hot Tag Black To Light White 1.4 1.5 Blue Black Green Master Power Black Red Black White Turn OFF circuit breaker or remove fuse(s) and test that power is off before wiring. Identify existing wiring (This switch will be a single-pole) and tag "Hot" wire. Use voltage tester as necessary to confirm "Hot" wire (Voltage will be present at the "Hot" wire when the lights are off). Identify existing wiring (This switch will be a single-pole). Connect master dimmer as shown. 11..64 TOP Hot 120V Black Red MAMSTAESRTER DIDMIMMERMER Green Blue Gently push dimmer into place and secure with mounting screws. Make sure disconnect switch at bottom of master is fully pushed in Neutral Ground White Two Location Control Installation (requires one Master and one Accessory) 22..11 Red 2.2 2.3 Light Fixture Master Dimmer Power Bare Tag Black Black White Turn OFF circuit breaker or remove fuse(s) and test that power is off before wiring. Identify existing wiring (both existing switches will be "3-way") Tag common wire on both 3-Way switches (see "How to Identify Common Wires" section*) 2.4 Accessory From Master Dimmer Disconnect existing switch and remove. Green Blue Connect to bare Traveller Wires White wire Blue ACCESSORY ACCESSORY Note the color of this traveller wire Green Connect to bare wire Black Tag Red White ACCESSORY Traveller Wires Blue Note the color of this traveller wire To Accessory dimmer Connect RF Master Dimmer as Shown. Note the color of the traveller wire you have connected to the blue wire. Connect green wire to bare wire in box ACCESSORY Light Fixture Tag Light Fixture Connect the Accessory Dimmer as shown. You must connect the tagged wire to the same traveller wire color noted in Step 2.3. Connect green wire to bare wire in box. Master Dimmer location (connects to power) Refer to 1.4 to install device in the wallbox. Accessory Dimmer location (connects to Light Fixture) Three Location Control Installation (requires one Master and two Accessory dimmers) 32.51 Red Red Black 2.6 Accessory - 4-way Location From Master Dimmer Blue White Bare Black White Blue ACCESSORY Traveller Wires The color of these traveller wires is same as noted in Step 2.3 To Accessory Dimmer Turn OFF circuit breaker or remove fuse(s) and test that power is off before wiring. Identify existing wiring (4-way switches) Tag common wires on 4-Way switch. (see "How to Identify Common Wires" section*) Red Hot 120V Neutral Black Tag Green Ground White Red ACCESSORY Blue White Blue Blue Green Ground White ACCESSORY White Blue Blue Green Ground White ACCESSORY White Master Dimmer (3-way location) Accessory Dimmer (4-way location) Accessory Dimmer (3-way location) Connects to Power Connects to Light Fixture Light Fixture Connect the second Accessory Dimmer (4-way switch) as shown. IMPORTANT! How to identify Common Wires* Two location: Each switch will have insulated wires connected to three terminal screws plus a green or bare wire connected to a green terminal screw. The three terminals are usually one dark colored screw and two light colored screws (ignore the Green screw). Alternatively, the three screws may be the same color and one will be marked COMMON or COM Find the wires connected to the dark or COMMON screws. Usually these wires are black but may be red or blue. Tag these wires on both switches to identify when wiring. Three location: Two of the existing switches will be 3-way. The 3-way switches will be located at each end of the circuit with a 4-way switch in between. TAG the two 3-way switches as in the Two Location Control section. The 4-Way switch has 4 insulated wires connected to 4 terminal screws. VERY IMPORTANT - TAG two same color insulated wires, which are connected to screws of opposite colors. Refer to 1.4 to push dimmers into place. Universal Remote Control, Inc. 500 Mamaroneck Ave. Harrison, NY 10528 (914) 835-4484 [email protected] www.UniversalRemote.com IS-RF9534U-EN (REV. A)
-
 1
1 -
 2
2 -
 3
3
 |
 |
