Uniden ACS2SGL Quick Reference Owner Manual 2 - Page 2
What's in the Box, Positioning the Solar Panel, Mount the Solar Panel
 |
View all Uniden ACS2SGL manuals
Add to My Manuals
Save this manual to your list of manuals |
Page 2 highlights
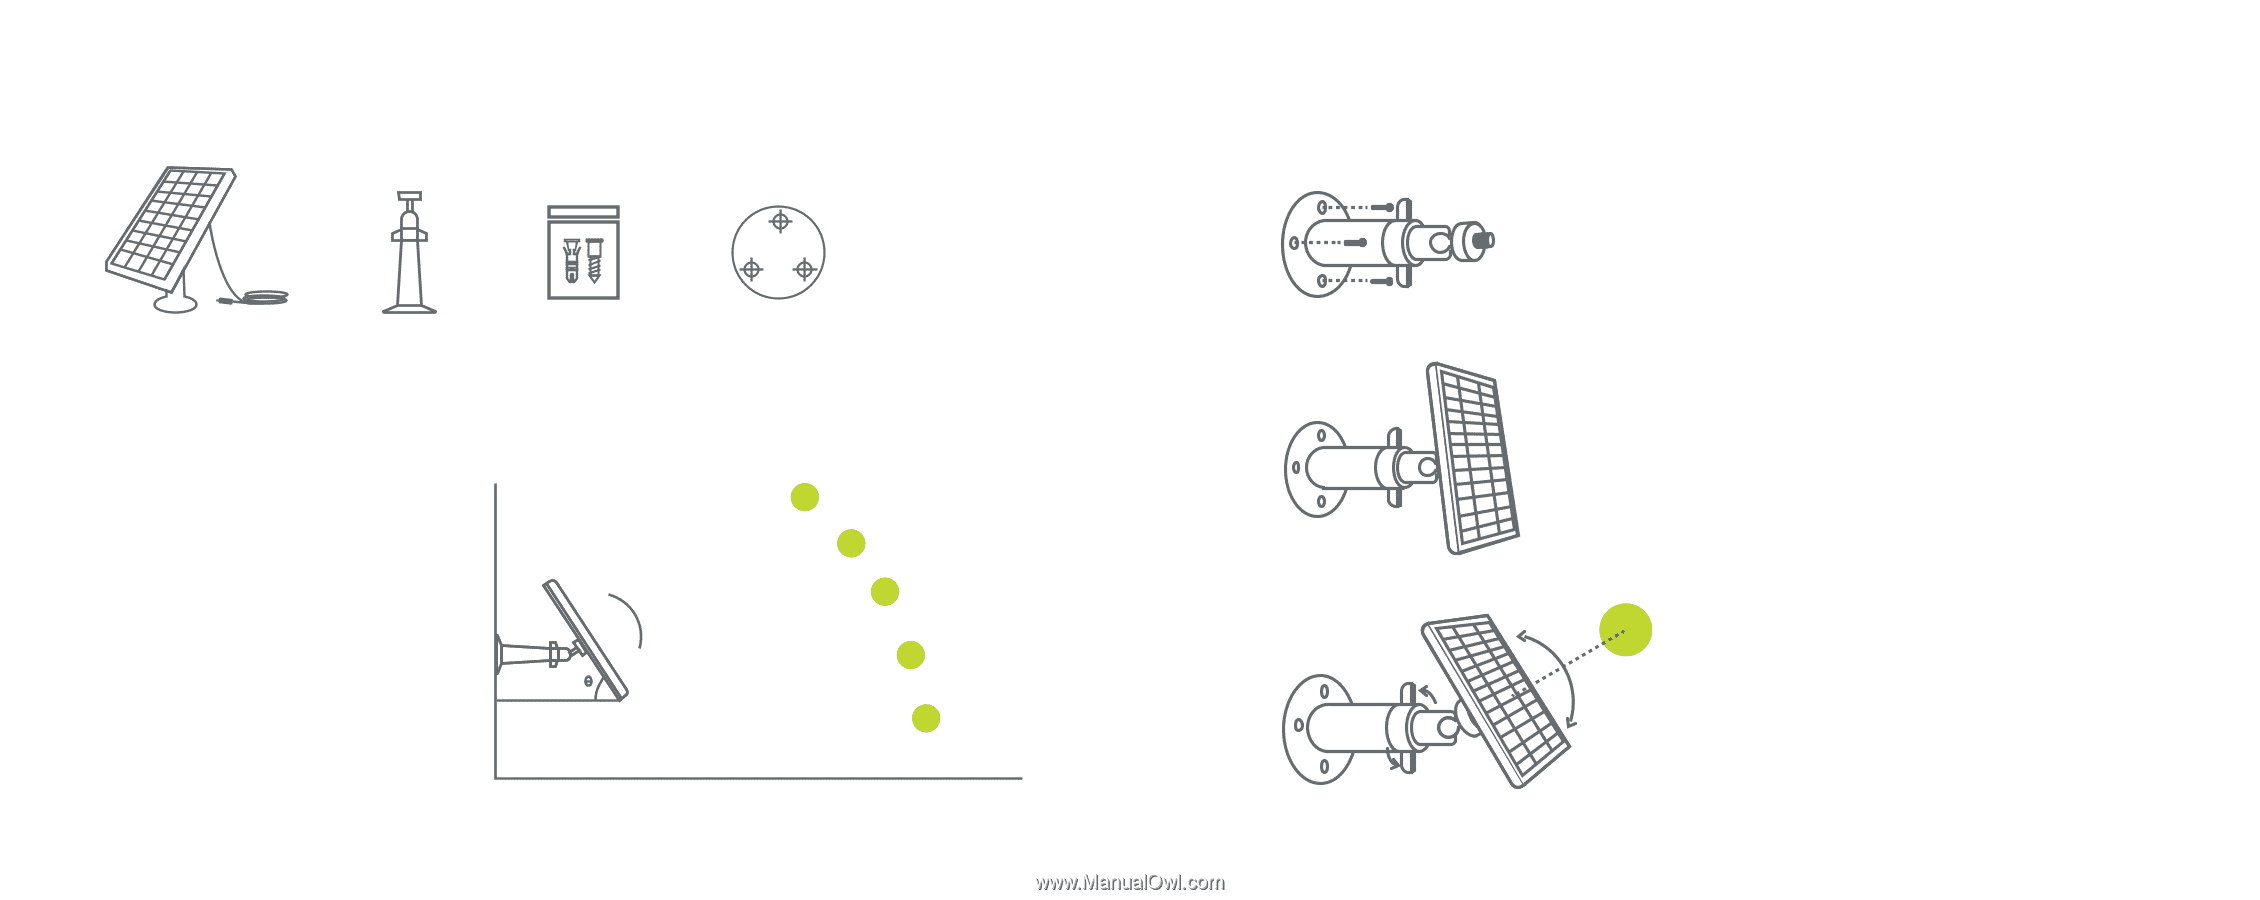
What's in the Box Solar Panel x1 Screw Mount x1 Screw Kit x2 Mounting Template x2 Positioning the Solar Panel Please select a position with the most sunlight throughout the year for your solar panel. The solar panel needs direct sunlight to sufficiently power your camera daily. The amount of energy that the solar panel can produce is affected by weather conditions, seasonal changes, geographic locations, etc. The Ideal Angle = The Local Latitudes + 5° 2 Mount the Solar Panel 1. Mount the bracket with the mounting template and the screws provided in the package. 2. Slot the solar panel into the bracket and make sure it's secure. 3. Loosen the adjusting control on the bracket and adjust the angle of the solar panel to make it receive direct sunlight, and then fasten the adjusting control to secure your setting. 3
-
 1
1 -
 2
2 -
 3
3 -
 4
4 -
 5
5
 |
 |