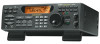
Uniden BC898T English Owners Manual - Page 33
Attenuating All Search Ranges, Setting Delay For All Search Ranges, Searching a Trunked Bank - scanner review
 |
UPC - 050633650370
View all Uniden BC898T manuals
Add to My Manuals
Save this manual to your list of manuals |
Page 33 highlights
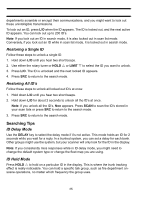
Attenuating All Search Ranges If you are near a strong RF source, you might need to attenuate the input signal in order to search properly. Repeatedly press ATT until ATT appears (to turn on attenuation) or until ATT disappears (to turn off attenuation). Setting Delay For All Search Ranges You can set the scanner to have a 2-second delay after the end of a transmission before searching resumes. This slows searching, but helps you prevent missing replies on a frequency. To turn on this option for all search ranges, select the channel where you want to add a delay then press DELAY. Searching a Trunked Bank Before you search a trunked bank with your scanner, consider the following: • You can only trunk track one bank at a time. • Repeatedly press TRUNK to toggle between the conventional and the trunk tracking modes. • Press DATA while in the trunk tracking mode to review which bank is currently in use. The appropriate bank icon flashes at the top of the display. Press DATA again to turn off review. If you have programmed frequencies for a trunked system in one or more of the 10 available banks and you are in conventional mode, follow these steps to begin trunk searching. 1. Press TRUNK then press SCAN. 2. Press a bank key (A-J) to select the trunked bank you want. For example, press B. Note: You will see the frequencies appear quickly as your scanner looks for the data channel, which controls the system. 3. Once the data channel is acquired, the scanner starts to trunk track. Talk group ID's, which represent different service groups, appear. 4. Press TRUNK again to return to conventional mode. While searching, you won't know exactly to whom the ID's are assigned until you listen awhile or until ID lists are available in frequency guides or on internet sites. However, it usually only takes a few minutes to figure out police, fire, and emergency medical personnel. Other ID's might take some time, but determining who each ID represents is half the fun of trunk scanning! 30
-
 1
1 -
2
-
3
-
4
-
5
-
6
-
7
-
8
-
9
-
10
-
11
-
12
-
13
-
14
-
15
-
16
-
17
-
18
-
19
-
20
-
21
-
22
-
23
-
24
-
25
-
26
-
27
-
 28
28 -
 29
29 -
 30
30 -
 31
31 -
 32
32 -
 33
33 -
 34
34 -
 35
35 -
 36
36 -
 37
37 -
 38
38 -
39
-
40
-
41
-
42
-
43
-
44
-
45
-
46
-
47
-
48
-
49
-
50
-
51
-
52
-
53
-
54
-
55
-
56
-
57
-
58
-
59
-
60
-
61
-
62
-
63
-
64
 |
 |
