Uniden EXI8560 English Owners Manual - Page 2
Installing the Phone
 |
UPC - 050633280393
View all Uniden EXI8560 manuals
Add to My Manuals
Save this manual to your list of manuals |
Page 2 highlights
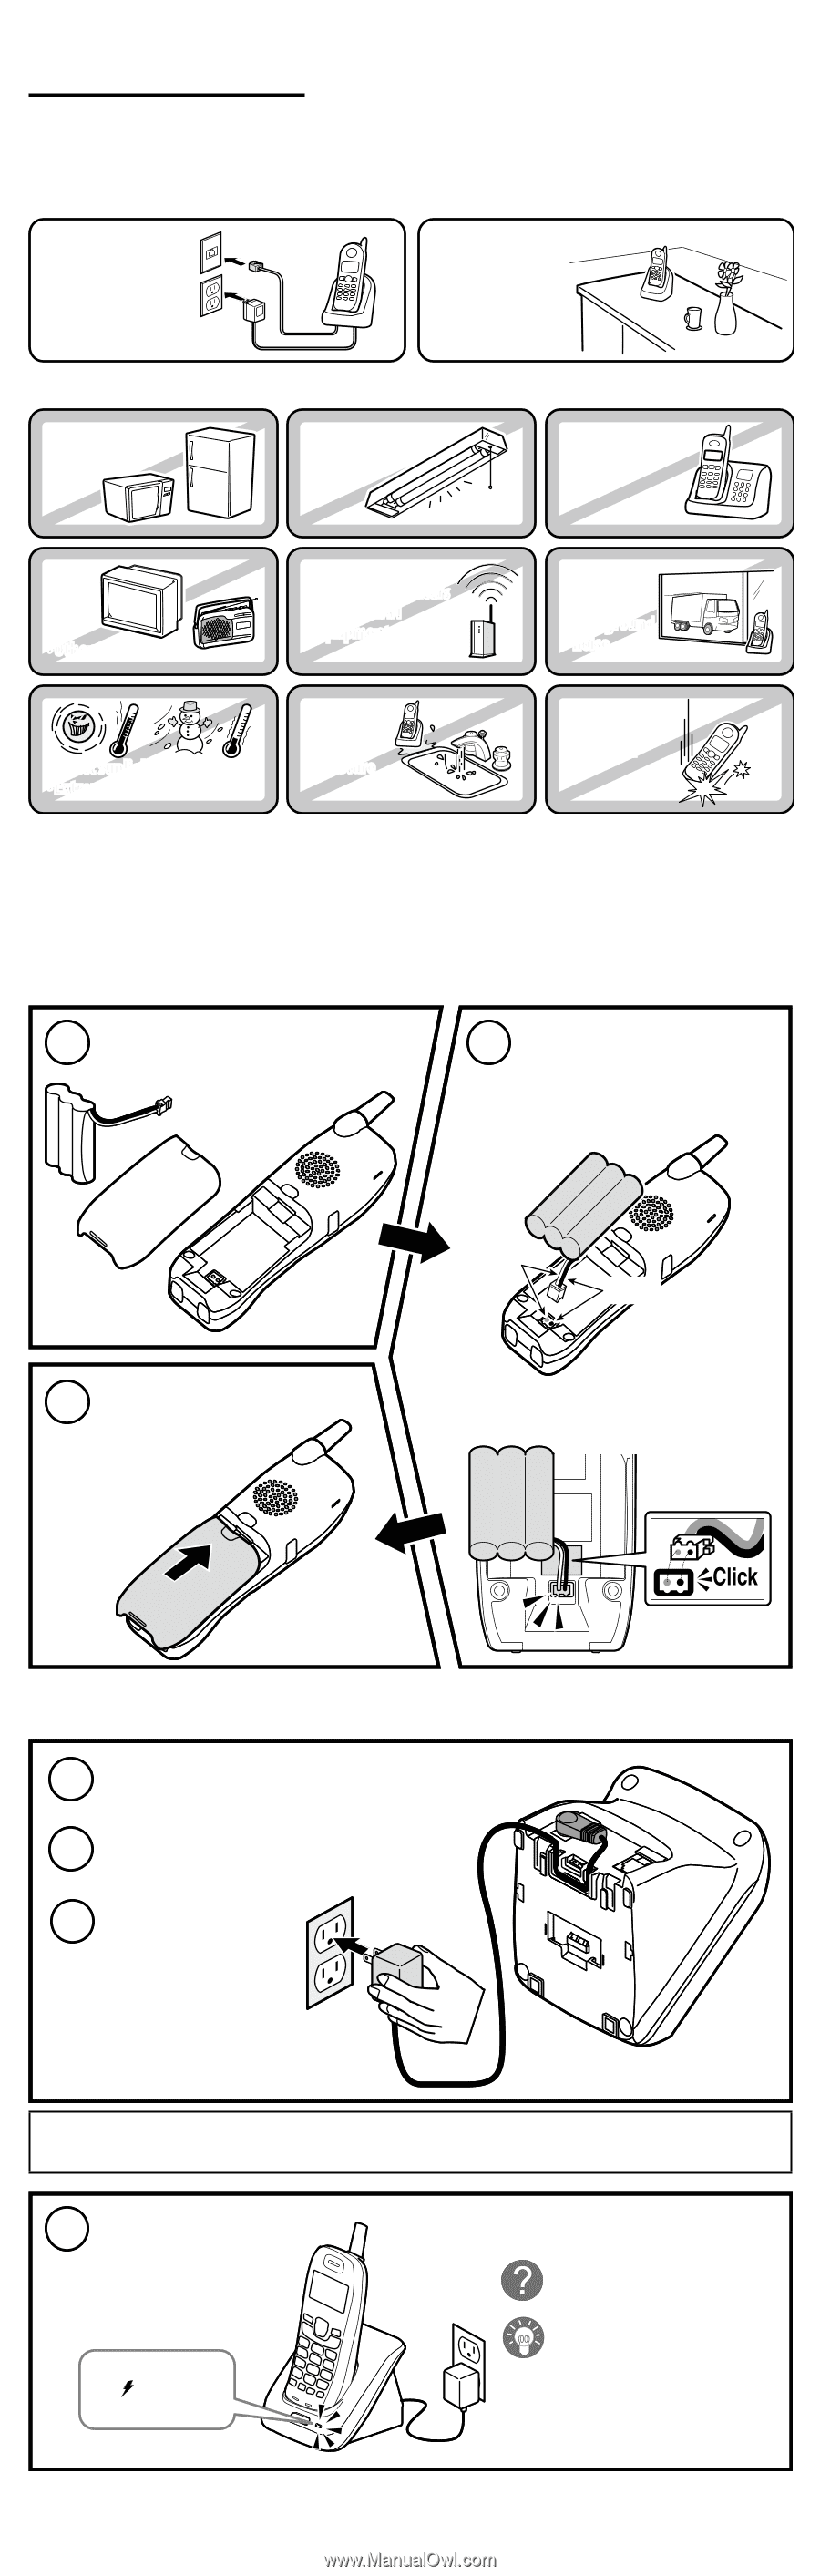
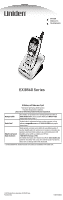
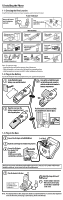
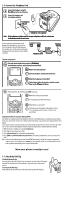
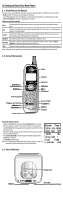
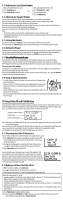
1) Installing the Phone 1-1. Choosing the Best Location To get the best performance out of your new phone, put it in the best location: PLACE YOUR BASE Near an AC outlet and a telephone wall jack. In a centrally-located open area. •Microwave ovens • Refrigerators TRY TO AVOID • Fluorescent lighting •Other cordless telephones • TVs •Other electronics •Personal computers •Wireless LAN equipment •Areas with a lot of background noise •Direct sunlight •Extreme temperatures • Dust • Excessive moisture • Shock • Vibration Notes: For maximum range • Keep both the base and handset antennas free of obstruction. • When the handset is not in use, place the handset in an upright position. • Metal and reinforced concrete may affect cordless telephone performance. 1-2. Plug in the Battery Use only the Uniden BT-905 rechargeable battery pack supplied with your phone. 1 Locate the battery pack, battery cover and the handset. 2 Line up the red and black wires on the battery pack connector with the sticker in the handset's battery compartment. 3 Place the cover over the battery compartment and slide it up into place. Red Black Push the battery connector in firmly. (You should hear it click into place.) 1-3. Plug in the Base 4 Connect the AC adapter to the DC IN 9V jack. To DC IN 9V 5 Route the cord through the molded wiring channel. 6 Connect the AC adapter to a standard 120V To AC outlet AC wall outlet. DO NOT use an AC outlet controlled by a wall switch. AC adapter (supplied) Don't put any power cord where people might trip over it or step on it. If a power cord becomes chafed or worn out, it can create a fire or electrical hazard. 7 Place the handset in the base. Make sure that the /in use LED illuminates. What if the charge LED doesn't light up? • Check AC adapter connection. • Make sure you are not using an outlet that's controlled by a wall switch. Note: For optimum battery life, charge your handset completely before you connect the telephone cord. The first time you charge a new battery, allow 15 to 20 hours.
-
 1
1 -
 2
2 -
 3
3 -
 4
4 -
 5
5 -
 6
6 -
 7
7 -
 8
8 -
9
-
10
-
11
-
12
 |
 |