Uniden PC68LTX Owners Manual - Page 7
Installation
 |
View all Uniden PC68LTX manuals
Add to My Manuals
Save this manual to your list of manuals |
Page 7 highlights
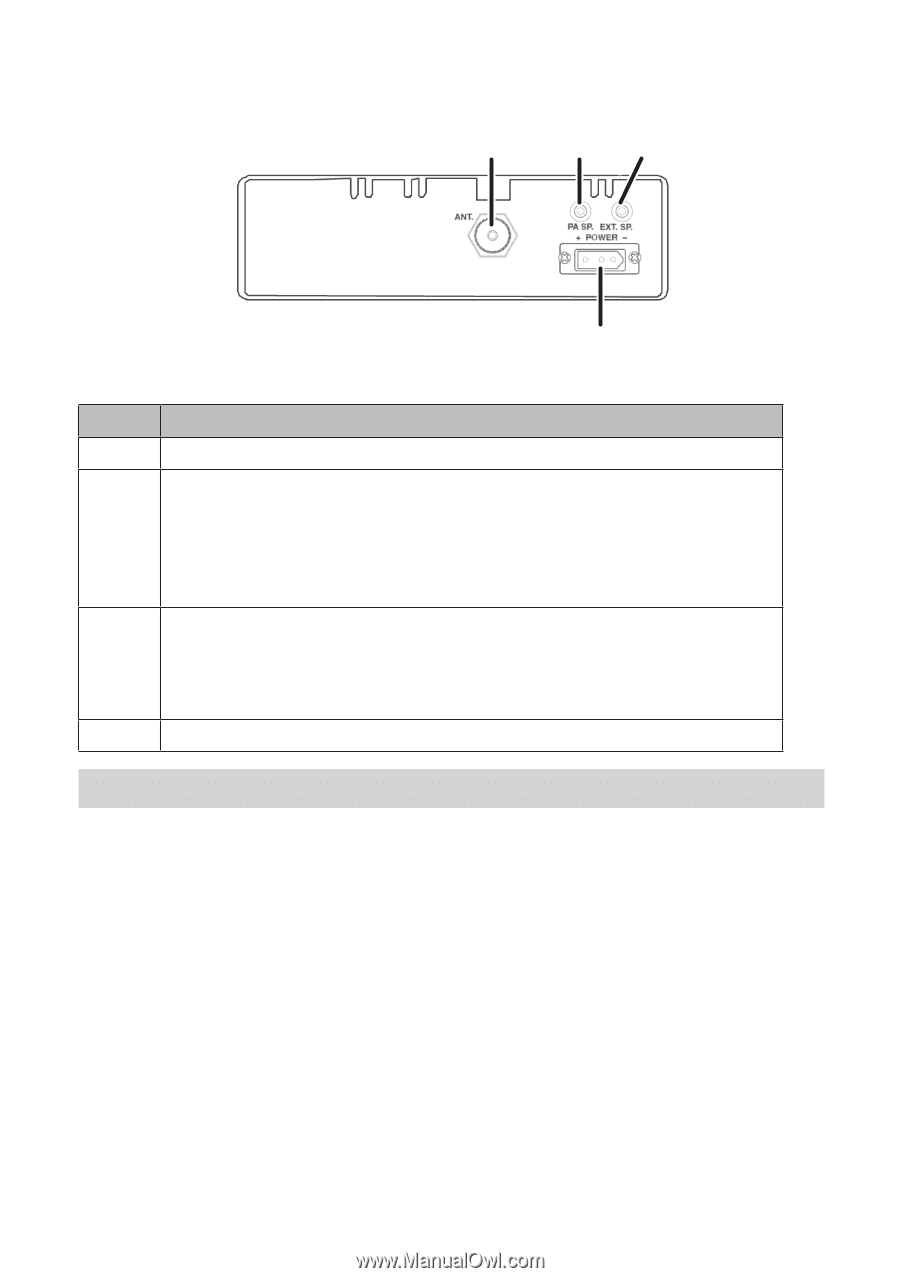
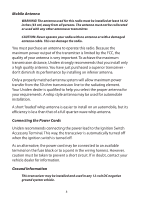
REAR VIEW 16 17 18 19 Item 16 17 18 19 Definition Antenna Jack PA SP: Connects optional external 8-ohm, 4-watt speaker for use as a public address system. To prevent acoustic feedback, separate the microphone from the speaker when operating the PA at high output levels. EXT. SP: Connects an 8-ohm 4-watt speaker to remotely monitor the receiver. When the external speaker is plugged in, the internal speaker is off. POWER: Connects DC power to transceiver. INSTALLATION MOBILE INSTALLATION Plan the location of the transceiver and microphone bracket before beginning installation. 1. Select a location that is convenient for operating the radio but does not interfere with the driver or passenger. 2. Install bracket with self-tapping screws provided. 3. Connect power cords (see page 8). 4. Attach the microphone bracket to side of the radio. 5. Attach radio to bracket. 7
-
 1
1 -
 2
2 -
 3
3 -
 4
4 -
 5
5 -
 6
6 -
 7
7 -
 8
8 -
 9
9 -
 10
10 -
 11
11 -
 12
12 -
13
-
14
-
15
-
16
-
17
-
18
-
19
-
20
 |
 |