ViewSonic M1-2 User Guide - Page 17
Adjus°ng the Projected Image
 |
View all ViewSonic M1-2 manuals
Add to My Manuals
Save this manual to your list of manuals |
Page 17 highlights
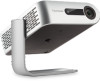
Adjusting the Projected Image Adjusting the Projector's Height and Projection Angle The projector is equipped with one (1) Smart Stand. Adjusting the stand will change the projector's height and the vertical projection angle. Carefully adjust the stand to fine tune the projected image's position. NOTE: • If the projector is not placed on a flat surface or the screen and the projector are not perpendicular to each other, the projected image can become trapezoidal. However, the "Auto Vertical Keystone" function will correct the issue automatically. Adjusting the Focus To adjust the focus of the on-screen image, slowly move the focus ring upwards or downwards. 17
-
 1
1 -
2
-
3
-
4
-
5
-
6
-
7
-
8
-
9
-
10
-
11
-
 12
12 -
 13
13 -
 14
14 -
 15
15 -
 16
16 -
 17
17 -
 18
18 -
 19
19 -
 20
20 -
 21
21 -
 22
22 -
23
-
24
-
25
-
26
-
27
-
28
-
29
-
30
-
31
-
32
-
33
-
34
-
35
-
36
-
37
-
38
-
39
-
40
-
41
-
42
-
43
-
44
-
45
-
46
-
47
-
48
-
49
-
50
-
51
-
52
-
53
-
54
-
55
-
56
-
57
-
58
-
59
-
60
-
61
-
62
-
63
-
64
-
65
-
66
-
67
-
68
-
69
-
70
 |
 |

17
Adjus°ng the Projected Image
Adjus°ng the Projector's Height and Projec°on Angle
The projector is equipped with one (1) Smart Stand. Adjus°ng the stand will change
the projector’s height and the ver°cal projec°on angle. Carefully adjust the stand to
fine tune the projected image’s posi°on.
NOTE:
•
If the projector is not placed on a flat surface or the screen and the
projector are not perpendicular to each other, the projected image can
become trapezoidal. However, the “Auto Ver°cal Keystone” func°on will
correct the issue automa°cally.
Adjus°ng the Focus
To adjust the focus of the on-screen image, slowly move the focus ring upwards or
downwards.