ViewSonic PA502X PA502S User Guide English - Page 26
Operation, Activate the projector, Using the menus
 |
View all ViewSonic PA502X manuals
Add to My Manuals
Save this manual to your list of manuals |
Page 26 highlights
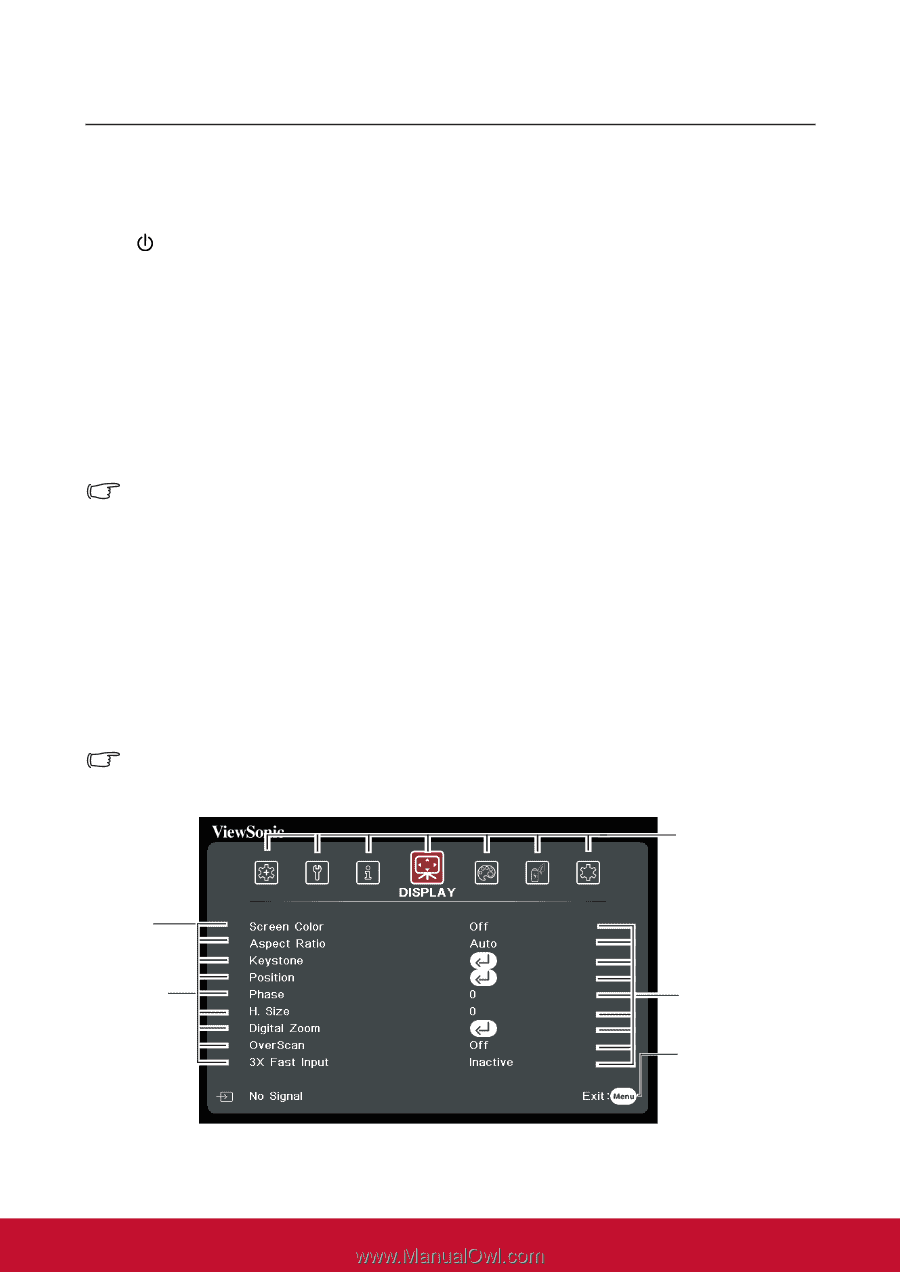
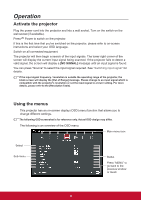
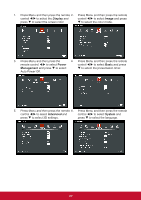
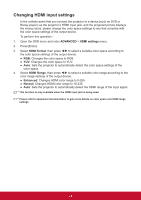
Operation Activate the projector Plug the power cord into the projector and into a wall socket. Turn on the switch on the wall socket (if available). Press Power to switch on the projector. If this is the first time that you've switched on the projector, please refer to on-screen instructions and select your OSD language. Switch on all connected equipment. The projector will then begin a search of the input signals. The lower right corner of the screen will display the current input signal being scanned. If the projector fails to detect a valid signal, the screen will display a [NO SIGNAL] message until an input signal is found. You can press "Source" to select the input signal required. See "Switching input signal" for details. If the input signal frequency / resolution is outside the operating range of the projector, the blank screen will display the [Out of Range] message. Please change to an input signal which is compatible with the projector's resolution or set the input signal to a lower setting. For more details, please refer to the [Resolution Table]. Using the menus This projector has an on-screen display (OSD) menu function that allows you to change different settings. The following OSD screenshot is for reference only. Actual OSD design may differ. The following is an overview of the OSD menu. Main menu icon Select Sub-menu Status Press "MENU" to go back to the previous window or toexit. 19
-
 1
1 -
2
-
3
-
4
-
5
-
6
-
7
-
8
-
9
-
10
-
11
-
12
-
13
-
14
-
15
-
16
-
17
-
18
-
19
-
20
-
 21
21 -
 22
22 -
 23
23 -
 24
24 -
 25
25 -
 26
26 -
 27
27 -
 28
28 -
 29
29 -
 30
30 -
 31
31 -
32
-
33
-
34
-
35
-
36
-
37
-
38
-
39
-
40
-
41
-
42
-
43
-
44
-
45
-
46
-
47
-
48
-
49
-
50
-
51
-
52
-
53
-
54
-
55
-
56
-
57
-
58
-
59
-
60
-
61
-
62
-
63
-
64
-
65
-
66
-
67
-
68
-
69
-
70
-
71
-
72
-
73
-
74
-
75
-
76
-
77
-
78
 |
 |